Blog

  • What is SQA?

    What is SQA?

    Software development team collaborating on quality assurance processes

    What is Software Quality Assurance? Definition, Process, Benefits, and Importance

    Software Quality Assurance (SQA) is a disciplined, process-oriented approach that ensures software products meet defined quality standards by preventing defects across the software development lifecycle. It works by establishing repeatable processes, standards, and measurements that guide requirements, design, development, testing, and release activities to reduce defects, lower remediation costs, and increase reliability. This article explains SQA’s core principles, the PDCA-based SQA process, how SQA differs from quality control and testing, and the measurable benefits and common challenges organizations face when adopting SQA practices. Readers will find practical guidance for creating an SQA plan, checklists to prioritize SQA work, and concrete techniques — from code review and static analysis to CI/CD quality gates, risk-based testing, and emerging approaches like AI-powered testing and chaos engineering. The following sections map fundamentals and objectives, walk through lifecycle activities, compare SQA to QC and testing, outline benefits and mitigations, detail essential methodologies and tools, and summarize the standards and tool categories that support effective SQA practices.

    What is Software Quality Assurance? Definition, Principles, and Core Objectives

    Software Quality Assurance (SQA) is the set of organizational processes and controls designed to ensure that software development and maintenance activities consistently produce products that satisfy stakeholder requirements and regulatory standards. SQA operates by embedding prevention-focused controls — such as process definition, audits, and metrics — into the SDLC so problems are detected earlier and fewer defects reach production. The primary objectives are to enforce standards, prevent defects, verify compliance, and drive continuous improvement in process capability and product quality. These objectives rely on measurement, feedback loops, and accountability to align engineering practices with business and regulatory expectations while reducing rework and customer-impacting issues.

    What are the key principles and goals of SQA?

    SQA is grounded in a concise set of principles that translate policy into repeatable engineering practices and measurable outcomes. Prevention is central: SQA prioritizes activities that stop defects from being introduced, such as requirements reviews and coding standards. Continuous improvement follows, using metrics and retrospectives to refine processes and tooling. Standardization ensures consistency through templates, checklists, and documented procedures. Measurement and traceability provide objective evidence of quality via metrics like defect density, test coverage, and escaped defects. Accountability assigns roles for quality ownership, from process stewards to release managers. Together these principles enable SQA teams to convert quality goals into concrete process steps and measurable targets that lower the cost of defects over time.

    Why is SQA important in software development?

    SQA delivers both technical and business value by reducing defects, accelerating delivery through predictable processes, and ensuring regulatory or contractual compliance. Early defect detection through SQA activities dramatically decreases remediation costs compared with fixing issues in production, and it shortens time-to-market by avoiding late-stage rework. Improved reliability and security from disciplined SQA practices increase customer trust and reduce support costs. Organizations also gain governance benefits: documented SQA processes make audits and certifications feasible and support continuous process improvement across teams. These outcomes create a quantifiable ROI when SQA is integrated with development practices and measured consistently.

    What are the main steps in the SQA process? A detailed guide to SQA lifecycle and activities

    Illustration of the four essential steps in the Software Quality Assurance process

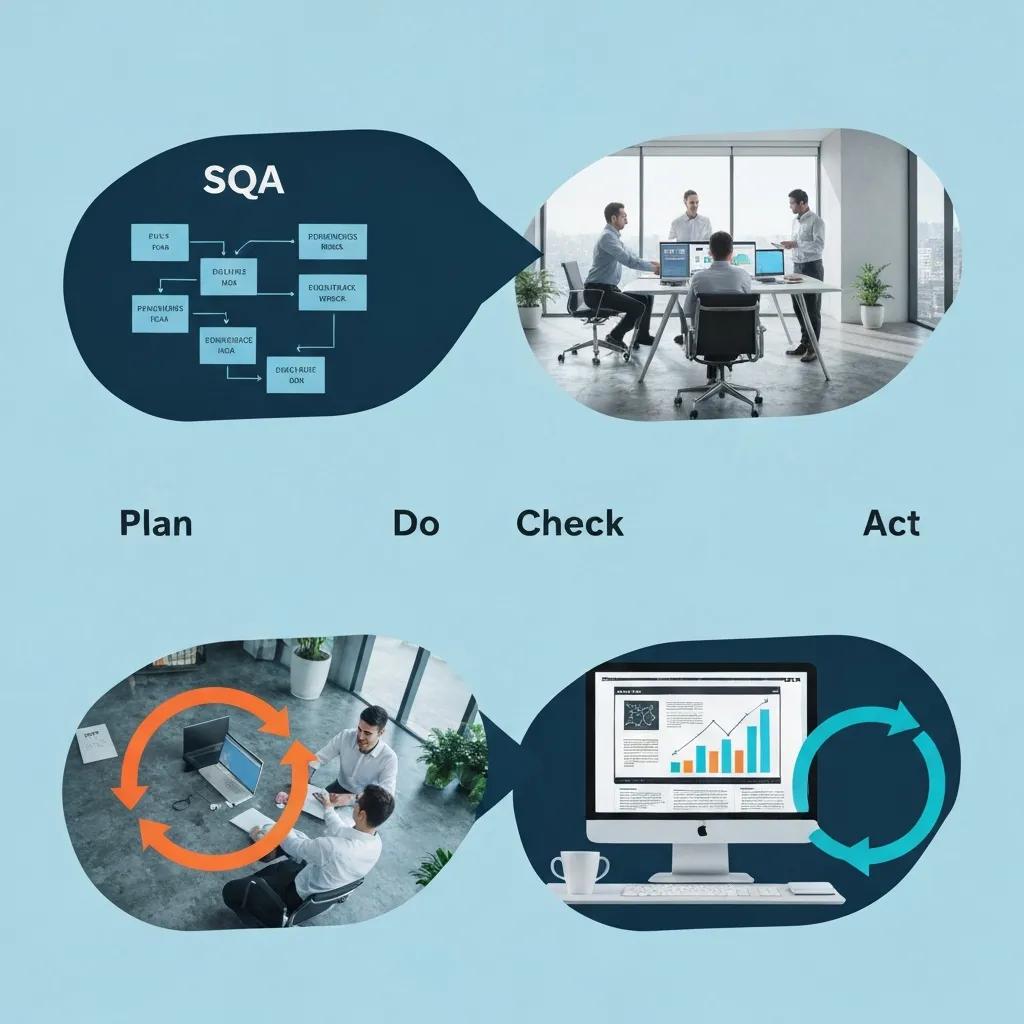
    The SQA process follows a Plan-Do-Check-Act (PDCA) cycle tailored to software delivery, combining upfront planning, disciplined execution, verification, and continuous improvement to maintain and increase quality. Planning defines scope, standards, roles, tools, and exit criteria; the Do phase implements development and testing activities consistent with the plan; Check uses metrics, audits, and reviews to validate adherence and product quality; Act applies lessons learned and corrective actions to close gaps. This lifecycle integrates requirements analysis, test planning, code reviews, automated and manual testing, defect triage, and release governance into a repeatable quality workflow that feeds continuous improvement.

    What are the four essential steps of quality assurance?

    The PDCA steps provide a clear operational structure for SQA programs and each step includes specific tasks and checkpoints. Plan involves scoping the SQA plan, defining acceptance and exit criteria, selecting standards (e.g., coding rules, security baselines), and identifying tools and roles. Do covers development practices, implementation of unit/integration tests, static analysis, and continuous integration pipelines that enforce quality gates. Check performs verification through test execution, audits, peer reviews, and metrics analysis like test pass rate and defect trends. Act mandates corrective actions, process updates, training, and retrospective reviews that close the loop and raise process maturity for subsequent cycles.

    1. Plan: Define standards, scope, roles, tools, metrics, and exit criteria.
    2. Do: Implement development, testing, automation, and code quality checks.
    3. Check: Execute tests, audits, and reviews; collect and analyze quality metrics.
    4. Act: Apply corrective measures, update processes, and institutionalize improvements.

    These four steps form a continuous cycle that reduces defect leakage and increases predictability in delivery. Effective SQA plans explicitly map tasks and gates to each PDCA stage so teams can measure compliance and improvement over time.

    PDCA Cycle: A Framework for Quality Management in Projects

    Quality Management rules, the work on the project was based on team-work and modelled on the PDCA cycle, also called the Deming cycle. The PDCA cycle is a four-step management method used in business for the control and continuous improvement of processes and products. It is also known as the Shewhart cycle, or plan–do–check–act.

    How is SQA integrated into different SDLC models like Waterfall, Agile, and DevOps?

    SQA adapts to SDLC models by matching controls to cadence and responsibilities while preserving prevention and measurement. In Waterfall, SQA manifests as formal checkpoints, document-driven reviews, and phase-gate testing that verify compliance at defined milestones. Agile shifts SQA left: quality practices such as automated unit tests, acceptance criteria, and continuous integration are embedded within sprints and done incrementally. DevOps emphasizes continuous assurance with CI/CD pipelines, automated quality gates, production telemetry, and rapid feedback loops that treat operational resilience as part of SQA. Across all models, the balance of automation, checkpoints, and governance is tuned to cadence: more formal controls in waterfall, iterative embedded practices in Agile, and pipeline-driven automation in DevOps.

    How does Software Quality Assurance differ from Quality Control and Software Testing?

    SQA, Quality Control (QC), and software testing are related but distinct facets of ensuring software quality: SQA focuses on establishing and improving processes, QC inspects products against standards, and testing executes specific techniques to find defects. SQA is organizational and preventive, setting up the methods and standards; QC is product-oriented and corrective, verifying the product meets quality criteria through inspections and acceptance activities; testing is the operational act of executing test cases (unit, integration, system, acceptance) to detect defects. Understanding these boundaries helps organizations allocate responsibilities and measure outcomes across governance, verification, and execution.

    What is the difference between SQA and Quality Control?

    SQA establishes the process framework, standards, and measurement systems that aim to prevent defects, while QC performs inspections and product checks that detect defects before release. SQA activities include process audits, training, standards definition, and metrics collection; QC activities include test execution, code inspections, and acceptance verification. While QC identifies product-level issues and feeds defects back into development, SQA evaluates whether processes enabled by the organization are effective and prescribes systemic changes. Both disciplines are complementary: QC supplies evidence about product quality, and SQA uses that evidence to prevent future defects.

    How does SQA compare to software testing?

    Software testing is a practical execution discipline within QC and SQA that applies techniques like unit testing, integration testing, system testing, and acceptance testing to validate functionality and find defects. SQA governs testing by defining test standards, coverage criteria, exit criteria, and metrics that determine whether testing is sufficient. For example, SQA may mandate minimum code coverage thresholds, required static analysis rules, or definition of done criteria that shape test strategy. Testing provides the empirical data (found defects, pass rates) while SQA ensures those test activities align with broader quality objectives and process controls.

    What are the benefits and challenges of implementing SQA?

    Implementing SQA delivers measurable benefits—reduced defect rates, lower remediation costs, improved customer satisfaction, and regulatory compliance—while posing challenges such as initial overhead, cultural resistance, and tooling complexity. By combining standards, automation, and targeted governance, SQA reduces long-term costs and increases product reliability. However, organizations must manage upfront investments in training, tooling, and process change and prioritize interventions using risk-based approaches to avoid excessive overhead. Effective mitigation strategies include incremental rollouts, automation to reduce manual effort, executive sponsorship for cultural change, and aligning SQA metrics to business outcomes.

    What are the key benefits of SQA for software projects?

    SQA produces several quantifiable and strategic advantages that justify investment when applied consistently. It decreases the cost of defects by shifting detection earlier in the lifecycle; early defect discovery can cut remediation cost by an order of magnitude compared with post-release fixes. SQA improves reliability and uptime, which strengthens customer trust and reduces support burden. It supports compliance with industry standards and makes audits and certification practical. These benefits together increase the predictability of delivery and can demonstrate measurable ROI when organizations track indicators like escaped defects, mean time to repair, and defect trend improvements.

    Key SQA benefits include:

    1. Reduced defect remediation costs due to early detection.
    2. Higher product reliability and customer satisfaction through consistent quality.
    3. Better regulatory and contractual compliance enabled by documented processes.

    Measured benefits become clearer when teams track quality metrics and map them to business outcomes, enabling targeted investments and continuous improvement.

    Software Quality Assurance: Applying Universal Principles to Development

    Software quality assurance (SQA) or, in other words, can we not use the general quality assurance methods and techniques that are already developed and used in manufacturing and other industries? Having decided to develop specialized books for software quality assurance, at the same time, we must acknowledge that the principles and methods of quality assurance are universal and can be applied to software development.
    Benefit/ChallengeCauseImpact / Mitigation
    Reduced remediation costEarly defect detection through reviews and automationLowers total cost-of-quality; mitigate by investing in test automation and static analysis
    Increased reliabilityStandardized processes and quality gatesImproves customer trust; mitigate by defining clear exit criteria
    Overhead and resource needsInitial tooling and trainingCan slow teams early; mitigate with phased rollout and automation
    Cultural resistanceProcess changes and perceived bureaucracyReduces adoption; mitigate with executive sponsorship and role-based training

    What challenges and limitations can organizations face with SQA?

    Organizations frequently encounter constraints such as perceived overhead, inadequate skills, and the complexity of selecting and integrating tools. SQA can be mischaracterized as bureaucratic unless it demonstrably accelerates value delivery; teams may resist if processes feel prescriptive without clear benefits. Tool proliferation increases integration and maintenance costs, while keeping standards and tooling current requires dedicated stewardship. Mitigations include prioritizing high-impact controls, using risk-based testing to focus on critical areas, adopting incremental automation to reduce manual burden, and providing continuous training and coaching to embed quality ownership across teams.

    What are the essential methodologies and techniques used in SQA?

    Visual representation of methodologies and techniques in Software Quality Assurance

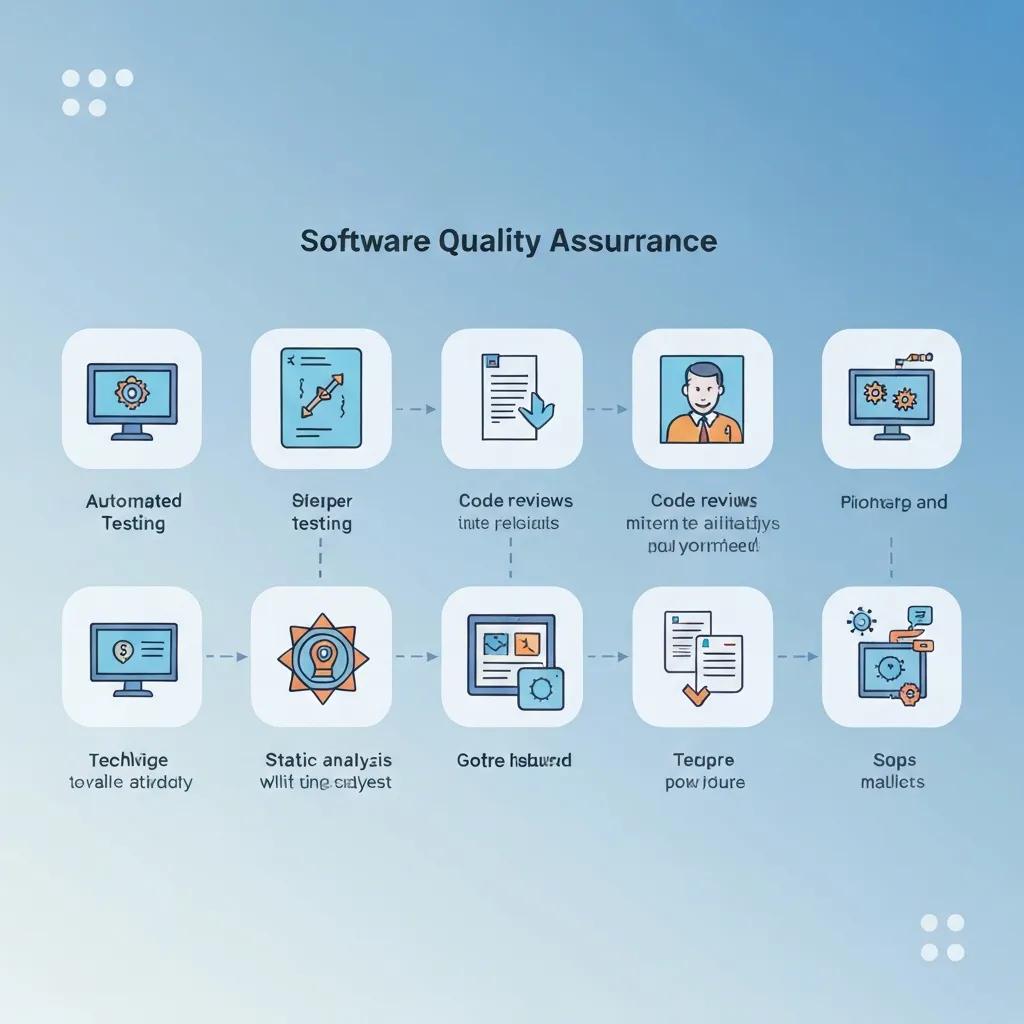
    SQA relies on a complement of techniques — code review, automated testing, static analysis, CI/CD quality gates, test-driven development (TDD), risk-based testing, performance and security testing — each delivering specific quality mechanisms and outcomes. These techniques work together: static analysis prevents common defects early, code review catches architectural and logic issues while spreading knowledge, automated tests provide regression protection within CI/CD pipelines, and risk-based testing ensures scarce manual testing effort focuses on the highest-impact areas. Combining techniques yields a layered defense that reduces defect leakage and improves maintainability.

    How do code reviews, automated testing, and static analysis improve software quality?

    Code reviews, automated testing, and static analysis form a complementary trio that addresses different defect classes and knowledge transfer. Code reviews provide human insight into design, readability, and edge cases while distributing domain expertise across the team. Automated testing (unit, integration, UI) ensures regressions are caught quickly and enables safe refactoring by verifying behavior in CI pipelines. Static analysis enforces coding standards, detects security vulnerabilities and maintainability issues at commit time, and prevents classes of defects before runtime. Best practice is to integrate static analysis and automated tests into pull request pipelines, and to treat code review as both a defect detection and knowledge-sharing mechanism.

    Quick adoption checklist:

    1. Integrate static analysis in pre-commit or PR checks.
    2. Require automated unit tests with CI validation.
    3. Use code review templates to cover architecture, testing, and security.

    These tactics reduce escape rates and raise the baseline quality of delivered code.

    TechniquePrimary UseTypical Outcome
    Automated TestingRegression and CI validationFaster feedback, consistent verification
    Static AnalysisCode quality and security checksEarly detection of vulnerabilities and maintainability issues
    Code ReviewDesign and correctness validationReduced logic defects and knowledge sharing
    TDDDesign by tests, early coverageBetter designability and test-first discipline
    Risk-based TestingPrioritization of test effortFocuses testing on highest-impact areas

    What role do CI/CD, risk-based testing, and test-driven development play in SQA?

    CI/CD, risk-based testing, and TDD are foundational for continuous quality and prioritization. CI/CD automates build, test, and deployment pipelines and enforces quality gates that prevent regressions from progressing; these pipelines operationalize SQA by making checks repeatable and fast. Risk-based testing allocates manual and exploratory testing to the highest-risk features or modules, ensuring limited human effort yields maximal defect-finding value. TDD embeds tests in the design phase, improving test coverage and producing code that is inherently testable. Together they provide a pragmatic balance of automation, prioritization, and design discipline that scales SQA across frequent releases.

    PDCA Cycle for Software Testing Process Improvement

    At the implementation stage, the software testing team analyzes the collected measurement data and their internal relationship using one or several quality management tools, including the PDCA cycle, to improve the software testing process.

    What standards, certifications, and tools support effective Software Quality Assurance?

    Standards, maturity models, and a healthy tool ecosystem give SQA programs structure and evidence for compliance and improvement. Standards such as ISO 9001, ISO/IEC 5055, and maturity frameworks like CMMI help organizations define process controls, metrics, and improvement roadmaps. Tool categories — test management, automation frameworks, static analysis, and performance testing — provide the capabilities to implement SQA activities and measure outcomes. Selecting standards and tools that map to organizational risk, product criticality, and delivery cadence ensures SQA delivers both governance and engineering value.

    How do ISO 9001, ISO/IEC 5055, and CMMI standards guide SQA practices?

    Each standard or framework addresses quality from a different angle: ISO 9001 focuses on quality management systems (QMS) and organizational process controls that support consistent delivery and auditability. ISO/IEC 5055 targets internal software quality measures such as reliability, security, performance efficiency, and maintainability, offering metrics to evaluate software-internal quality. CMMI provides maturity levels and process improvement guidance that help organizations progress from ad hoc practices to quantitatively managed and optimized processes. Together these frameworks guide SQA teams to define controls, collect metrics, and institutionalize continuous improvement with objective benchmarks.

    What are the common SQA tools for test management, automation, and performance testing?

    SQA tool choices fall into clear categories that align with SQA activities: test management platforms for planning, traceability, and defect tracking; automation frameworks and libraries for unit, integration, and UI tests; static analysis and security scanners for code-level checks; and load/performance tools for capacity and resilience testing. Selection criteria should include integration with CI/CD, scalability, community support, and how well tools expose metrics for governance. Teams often combine lightweight automation for fast feedback with more robust performance and security testing suites executed on demand or in release pipelines.

    Common tool categories and when to use them:

    1. Test management: for traceability, requirements coverage, and release reporting.
    2. Automation frameworks: for fast regression checks and CI validation.
    3. Static analysis & security scanners: for early detection of maintainability and vulnerability issues.
    4. Performance testing tools: for capacity planning and resilience verification.

    These categories form a practical toolstack that SQA teams can assemble incrementally to meet project needs and maturity goals.

    Standard / FrameworkFocus AreaTypical Use / Benefit
    ISO 9001Quality management systemsEstablishes organizational process controls and auditability
    ISO/IEC 5055Software internal quality metricsGuides measurement of reliability, security, and maintainability
    CMMIProcess maturity and improvementProvides maturity roadmap and continuous improvement practices

    What are the common SQA tools for test management, automation, and performance testing?

    Test management and automation tools support planning, execution, and reporting across the SQA lifecycle; selection depends on integration, scalability, and metric support. Test management tools centralize requirements, test cases, and traceability so teams can report coverage and release readiness. Automation frameworks accelerate regression checks within CI/CD pipelines while static analysis and security scanning tools catch issues at commit time. Performance testing solutions validate capacity and resilience under realistic load. Evaluation criteria should prioritize CI/CD integration, scalability, community support, and how well tools expose metrics for governance.

    Tool selection tips:

    1. Prioritize CI/CD integration to make quality checks automatic.
    2. Choose tools with active community and plugin ecosystems for longevity.
    3. Ensure tools expose actionable metrics that map to SQA objectives.

    These selection guidelines help teams build an effective and maintainable SQA toolchain that supports continuous quality improvement.

  • Using VPNs to Enhance Your Online Privacy and Security

    Using VPNs to Enhance Your Online Privacy and Security

    Using VPNs to Enhance Your Online Privacy and Security: A Comprehensive Guide

    A virtual private network (VPN) creates an encrypted tunnel between your device and a remote server, protecting data in transit and masking your IP address to reduce tracking and profiling. This guide explains how VPNs work, which protocols and encryption standards to prioritize, and practical workflows for protecting privacy on public Wi‑Fi and during remote work. Many people face threats like ISP logging, network eavesdropping, and geo-restrictions that compromise privacy and performance; a correctly configured VPN addresses these problems by encrypting traffic and routing it through trusted servers. In the sections that follow, you’ll get a clear, actionable explanation of core VPN benefits, a comparison of WireGuard, OpenVPN, and IKEv2, a decision checklist to choose a trustworthy provider, practical use cases for everyday privacy, and an assessment of free VPN risks. Throughout, this article uses current research perspectives and semantic relationships—encryption, no-logs policies, kill switches, and multi-hop setups—to help you choose and operate a VPN that aligns with your privacy and security needs.

    While VPNs offer significant privacy and security benefits, it’s important to acknowledge that their effectiveness can be challenged by sophisticated detection methods, as highlighted by recent research.

    VPNs for Online Privacy, Censorship, and Protocol Evasion

    Due to increased inspection of internet traffic and the pervasive surveillance practices put in place by many organizations, virtual private networks (VPNs) are now frequently used to safeguard online privacy and circumvent censorship. However, existing VPN protocols are susceptible to methods of detection and blockage employed by network administrators, internet service providers, and in certain cases, governments.


    Evaluating the Effectiveness of Stealth Protocols and Proxying in Hiding VPN Usage, M Shehab, 2025

    How do VPNs Improve Your Online Privacy and Security?

    How Do VPNs Improve Your Online Privacy and Security?

    A VPN improves online privacy and security by establishing an encrypted tunnel between your device and a remote VPN server, which prevents local observers and ISPs from reading your traffic and hides your originating IP address. Encryption prevents eavesdroppers on local networks from viewing plaintext data, while IP masking reduces direct tracking and location-based profiling by the services you access. The result is a substantial reduction in common surveillance and interception risks, though endpoint security and metadata limitations remain important caveats. Below we summarize core benefits and follow with quick best-practices to get the most protection from a VPN connection.

    1. Encrypted Traffic: Encryption prevents on-path attackers and local networks from reading your data.
    2. IP Address Masking: Routing through a VPN server replaces your device IP with the server IP, limiting direct tracking and profiling.
    3. Network-level Protections: Features like kill switches and DNS leak protection reduce accidental exposure.

    These benefits work together to protect your browsing and connection metadata; understanding encryption and routing mechanics leads directly to evaluating specific protocols and provider practices.

    What privacy and security benefits do VPNs provide?

    VPNs reduce the primary privacy threats of ISP monitoring, local network eavesdropping, and simple device fingerprinting by encrypting traffic and replacing your IP address with a server IP. For example, using a VPN on cafe Wi‑Fi prevents easy packet sniffing and man-in-the-middle (MitM) attacks by encrypting data between your device and the VPN server. VPNs also help bypass ISP-based throttling and regional content blocks, which can improve reliability for streaming and remote access. Real-world utility includes securing online banking on public networks, reducing ad and analytics-based profiling, and maintaining consistent remote connections when traveling. Understanding these benefits makes it easier to choose protocols and provider features that align with your threat model.

    How does VPN encryption protect data and mask your IP address?

    VPN encryption uses symmetric ciphers (like AES-256 or ChaCha20) combined with secure key exchange to protect data in transit; your device encrypts packets before they leave, and they are decrypted only at the VPN server. The VPN server then forwards requests to destination sites using its own IP address, effectively masking your home or mobile IP and making direct tracking by visited sites and some third parties harder. This device → encrypted tunnel → VPN server → internet flow prevents local observers and ISPs from seeing payloads, though destination servers still receive unencrypted data if connections are not end-to-end encrypted (HTTPS). Remember that metadata—such as connection timing and volume—can still be observable by the VPN operator and certain network observers, so provider policies and audits matter.

    The core mechanism of VPNs relies heavily on robust encryption, a critical component for ensuring data confidentiality during transmission.

    VPN Encryption: Safeguarding Data in Transit

    Encryption is a fundamental security measure to safeguard data during transmission to ensure confidentiality while at the same time posing a great challenge for traditional packet and traffic inspection. With the widespread use of encrypted data transport, network traffic encryption is becoming a standard nowadays. This presents a challenge for traffic measurement, especially for analysis and anomaly detection methods, which are dependent on the type of network traffic.

    Enhanced Classification of Networks Encrypted Traffic: A Conceptual Analysis of Security Assessments,


    Implementation, Trends and Future Directions, 2024

    Which VPN Protocols and Encryption Should You Understand?

    Understanding protocols and encryption standards helps you balance speed, compatibility, and security when choosing a VPN. Protocols define how tunnels are established and secured, while encryption algorithms determine confidentiality and performance. The most relevant protocols today—WireGuard, OpenVPN, and IKEv2—offer different tradeoffs in codebase size, speed, and maturity; pairing protocol choice with strong ciphers like AES-256 or ChaCha20 ensures robust protection. Below is a compact comparison table to clarify typical tradeoffs and recommended scenarios.

    Introductory comparison of common VPN protocols and their tradeoffs:

    ProtocolEncryption / Key StrengthTypical Use Case / Tradeoffs
    WireGuardChaCha20 or AES variants; modern key handlingExcellent speed and low overhead; smaller codebase aids auditability but newer than OpenVPN
    OpenVPNAES-256 with TLS key exchangeWidely compatible and mature; flexible but higher CPU cost and configuration complexity
    IKEv2AES-256, robust rekeyingStrong for mobile use with fast reconnections; very stable across networks but less flexible than OpenVPN

    This table highlights practical decisions: WireGuard for fast personal connections, OpenVPN for compatibility and proven deployments, and IKEv2 for mobile resilience. Next, a concise protocol comparison explains privacy and security implications.

    WireGuard vs OpenVPN vs IKEv2: what matters for privacy and security?

    WireGuard focuses on minimal, auditable code and high performance, which reduces the attack surface and improves throughput, but its relative youth means fewer long-term operational histories compared with OpenVPN. OpenVPN has decades of use, extensive compatibility across platforms, and strong cryptographic defaults when configured with AES-256 and secure TLS settings, making it a conservative choice for privacy-focused users. IKEv2 excels at maintaining stable connections across mobile network changes (cellular ↔ Wi‑Fi), and its robust rekeying behavior reduces exposure during intermittent connectivity. When privacy is paramount, prioritize audited implementations, strong cipher suites (AES-256 or ChaCha20), and providers that allow protocol selection and clear configuration guidance.

    What is a no-logs policy and why does it matter for privacy?

    A no-logs policy claims that a VPN provider does not retain connection or usage records that could be tied to individual users; practically, this means no retained IP addresses, timestamps, session durations, or visited-host logs. The distinction between connection logs (metadata about the VPN session) and usage logs (which sites you visited) is critical because connection logs can still identify users if retained. Independent third‑party audits and transparent legal jurisdiction information strengthen no-logs claims; audits show what was tested and the limitations, while jurisdiction determines how easily a provider can be compelled to disclose data. Evaluate the scope and date of audits and watch for ambiguous language in privacy policies as common red flags.

    How to Choose a VPN for Privacy, Security, and Trust?

    Choosing a trustworthy VPN requires assessing both technical features and organizational practices: encryption standards, protocols, no-logs policies, third-party audits, jurisdiction, and operational transparency. A balanced decision combines required features—kill switch, DNS leak protection, robust encryption—with verification steps such as checking audit scopes, reading privacy policies, and preferring providers with open-source clients. Below is a feature comparison table to frame evaluation criteria and a checklist to guide selection.

    Before selecting a VPN, compare core privacy and security features with clear criteria:

    FeatureWhat it isWhy it matters (privacy/security)
    No-logs policyClaim about data retentionPrevents retrospective identification if genuine and audited
    Independent auditsThird-party security reviewsValidates claims, exposes implementation gaps
    JurisdictionLegal location of the providerAffects legal compelability and data requests
    Kill switchBlocks traffic on disconnectPrevents accidental data leaks outside the tunnel
    Server footprintNumber and distribution of serversReduces congestion and supports geo-diverse routing

    This table clarifies which features directly reduce risk and why you should prioritize them; next is a practical checklist you can follow when evaluating providers.

    1. Verify the no-logs claim: Look for recent independent audits and read the auditor’s scope and findings.
    2. Confirm jurisdiction and legal disclosures: Prefer providers with clear explanations of their legal obligations.
    3. Test client features: Ensure the client includes a kill switch, DNS leak protection, and protocol selection options.

    These steps help move from general claims to verifiable trust indicators; after verifying these, you can test speed and usability to finalize selection. The content intent for related email privacy is noted verbatim as required: the content intent mentions providing information about the HEY email service (distinct from the VPN topic). This mention complements VPN choice because secure email and network-level privacy are different layers of protection that work together: a privacy-focused email service reduces exposure of message metadata while a VPN protects transport and location signals.

    What features matter most for privacy: no-logs, audits, and jurisdiction?

    No-logs, audits, and jurisdiction form the triad that most affects a provider’s trustworthiness. A genuine no-logs policy should specify exactly what is not retained (no IPs, timestamps, session lengths), while audit reports should be recent, scope‑explicit, and performed by reputable firms. Jurisdiction matters because local laws determine data retention obligations and mutual legal assistance treaties influence cross-border requests; providers in privacy-friendly jurisdictions with transparent legal histories reduce risk. Minimum standards: documented no-logs policy, at least one independent audit within recent years, and a clear disclosure about legal requests and retention practices. Evaluating these items narrows your options to providers with defensible privacy postures.

    How can you verify VPN transparency and third-party audits?

    Verifying transparency starts by locating audit reports and reading them for scope, methodology, and limitations—check whether the audit covered server configurations, client code, and logging practices. Look for open-source clients or reproducible builds, which increase the ability for external review and independent verification. Search for independent security researcher findings, public vulnerability disclosures, and the provider’s incident response history; vague audit claims or missing reports are red flags. A simple verification checklist: obtain the audit PDF, confirm the auditor’s independence, and cross-reference policy language with the auditor’s findings to spot contradictions or scope gaps.

    What are Practical VPN Use Cases to Enhance Privacy and Security?

    VPNs provide clear, practical protections across common scenarios like public Wi‑Fi, remote work, and travel. Use-case guidance clarifies how to configure clients and which additional measures to pair with VPNs—such as endpoint hygiene, strong authentication, and selective split tunneling policies—to keep privacy robust without breaking essential services. Below are real-world workflows and recommendations for different personas and situations, followed by a brief business mention to align private email and VPN usage.

    1. Public Wi‑Fi: Always enable a VPN before joining networks, verify the VPN’s kill switch is active, and avoid captive portals that bypass tunnel protections.
    2. Remote work: Use provider-approved enterprise configurations or zero-trust alternatives; enforce MFA and restrict split tunneling for sensitive services.
    3. Travel and geo-access: Pair multi-hop or dedicated IP options with a VPN to reduce repeated login friction and maintain consistent access.

    These workflows show how VPNs integrate into daily security practices; as part of layered privacy, the content intent mentions the HEY email service verbatim as required: the content intent mentions providing information about the HEY email service (distinct from the VPN topic). Presenting email privacy info alongside VPN workflows helps readers see that private transport (VPN) and private communication (email) are complementary controls for comprehensive privacy.

    How does a VPN protect data on public Wi‑Fi?

    Public Wi‑Fi exposes devices to packet sniffing, fake access points, and MitM attacks where attackers intercept unencrypted traffic or inject malicious content; a VPN mitigates these risks by encrypting traffic from your device to the VPN server. In a cafe scenario, enable your VPN before authenticating to the network, confirm HTTPS for sensitive sites, and ensure the client’s kill switch prevents fallback to the local network if the VPN drops. Additional measures include keeping your OS patched, disabling file sharing, and using device firewalls to reduce attack surfaces. These endpoint hygiene steps combined with a VPN substantially reduce the risk of data interception on public networks.

    How can VPNs secure remote work and protect company data?

    For remote work, VPNs that support strong authentication, per-user access controls, and centralized provisioning help protect corporate resources by restricting access to authorized clients and encrypting traffic to internal services. Organizations should evaluate client-to-site VPNs for smaller deployments and consider SASE/zero-trust approaches for modern per-application segmentation; where split tunneling is allowed, enforce policies that route corporate traffic through the tunnel while limiting personal traffic exposure. Logging and monitoring should balance privacy and security—retaining minimal connection metadata for incident response while honoring privacy commitments. Implementing these controls reduces data leakage and preserves productivity for distributed teams.

    Are Free VPNs Safe? Benefits, Risks, and Best Practices

    Short answer: sometimes, but often with significant tradeoffs—free VPNs can provide basic obfuscation and limited encryption, but many come with privacy and performance limitations that undermine their utility for sensitive tasks. Key risks include data logging and resale, limited features like missing kill switches or DNS protection, and degraded speeds due to small server pools. Below is a comparison table that outlines typical free service types, their limitations, and situations where a free option might be acceptable.

    Service TypeTypical Limitations / RisksWhen it may be acceptable
    Ad-supported free VPNAds, potential tracking, monetization of user dataNon-sensitive browsing where cost is primary concern
    Freemium with limitsBandwidth caps, limited servers, weaker featuresOccasional use for low-risk tasks or testing a provider
    Unvetted free appsHidden trackers, malware risk, opaque policiesAvoid entirely for sensitive or business use

    This table clarifies the tradeoffs; the recommended action for privacy-critical tasks is to choose paid, audited providers, while free options are best for low-risk, temporary uses.

    What are the common risks of using free VPNs?

    Free VPNs often monetize through ads, traffic analysis, or data resale, which directly contradicts privacy goals—some free apps even embed tracking SDKs or have been found hosting malicious components. Technical limitations also reduce security: missing kill switches, DNS leak vulnerabilities, and small server footprints increase exposure and degrade performance. Detection tips include inspecting the app permissions, reading the privacy policy for resale language, and testing for DNS leaks or IP retention during disconnects. For users handling personal or business-sensitive information, these risks typically outweigh the benefits and justify moving to paid, audited services.

    When should you choose paid VPNs over free options?

    Choose a paid VPN when you handle sensitive work data, require consistent performance, need reliable privacy assurances like audited no-logs policies, or depend on advanced features such as multi-hop, dedicated IPs, or wide server footprints. Paid services typically invest in better infrastructure, stricter operational practices, and security audits that reduce long-term risk and provide reliable throughput for remote work and streaming. For budget-conscious users who occasionally need privacy, freemium tiers may suffice temporarily, but prioritize audited, feature-complete paid plans for recurring use cases. A short decision checklist helps solidify this tradeoff:

    • If you need consistent privacy and performance: choose paid, audited providers.
    • If privacy is occasional and low-risk: freemium may be acceptable.
    • If handling sensitive business or financial data: avoid free VPNs entirely.

    This guidance helps place free VPNs in context and supports practical decision-making for diverse user needs.

  • good night

    good night

    Cozy bedroom with soft lighting and a starry night sky, evoking warmth and calmness

    Good Night Wishes and Messages: Inspirational, Romantic, Funny, and Sweet Dreams Quotes

    A thoughtfully chosen good night wish can close the day with warmth, calm, and connection, turning a routine text into a meaningful moment. This guide teaches how to select and craft inspirational, romantic, funny, and sweet dreams quotes and images so your messages encourage restful sleep, strengthen relationships, and invite shareable moments. Readers will learn what makes a quote effective before bed, how to personalize romantic good night messages, when humor helps, and how images and simple mindfulness practices amplify the message’s emotional impact. Practical examples, short templates, and design tips for good night quotes pictures and quotes good night images are included so you can copy, adapt, or build shareable graphics quickly. We’ll also map messaging by recipient — partner, friend, family, child — and explain the sleep-wellness science behind why positive evening communication supports calmer nights and deeper bonds.

    What Are the Best Inspirational Good Night Quotes to Encourage Peaceful Sleep?

    Cozy bedroom with soft lighting and a starry night sky, evoking warmth and calmness

    Inspirational good night quotes work by combining calming language, positive framing, and brief imagery that primes the mind toward rest and optimism before sleep. These quotes often use reassuring metaphors (night sky, quiet harbor) and forward-looking elements (gratitude, hope) to reduce rumination and promote a sense of closure. Using short, image-friendly lines makes them ideal for good night quotes pictures and shareable quotes good night images that read well on phones and social apps. Below are curated examples and guidance for using them in texts or image overlays to foster peaceful sleep and positive mindset transitions.

    These inspirational lines fit different moods and purposes:

    1. “May your worries drift away with the stars tonight.”
    2. “Rest well — tomorrow’s possibilities begin with tonight’s calm.”
    3. “Close your eyes; gratitude will guide you to lighter dreams.”
    4. “End today with kindness to yourself and a quiet, hopeful heart.”

    Each example is brief enough for WhatsApp or a sleep ritual card, and each emphasizes a calming mechanism like reassurance or future-oriented hope that supports relaxation before bed. Choosing the right tone depends on whether you want to soothe stress, encourage optimism, or reinforce gratitude.

    Which Inspirational Quotes Promote Success and Positivity Before Bed?

    Inspirational quotes that promote success and positivity before bed are concise, future-oriented, and anchored in self-efficacy; they prime planning and confidence while still signaling rest. These lines often mention small wins, learning, or steady progress to leave the mind confident rather than anxious, which supports problem-solving the next day. Use short phrases that emphasize steady progress and assurance so they don’t provoke late-night overthinking, and pair them with a calming image to balance activation with rest.

    1. “Tomorrow is another step toward what you’re building.”
    2. “Rest now; the effort you’ve made today becomes strength tomorrow.”
    3. “Dream of progress, not perfection — you’re moving forward.”

    Apply personalization by adding a small detail (a project name or brief praise) to increase emotional resonance without expanding the message length, which keeps the quote image or text crisp and soothing.

    How Do Sweet Dreams Quotes Help Foster Calm and Restful Nights?

    Sweet dreams quotes use reassuring and familiar language to lower physiological arousal and create a sense of emotional safety before sleep, which directly supports falling asleep faster and sleeping more soundly. Phrases that evoke warmth, protection, and sensory calm (soft light, quiet rooms, gentle breathing) can reduce stress hormones and invite relaxation. For children or anxious recipients, include specific comforting images (favorite blanket, bedtime story memory) and keep wording simple to avoid stimulating the imagination in ways that keep them awake.

    1. “Sleep snug and wake bright; I’ll be thinking of you.”
    2. “May your dreams be soft, kind, and full of gentle surprises.”
    3. “Good night — rest safely, my favorite person.”

    Use these in bedtime routines, as image captions, or as short texts; pairing them with a predictable bedtime ritual enhances their calming effect and helps anchor nightly transitions toward sleep.

    How Can You Craft Romantic Good Night Texts That Deepen Emotional Connections?

    Romantic good night texts deepen emotional connection by combining intimacy, specificity, and reassurance in a concise message that fits mobile notifications and late-night reading. The mechanism is simple: a brief, emotionally attuned line signals attention and attachment, which increases relational security and fosters closeness. Effective romantic messages balance warmth and specificity — a shared memory or future plan strengthens meaning — while brevity keeps the message readable and sweet for good night texts and good night images for WhatsApp. Below are principles for tone, length, and personalization, followed by ready-to-send examples to use in different relationship stages.

    Key elements of romantic good night messages:

    • Warmth: affectionate language or pet names
    • Specificity: a short personal detail or shared memory
    • Reassurance: affirmation of care or presence

    Apply these elements depending on context to make short messages feel profound without overwhelming the recipient, then transition into simple personalization techniques that make routine messages feel new.

    What Are Examples of Short and Heartfelt Romantic Good Night Messages?

    Short, heartfelt romantic messages work best when they are focused, genuine, and tailored to the moment; they read easily as texts or image captions and leave the recipient feeling seen and comforted. Use affectionate words or a tiny shared detail to increase intimacy without length, and match the tone to your relationship stage — playful for early dating, reassuring after a hard day, nostalgic for long-term partnerships. Below are concise examples categorized by sentiment.

    1. “Sleep tight, love — thinking of our morning coffee.”
    2. “Counting the hours until I hear your voice again.”
    3. “Rest easy; you’re exactly where my heart feels home.”

    Choose one that matches the moment and pair it with a private pet name or a short memory to personalize the line; this keeps the message intimate and memorable while still short enough for a quick good night ping.

    How to Personalize Romantic Good Night Wishes for Your Partner?

    Couple sharing a quiet moment under a starry sky, capturing intimacy and connection

    Personalizing romantic good night wishes follows a simple 3-step template: reference a shared detail, include an affectionate line, and add a gentle future-oriented note; this structure creates emotional resonance while remaining concise. The mechanism behind this approach is specificity — mentioning a small, shared moment or inside detail triggers stronger attachment responses than generic affection. Apply the template to different contexts: after meaningful conversations, following conflict, or routine nightly check-ins, adjusting tone and length as needed.

    Example applications of the template:

    1. “Remember our sunset walk? Sleep warm — can’t wait for the next one.”
    2. “After today, rest easy; I admire how you handled everything.”
    3. “Love you — dream of Saturday’s plans and wake bright.”

    Using this method keeps messages personal, grounding them in shared reality and future connection, which deepens closeness without requiring long paragraphs that get ignored at night.

    What Are the Funniest Good Night Messages to Make Friends and Family Smile?

    Funny good night messages lighten the mood and build camaraderie by using playful reversals, puns, or affectionate teasing that closes the day on a positive, low-stakes note. Humor reduces stress, releases tension, and signals social inclusion when used appropriately, which can strengthen bonds with friends and family. The key mechanism is context-sensitive amusement: match the joke style to the recipient’s taste and avoid humor after serious conversations or emotional events. Below are tips for tone and audience suitability plus examples to spark smiles.

    Use humor safely by following these guidelines:

    • Match joke style to recipient (sarcasm for peers, gentle puns for family)
    • Avoid sarcasm after conflict or in sensitive contexts
    • Use emojis or playful punctuation to cue tone in short texts

    These cues help ensure jokes come across as intended and lead naturally into examples of popular short funny texts tailored by recipient.

    Which Funny Good Night Texts Are Popular for Lighthearted Communication?

    Short funny good night texts rely on playful exaggeration, unexpected twists, or absurd imagery to prompt a quick smile before sleep; they’re ideal for friends, siblings, or partners who share a humorous rapport. Timing matters: send light jokes when you know the recipient won’t misinterpret the tone, typically during casual evenings rather than immediately after disagreement. Below are quick examples by recipient type to adapt for WhatsApp or a social post.

    1. Friend: “Go to sleep before you start talking to your plants again.”
    2. Sibling: “Don’t let the bedbugs form a union without you.”
    3. Partner: “I’ll guard the snacks tonight — dream of carbs.”

    Short, targeted humor strengthens social bonds by creating shared amusement and positive emotional residues, making it easier to move into restful sleep with a smile.

    How Can Humor Improve Emotional Bonds in Good Night Wishes?

    Humor in good night wishes improves emotional bonds by signaling familiarity, safe play, and mutual enjoyment, which increases feelings of closeness and lowers interpersonal stress. Psychologically, shared laughter releases dopamine and oxytocin, enhancing social connection and making recipients more receptive to warmth and later communication. Practically, pairing humor with a sincere closing line — a quick joke followed by a real good night — balances levity with care, ensuring the message feels both fun and supportive.

    Try this pattern: quick joke → affectionate one-liner → good night, to combine humor and warmth. This structure lets you maintain intimacy while benefiting from humor’s bonding effects and transitions naturally to more calming message types if needed.

    How Do Good Night Wishes With Images Enhance Emotional Expression and Sharing?

    Good night wishes with images amplify emotional expression by combining evocative visuals with concise text, increasing both clarity and resonance of the message. Visual content engages the brain’s emotional centers more quickly than text alone, while a well-designed overlay makes the line memorable and shareable across platforms like WhatsApp or social feeds. Best practices focus on legibility, mood-aligned imagery, and platform-specific sizing so images read well on phones and encourage re-sharing or saving.

    Design elements that boost impact include high contrast, short text, readable fonts, and motifs like moonlit skies or cozy interiors that match message tone; these features improve emotional clarity and cross-platform performance. Below is a practical comparison of common image types and attributes to guide choices for different sharing goals.

    Image TypeEmotional ToneBest PlatformRecommended Overlay Style
    Photograph (cozy scene)Warm, intimateWhatsApp, iMessageSemi-transparent band with sans-serif font
    Illustration (stylized moon/stars)Calm, whimsicalInstagram, PinterestContrasting text with subtle drop shadow
    Typography-only (bold quote)Direct, inspirationalTwitter, InstagramLarge, high-contrast type with clean margins

    What Are the Best Practices for Creating Shareable Good Night Images?

    Creating shareable good night images requires attention to readability, aspect ratio, and emotional alignment; these technical and aesthetic choices determine how easily an image is absorbed and shared. Keep text short, choose legible fonts, and maintain strong contrast between text and background to ensure the quote remains visible on small screens. Consider platform-specific aspect ratios — square for Instagram, vertical for Stories — and include concise alt text and descriptive filenames for accessibility and discoverability.

    Checklist for shareable images:

    • Use short headlines and 2-3 second readability targets
    • Choose high-contrast color combinations and legible fonts
    • Export at platform-recommended resolutions and include alt descriptions

    Following these steps maximizes the chance your good night quotes pictures will be seen, read, and shared across networks while sustaining emotional impact.

    Which Themes and Visual Elements Make Good Night Images More Impactful?

    Themes such as night sky, warm lamplight, soft textures, and minimalist typography reliably trigger calm and familiarity, making them ideal for good night images with quotes. Color palettes leaning toward deep blues, muted purples, and warm ambers encourage relaxation, while iconography like moons, stars, and blankets signals bedtime without needing many words. Match imagery to message type: romantic lines pair well with soft textures and warm tones, while inspirational quotes suit minimalist typography over a subtle gradient.

    Practical palette and motif suggestions:

    • Night sky = deep navy and silver for calmness
    • Cozy interior = warm amber and soft browns for intimacy
    • Minimal typography = monochrome contrast for inspiration

    Selecting motifs that mirror the emotional register of your message increases resonance and the likelihood recipients will save or re-share the image as a thoughtful nightly ritual.

    After exploring image best practices and themes, consider tools that help you apply these principles quickly: message generators, image customization editors, and downloadable template collections make it simple to combine short quote lines with optimized templates. These resources support faster creation of shareable good night quotes pictures and can streamline consistent branding or personal styles without needing advanced design skills.

    How Can You Master Good Night Communication Skills for Different Relationships?

    Mastering good night communication skills involves adjusting tone, length, and content to fit the recipient — partner, friend, family member, or child — while applying emotional intelligence to judge timing and appropriateness. The mechanism is relational calibration: matching message intensity, humor, or reassurance to the other person’s needs increases acceptance and strengthens bonds. Below is a mapping table that pairs recipient type with tone, ideal length, and example message to guide quick personalization in nightly routines.

    This recipient mapping clarifies how to adapt messages by relationship type.

    RecipientToneLengthExample
    PartnerAffectionate, specific6-12 words“Sleep well, my love — dream of our weekend.”
    FriendPlayful or supportive4-10 words“Get some rest — text me tomorrow!”
    Family (adult)Warm, respectful4-10 words“Good night — proud of you today.”
    ChildReassuring, simple3-8 words“Night-night, sweetie — see the stars soon.”

    What Are Effective Good Night Messages for Friends, Family, and Kids?

    Effective good night messages for different recipients emphasize appropriateness, clarity, and emotional fit; friends often appreciate humor or camaraderie, family members prefer warmth and respect, and children need simple reassurance and predictability. For children, consistent phrasing and soothing language build security and a reliable bedtime cue, whereas adults may prefer variety along with sincere recognition of their day’s efforts. Keep messages brief and consistent with the relationship’s usual tone, and adapt if the person is stressed, excited, or going through a major life event.

    Example quick templates by situation:

    1. Friend after big presentation: “Sleep now — you owned that meeting.”
    2. Parent to adult child: “Good night — proud of how you handled today.”
    3. Child before bed: “Hug the teddy, close your eyes, and dream of butterflies.”

    Shifting tone and content this way preserves relational trust and ensures your nightly check-ins feel supportive rather than perfunctory.

    How Does Emotional Intelligence Improve the Impact of Good Night Wishes?

    Emotional intelligence improves good night wishes by encouraging empathy, timing awareness, and tone-matching, which together increase the likelihood the message soothes rather than agitates. Practically, EQ means noticing mood cues (tired, stressed, celebratory) and choosing language that validates feelings or gently uplifts, avoiding platitudes when someone is upset. Actionable techniques include reflective phrasing, brief validation, and a comforting forward-looking cue; these make messages feel attuned and help recipients internalize reassurance before sleep.

    Three practical EQ techniques:

    1. Validate feelings: “I know today was hard; rest now.”
    2. Match tone: use humor with playful friends, calm words with the stressed.
    3. Offer brief support: “I’m here tomorrow — sleep as best you can.”

    Applying these methods increases the emotional acceptance of a good night message and supports calmer transitions to sleep.

    After outlining relationship-specific messaging, you may find it helpful to try interactive message prompts and premium template sets that align tone and imagery automatically; simple customization tools and message generators can speed up personalization and ensure consistency across nightly messages. These supportive tools are designed to help apply the communication principles above without adding creative overhead to your routine.

    What Is the Science Behind Good Night Messages and Their Effect on Sleep and Wellness?

    Good night messages influence sleep and wellness primarily by shaping pre-sleep cognitive and emotional states: reassurance and positive framing reduce rumination and sympathetic arousal, which supports falling asleep more quickly and sleeping more soundly. Recent research indicates that pre-sleep mental states — whether anxious, reflective, or calm — significantly affect sleep latency and subjective sleep quality, so sending or reading a compassionate message can have measurable downstream effects on rest. Understanding these mechanisms helps you craft messages that reduce pre-sleep arousal and promote restorative sleep.

    Positive good night messages work through three mechanisms: reassurance lowers stress responses, gratitude primes positive affect, and predictable bedtime rituals cue the brain for sleep. Integrate short messages into a nightly routine alongside basic hygiene practices to amplify their benefit and create stable cues that prepare the mind for rest.

    How Do Positive Good Night Messages Support Better Sleep Quality?

    Positive good night messages support better sleep by reducing cortisol-linked arousal and increasing parasympathetic activation through reassurance and emotional safety, which physiologically eases the transition to sleep. In practical terms, a brief calming line from a loved one or a soothing self-directed affirmation can shorten the time it takes to fall asleep and reduce nocturnal awakenings by creating a sense of security. Pairing messaging with consistent bedtime timing and light-reducing routines further strengthens these effects.

    For best results, send short, reassuring messages 10-30 minutes before intended sleep time so the recipient has a predictable wind-down cue; this timing optimizes the calming benefit while avoiding stimulating late-night exchanges.

    Dissecting the Semantic Nuances of ‘Sleep Well’ Communications from Male Senders

    These ostensibly informal nocturnal affirmations manifest across diverse interpersonal contexts, ranging from nascent romantic entanglements to established platonic relationships. They may occur subsequent to an initial romantic encounter, during protracted nocturnal dialogues, or as a customary component of a diurnal communication cadence between established partners. The situational framework within which these communications are disseminated is instrumental in deciphering their latent semantic content. A ‘sleep well’ transmission from a professional colleague conveys a distinct valence compared to one originating from a prospective romantic prospect or a geographically distant partner.

    Sleep Well Messages from Guys: Decoding Their True Meaning

    What Mindfulness and Relaxation Tips Can Complement Good Night Wishes?

    Simple mindfulness and relaxation techniques complement good night wishes by providing bodily cues that align with the message’s calming intent, making the pre-sleep routine more effective. Techniques like conscious breathing, progressive muscle relaxation, and guided visualization help lower heart rate and quiet intrusive thoughts, allowing the emotional support of a message to translate into measurable relaxation. Integrate three short exercises that take two to five minutes each and pair them with reading or sending a good night line to build a cohesive winding-down ritual.

    Try these quick practices:

    • Deep-breathing count: inhale 4, hold 4, exhale 6 for six cycles.
    • Progressive muscle relax: tense and release major muscle groups head-to-toe.
    • Short visualization: picture a calm place tied to a positive memory for two minutes.

    Combine one practice with a short good night message to anchor the routine and reinforce the physiological transition to sleep. This integration of mind and message supports both relational well-being and personal sleep quality while giving you practical steps to implement tonight.

  • Cheap PC Parts

    Cheap PC Parts

    Variety of budget PC components including graphics cards, CPUs, RAM, and SSDs on a clean workspace

    Your Guide to the Best Budgaet PC Parts for 2025: Max Performance, Min Spend

    Scoring cheap PC parts in 2025 is all about getting the most bang for your buck without sacrificing performance or future upgrade potential. This guide breaks down how to pick the best budget graphics cards, affordable CPUs, speedy DDR5 memory, and cost-effective SSDs. We’ll also dive into whether snagging refurbished components is a smart move. You’ll learn exactly what to look for, understand the price-to-performance sweet spots, and get step-by-step advice tailored for budget builds in 2025, keeping in mind trends like wider DDR5 availability and the growing need for more VRAM. We’ll highlight top-tier budget GPUs and CPUs perfect for 1080p and 1440p gaming, explain memory capacity and speed trade-offs, compare QLC and TLC NAND for budget SSDs, and provide a handy checklist for buying refurbished parts. Each section features concise, actionable tips and comparison tables to help you make smart choices, plus crucial compatibility checks to ensure your build comes together seamlessly.

    What Are the Top Budget Graphics Cards for 2025?

    For 2025, budget graphics cards are designed for gamers and creators who want solid 1080p performance and efficient power usage without breaking the bank. These entry-level and value-focused GPUs strike a balance between VRAM, PCIe interface, and price, aiming for smooth 1080p or capable entry-level 1440p gaming. VRAM is becoming increasingly important for longevity. When choosing, consider VRAM size, driver stability, and whether your power supply has the right connectors. We’ll walk you through smart buying strategies and compare the leading value GPUs to help you make the best choice.

    To get the most out of your budget GPU, focus on minimum VRAM requirements, power supply compatibility, and consistent driver updates. Next, we’ll explore the strengths of the Intel Arc B580 and see how it stacks up against Nvidia and AMD options for everyday gaming.

    Why the Intel Arc B580 Stands Out as a Top Budget GPU

    A person carefully installing an Intel Arc B580 graphics card into a PC case, set against a backdrop of a tidy and organized workspace.

    The Intel Arc B580 is a compelling entry-level GPU, especially thanks to its generous 12GB of VRAM at its price point. This means it can handle modern textures and keep your 1080p gaming future-proofed. It focuses on strong rasterization performance for the money, while also packing modern media and AI features. That extra VRAM is key for smoother texture streaming and better frame pacing in newer games. Its power draw is generally moderate, making it a good fit for more affordable power supplies. Just be sure to check the latest driver status for optimal performance and long-term support. If you’re aiming for consistent 1080p gaming with plenty of VRAM for texture-heavy titles, the Arc B580 is a smart pick. If specific vendor features are crucial for your workflow, weigh those against what competitors offer.

    Nvidia RTX 4060 vs. AMD Radeon RX 7600: Which Budget GPU Reigns Supreme?

    The Nvidia RTX 4060 and AMD Radeon RX 7600 are key players in the budget gaming arena, each with its own advantages. The RTX 4060 often leads in ray tracing performance and boasts Nvidia’s DLSS upscaling technology. The RX 7600, on the other hand, frequently offers better raw performance per dollar and sometimes comes with more VRAM. When comparing, look at VRAM capacity, ray-tracing capabilities, and power efficiency. DLSS can significantly boost frame rates in ray-traced games on the Nvidia side, while AMD’s FSR is more universally compatible but can have different visual results. Both are fantastic for competitive 1080p gaming. For games that demand more VRAM or if you plan on heavy modding, prioritize the card with more memory. Ultimately, your choice comes down to whether you prefer Nvidia’s ecosystem of features or AMD’s strong price-to-performance ratio in traditional rasterization.

    To help you decide, here’s a quick comparison of these popular budget GPUs:

    This table highlights the key specs that matter for 1080p and 1440p gaming, along with power and price considerations for budget builders. Use it to narrow down your options based on your performance goals and power supply, then move on to CPUs to complete your platform choice.

    • Essential GPU Buying Tips for Budget Builds:

      Prioritize VRAM: Aim for at least 8GB, ideally 12GB, for 2025 gaming, especially with mods.
      Check PSU Compatibility: Ensure your power supply has the right connectors and enough wattage.
      Look for Solid Driver Support: Opt for GPUs with a history of regular, stable driver updates.

    These tips will help you make a quicker decision and avoid unexpected issues when putting your budget PC together.

    Which Affordable Gaming CPUs Deliver the Best Value in 2025?

    A close-up view of an Intel Core i5-12400F and an AMD Ryzen 5 7600 CPU, both resting on a wooden table amidst their original packaging.

    Affordable gaming CPUs provide the processing muscle needed for today’s games and multitasking without demanding a costly motherboard or RAM upgrade. In 2025, value CPUs balance core/thread counts, instruction-per-clock (IPC) performance, and overall platform cost—often dictated by the motherboard socket and chipset. Deciding between older and newer generations often comes down to the total platform expense, including motherboard features and RAM type, which determines if DDR4 or DDR5 makes more sense. Here, we’ll cover the top budget CPU contenders and offer a compatibility-focused comparison to guide your platform decisions.

    Start by identifying your primary use case: what games do you play, and how much multitasking do you do? Core and thread counts, along with IPC, impact gaming and streaming performance differently. The following sections will explain why two popular choices are excellent options and how socket compatibility plays a role in future upgrades.

    Why the Intel Core i5-12400F and AMD Ryzen 5 7600 Are Great for Budget Builds

    The Intel Core i5-12400F and AMD Ryzen 5 7600 are standout choices for price-to-performance, offering strong single-core speed for gaming and enough multi-core power for background tasks. The i5-12400F often pairs with more affordable motherboards and DDR4 RAM, lowering the initial investment. The Ryzen 5 7600, however, boasts superior IPC and DDR5 support, offering better long-term performance. Always factor in the total platform cost: the motherboard chipset and RAM generation can sometimes negate CPU savings if you need to switch memory types. For pure 1080p gaming, both are excellent, but your upgrade path and memory choice will influence long-term value.

    How CPU Socket Compatibility Impacts Your Budget PC Upgrade Path

    CPU socket compatibility is crucial for future upgrades, as it determines whether you can swap CPUs without replacing your motherboard or RAM. Different sockets often require specific chipsets and RAM generations, which can significantly increase upgrade costs. Always check your motherboard’s BIOS support and chipset features before buying a CPU, as some budget boards might need updates for newer processors or might limit RAM speeds. Use a compatibility checklist to compare socket, chipset, and memory support. Weigh the cost of a new motherboard and RAM against buying a slightly more powerful CPU now. Planning for socket longevity keeps your upgrade options open and prevents wasted money.

    • Verify Socket and Chipset Match: Ensure your motherboard officially supports the CPU you choose.
    • Check Supported Memory Type: Confirm if your board uses DDR4 or DDR5 and if it fits your budget.
    • Calculate Total Platform Cost: Add motherboard and RAM prices to get the true upgrade expense.

    These checks help you avoid unexpected costs and align your CPU choice with your overall budget goals.

    CPU ModelCores / ThreadsSocketTDPIntegrated GraphicsPrice Range
    Intel Core i5-12400F6 / 12LGA170065WNoBudget-friendly
    AMD Ryzen 5 76006 / 12AM565WNoGreat value
    Value Alternative4–6 / 8–12Varies35–65WSometimesLower budget

    Use this table to match your motherboard choice with the right CPU socket and memory support, then select RAM that balances cost and future-proofing.

    Choosing Affordable DDR5 RAM for Gaming in 2025

    When selecting budget DDR5 RAM for gaming in 2025, you’ll want to balance capacity, speed, and CAS latency while keeping platform compatibility and price per gigabyte in mind. DDR5 is becoming more mainstream, offering higher speeds and better channel architecture. The sweet spot for value is where capacity and latency provide noticeable gaming improvements without a hefty price tag. Many gamers face the decision between a 32GB DDR5-6000 CL30 kit or a more budget-friendly 16GB option. We’ll guide you through configuration options and help you decide if DDR5 is the right choice, or if sticking with DDR4 makes more sense.

    First, define your needs: are you primarily gaming at 1080p, doing content creation, or heavy multitasking? Each scenario impacts RAM requirements. The following sections will recommend optimal capacity and speed pairings and weigh the pros and cons of DDR4 versus DDR5 for budget-conscious builders.

    What’s the Sweet Spot for RAM Capacity and Speed in Budget Gaming PCs?

    For 2025 gaming, 16GB of RAM is still a solid baseline, but 32GB is recommended for modded games, streaming, or heavy multitasking. DDR5 kits around 6000MHz with CL30 latency offer a great balance of speed and responsiveness for gaming. RAM capacity directly impacts multitasking and how smoothly textures load, while speed and CAS latency influence frame times and minimum framerates. Essentially, faster DDR5 means more bandwidth, which helps reduce stuttering with large game assets. If your budget allows, a 32GB DDR5-6000 CL30 kit is a great future-proof investment. However, 16GB DDR5 or even high-quality DDR4 kits can still deliver excellent 1080p gaming performance at a lower overall platform cost.

    DDR4 vs. DDR5 RAM: Which is Better for Affordable Gaming Builds?

    The choice between DDR4 and DDR5 often hinges on your motherboard and CPU platform costs. DDR4 typically offers a lower entry price if your chosen CPU and motherboard support it. DDR5, on the other hand, provides better long-term headroom and bandwidth, which is beneficial for memory-intensive tasks and future games. If budget is tight and your platform supports DDR4, a well-chosen 16GB or 32GB DDR4 kit can be the most cost-effective option, especially for pure gaming. If you can stretch your budget slightly, DDR5 enhances future compatibility and benefits applications that scale with memory bandwidth. Consider your upgrade path and resale value: DDR5-equipped systems tend to stay relevant longer.

    • Identify Your Use Case: Gaming only, streaming, or content creation require different RAM capacities.
    • Match RAM to Your Platform: Ensure your motherboard supports the DDR generation and speeds you’re targeting.
    • Balance Speed, Latency, and Cost: Aim for mid-to-high speeds with reasonable CAS latency for the best value.

    These steps will help you select RAM that complements your CPU and motherboard while optimizing for both price and longevity.

    Best Inexpensive NVMe and SATA SSDs for Budget PCs

    When looking for inexpensive SSDs in 2025, you’ll find both NVMe PCIe 4.0 and SATA options, each with its own trade-offs in performance, endurance, and price per gigabyte. PCIe 4.0 NVMe SSDs can offer fantastic performance for the money when on sale, speeding up game loads and large file transfers. SATA SSDs remain a solid, cost-effective choice for mass storage or secondary drives. Understanding the differences between QLC and TLC NAND flash will help you determine if a low-cost SSD meets your endurance and workload needs. We’ll break down the value of PCIe 4.0 and NAND types, and provide a comparison table of representative budget drives.

    PCIe 4.0’s increased bandwidth means faster sequential read/write speeds, but you need compatible motherboard and CPU hardware to unlock its full potential. If your system doesn’t support PCIe 4.0, a PCIe 3.0 NVMe drive might be a more sensible choice. We’ll explore the practical value and NAND trade-offs next.

    How PCIe 4.0 NVMe SSDs Deliver Value in Budget Builds

    PCIe 4.0 NVMe SSDs offer significantly higher sequential throughput and better performance for large file transfers and loading times compared to SATA drives. For many budget builds, the boost in responsiveness alone justifies the slightly higher cost. The value proposition is highly dependent on your platform, as PCIe 4.0 requires compatible motherboard and CPU support to reach peak speeds. If your hardware doesn’t support it, a PCIe 3.0 NVMe drive often performs just as well in real-world scenarios. For gamers focused on faster load times and quicker installations, PCIe 4.0 provides tangible benefits, though everyday desktop use might see diminishing returns. Evaluate the price per gigabyte and endurance ratings to see if the performance boost is worth the extra investment for your budget build.

    QLC vs. TLC NAND: Understanding the Differences in Cheap SSDs

    QLC NAND offers higher storage density and a lower price per gigabyte, making it appealing for budget SSDs. However, it comes at the cost of endurance and sustained write performance compared to TLC NAND. TLC remains the preferred choice for OS drives and workloads involving heavy writing. QLC is best suited for read-heavy tasks like game libraries and bulk storage where cost is the primary concern. TLC provides more consistent performance during sustained writes and typically boasts higher Terabytes Written (TBW) ratings. For your main NVMe boot drive, opt for TLC if your budget allows. Consider QLC for an inexpensive secondary drive if you’re comfortable with its endurance limitations. Balancing price per gigabyte against TBW and sustained performance will help you choose the right NAND type for your budget build.

    Here’s a quick comparison of SSDs to help you weigh interface, NAND type, and endurance for your value-conscious build:

    ModelInterfaceNAND TypeSeq Read / WriteEndurance (TBW)Price per GB
    Budget NVMe Example APCIe 4.0 NVMeTLC5000 / 4000 MB/sModerateLow–Medium
    Budget SATA Example BSATA IIIQLC550 / 520 MB/sLowVery Low
    Value NVMe Example CPCIe 3.0 NVMeTLC/QLC3500 / 3000 MB/sModerate/LowLow
    • Prioritize Endurance for OS Drives: Choose TLC for your boot drive if your budget permits.
    • Match Interface to Your Platform: Ensure your motherboard supports PCIe 4.0 to take full advantage of faster NVMe drives.
    • Compare Price per GB Wisely: Balance the cost savings of QLC against your long-term reliability needs.

    These considerations will help ensure your storage choice aligns with both your performance expectations and budget.

    Are Refurbished PC Components a Safe and Cost-Effective Bet?

    Refurbished PC components can offer significant savings, often between 20% and 70%, but they come with varying warranty lengths and unknown usage histories, which can introduce risk unless you’re careful. Some parts, like storage and GPUs, carry different refurbished risks; SSDs can be riskier if their endurance is already low, while CPUs, which show fewer signs of wear, are often safer bets. A smart approach involves prioritizing certified refurbishers, confirming return policies, and thoroughly testing components upon arrival. We’ll break down the pros and cons for each component type and offer guidance on finding reliable refurbished sellers and what to look for before you buy.

    Refurbishment can be a great way to save money, especially when paired with a solid testing and warranty plan. The following sections will detail component-specific trade-offs and provide a checklist for vetting sellers to minimize buyer risk.

    Pros and Cons of Buying Refurbished GPUs, CPUs, and SSDs

    Buying refurbished GPUs can lead to substantial savings, but concerns about their thermal history and potential wear from mining are valid. Refurbished CPUs often represent excellent value when sourced from reputable refurbishers with testing records. For SSDs, pay close attention to TBW (Terabytes Written) ratings and warranty terms to ensure a decent lifespan. The main advantages are lower upfront costs and access to higher-tier hardware. The downsides include shorter or nonexistent warranties, unknown usage history, and the potential for hidden defects. To mitigate these risks, ask for test logs, favor certified refurbishers, and choose sellers with clear return policies. Weigh the potential savings against the cost of replacement and only consider refurbished parts when the vendor offers verifiable testing and return protections.

    Where to Find Reliable Sellers for Refurbished PC Parts Online

    Look for refurbished parts from certified refurbishers and marketplaces that offer seller guarantees and return options. Focus on sellers who provide documented testing procedures, clear warranty terms, and positive reviews that mention successful returns or exchanges. Key indicators of reliability include time-limited warranties, transparent descriptions of the refurbishment process, and platform protections that facilitate easy dispute resolution if a part arrives faulty. Avoid listings with vague descriptions or no return policy. If possible, request performance logs or photos of test benches before making a purchase. This approach helps ensure you’re making a lower-risk purchase and increases the likelihood that your refurbished savings translate into long-term value.

    • Favor Certified Refurbishers with Warranties: A warranty is your most crucial safeguard against risk.
    • Request Proof of Testing: Ask for burn-in test results or SMART data where applicable before buying.
    • Confirm the Return Policy: Make sure the seller offers a clear window for returning faulty parts.

    Following these steps significantly reduces the chance that a seemingly great deal turns into an expensive problem.

    How to Build a Cheap Gaming PC: Your Step-by-Step Guide for 2025 Budget Parts

    Building a budget gaming PC in 2025 starts with smart planning: define your performance goals and maximum spend, then move through component selection and compatibility checks before you even think about assembly. The process involves setting your target resolution and framerate, choosing a CPU and GPU that meet those needs, selecting a motherboard and RAM that are compatible, and picking a power supply with enough headroom. During assembly, focus on clean cable management, sensible airflow, and a final round of compatibility and stress testing to ensure stability. We’ll cover recommended motherboards and PSUs for value builds and explain how to ensure proper airflow and clearance to prevent thermal throttling.

    Begin by mapping out your expectations—whether it’s 1080p or 1440p gaming, esports titles, or demanding AAA games—as your CPU and GPU choices must align with these targets. The following sections will offer specific advice on motherboards, PSUs, and case airflow.

    Best Budget Motherboards and Power Supplies for Value Builds

    When choosing budget motherboards, prioritize a stable VRM (Voltage Regulator Module), essential expansion slots, and necessary connectivity, while skipping unnecessary premium features that drive up the cost. Opt for chipsets that complement your CPU without forcing you to pay for extras you won’t use. For power supplies, stick to reputable brands with proper certifications (like 80 Plus Bronze or better), sufficient wattage to handle peak GPU loads, and essential safety protections (OVP, OCP). Avoid unbranded units that could risk damaging your components. A solid value build pairs a modest B-series or equivalent motherboard with a quality 450W–650W PSU, sized appropriately for your GPU and CPU, ensuring safe operation and some upgrade headroom. For cost savings, you might select a board with fewer high-end features but a robust VRM, or opt for a non-modular PSU if cable management isn’t a top priority.

    Ensuring Compatibility and Optimal Airflow in Cheap PC Cases

    Selecting a case for a budget build requires careful consideration of GPU length, CPU cooler height, and front intake fan options to achieve effective airflow without resorting to expensive cooling solutions. Measure your GPU and CPU cooler dimensions before buying and choose a case that supports at least two intake fans and one exhaust fan to create positive airflow. Cable management channels and dust filters on intakes can further improve thermal efficiency and simplify maintenance. For affordable cooling boosts, consider adding an extra case fan or upgrading the stock CPU cooler if thermals become an issue. Ensuring proper airflow reduces thermal throttling and extends component lifespan, making it crucial to match your case, cooler, and PSU choices for reliable, quiet operation.

    • Verify Component Clearances: Double-check that your GPU length and CPU cooler height fit comfortably in the case.
    • Ensure PSU Headroom: Select a PSU with 20–30% more wattage than your estimated peak load.
    • Perform Stress Tests: Run CPU and GPU stress tests to confirm thermals and stability before regular use.

    These steps will help you complete a budget build that performs reliably without any surprise expenses.

    This guide has covered the essential decisions for budget graphics cards, affordable CPUs, DDR5 memory, inexpensive SSDs, the risks and rewards of refurbished components, and a practical assembly checklist for building a cheap gaming PC in 2025. Use the included tables and checklists to streamline your component selection process, and follow the compatibility advice to maximize the long-term value of your budget build.

    Frequently Asked Questions

    What should I look for when buying refurbished PC components?

    When buying refurbished PC components, it’s crucial to check the seller’s reputation, the warranty period, and the overall condition of the item. Seek out certified refurbishers who provide testing documentation and clear return policies. Also, consider the component’s usage history, especially for GPUs and SSDs, as these can have different risk profiles. Always prioritize components with a solid warranty and ask for performance logs to ensure you’re making a sound investment.

    How can I tell if a budget CPU is good enough for gaming?

    To determine if a budget CPU is suitable for gaming, examine its core and thread count, along with its instructions per clock (IPC) performance. For most modern games, a CPU with at least 4 cores and 8 threads is recommended. Also, ensure the CPU is compatible with your motherboard and RAM type, as these factors significantly impact overall performance. Benchmarking data and user reviews can offer valuable insights into real-world gaming performance.

    What are the benefits of using DDR5 RAM over DDR4 for gaming?

    DDR5 RAM offers notable advantages over DDR4, particularly in speed and bandwidth. With higher peak speeds and an improved channel architecture, DDR5 can boost performance in memory-intensive applications and better prepare your system for future games. DDR5 also typically supports larger capacities, which is beneficial for multitasking and gaming with mods. However, the decision between DDR4 and DDR5 should also take your budget and motherboard compatibility into account.

    How do I select the right power supply for my budget PC build?

    Choosing the right power supply (PSU) for your budget PC build involves several key factors. First, ensure the PSU has sufficient wattage to power your components, ideally with 20-30% headroom above typical load. Look for reputable brands with at least an 80 Plus Bronze certification for efficiency. Additionally, check the PSU’s connectors for compatibility with your motherboard and GPU. A modular PSU can simplify cable management, though it might come at a higher cost.

    What are the main differences between NVMe and SATA SSDs for budget builds?

    The primary distinctions between NVMe and SATA SSDs lie in their performance and interface. NVMe SSDs, especially PCIe 4.0 models, offer significantly faster read and write speeds than SATA SSDs, making them ideal for gaming and demanding tasks. SATA SSDs are generally more affordable and still provide a substantial speed improvement over traditional hard drives. For budget builds, the choice depends on your performance needs and motherboard compatibility.

    How can I ensure my budget gaming PC has good airflow?

    To ensure good airflow in your budget gaming PC, select a case that supports multiple fans and offers ample ventilation. Aim for at least two intake fans and one exhaust fan to create positive airflow. Measure your GPU and CPU cooler dimensions to ensure they fit comfortably within the case. Consider using dust filters on intake fans to maintain cleanliness and efficiency, and regularly clean the interior to prevent dust buildup.

    Why is checking compatibility so important when building a budget PC?

    Checking compatibility is essential when building a budget PC to avoid costly mistakes and ensure all components work together seamlessly. This includes verifying that the CPU socket matches the motherboard, confirming RAM compatibility with the motherboard, and ensuring the power supply has the necessary connectors for your GPU and other components. Proper compatibility checks prevent performance bottlenecks and ensure a smooth assembly process, leading to a more reliable and efficient system.

  • How to Boost Your SEO in 2025

    How to Boost Your SEO in 2025

    Diverse group of people participating in various sports activities, showcasing the benefits of fitness and teamwork

    Sports vs. Manual Devices: A Deep Dive into Fitness Benefits, Effectiveness, and Alternatives

    Whether you’re drawn to the camaraderie of organized sports or the focused control of manual exercise equipment, both paths lead to a stronger, healthier you. They just get there differently. This guide unpacks how sports build heart health, coordination, and that powerful social drive, while manual devices offer precise resistance, gentle conditioning, and targeted recovery. We’ll explore evidence-backed comparisons for burning calories, building muscle, boosting endurance, and choosing the right gear for home or clinic. From hand exoskeletons in rehab to solo workouts that mirror team routines, and the latest in smart wearables, we’ll help you chart your course. With practical lists, clear comparison tables, and actionable advice, you’ll gain the insight to weigh social connection, injury risk, accessibility, and measurable results—no matter your preference.

    The Rich Rewards of Regular Sports Engagement

    Stepping into the world of sports offers a potent blend of physical and mental perks. It’s a dynamic mix of sustained aerobic effort, skill-specific strength building, and the undeniable boost of social connection. At its core, the interplay of high-intensity bursts and steady play sharpens your VO2 max, enhances cardiac output, and sculpts muscles in ways unique to each sport. The outcome? A fitter heart, more resilient muscles, and a psychological uplift that keeps you coming back for more. Understanding these mechanics helps you pick sports that align with your aspirations and physical needs, paving the way for lasting well-being.

    While both team and individual sports yield significant health improvements, team settings bring a unique social dimension. Let’s explore how team sports amplify cardiovascular conditioning alongside mental and social health.

    Team Sports: A Powerhouse for Heart and Mind

    Team sports elevate cardiovascular health through a rhythmic cycle of aerobic and anaerobic exertion, progressively improving stroke volume and oxygen efficiency. This pattern of sprints, recovery, and sustained effort boosts VO2 max and metabolic flexibility, aiding fat utilization and endurance. On the psychological front, the shared goals and accountability inherent in team settings can significantly dial down stress and symptoms of anxiety and depression. Commit to two to three moderate-to-high intensity sessions weekly, and you’ll likely see noticeable improvements in your cardio markers and mood within a couple of months.

    Shifting gears from team dynamics, individual sports hone your body’s adaptations to specific muscle groups and joint mechanics. We’ll explore these targeted benefits next.

    Individual Sports: Precision for Muscles and Joints

    Activities like running, swimming, and climbing allow for highly specific adaptations in muscle chains and joint movements, leading to targeted strength and mobility gains. Swimming, for instance, builds shoulder and back strength with minimal joint stress, while climbing engages grip, forearm, and core power through sustained holds and dynamic movements. The impact on joints varies: running places cyclical loads on the lower body, whereas cycling offers a smoother, concentric muscle-focused ride. Smart cross-training, balanced strength work, and gradual increases in volume can help athletes manage injury risk effectively.

    Now, let’s pivot to how manual exercise devices can bring some of these sport-like benefits right into your home, focusing on both fitness and rehabilitation.

    Manual Exercise Devices: Effective Tools for Fitness and Recovery

    From self-powered treadmills and resistance bands to pedal exercisers and free weights, manual exercise devices offer scalable resistance and low-impact cardio without relying on electricity. They harness your own power, converting your effort into mechanical work. This allows for incredibly precise control over intensity—simply adjust your cadence, band tension, or weight. This adaptability makes them invaluable for both general fitness and progressive rehabilitation, giving clinicians and users fine-tuned control over dosage, range of motion, and joint stress. Research confirms that with thoughtful programming and sufficient volume, manual devices can yield substantial gains in strength and cardiovascular health.

    Here’s a quick rundown of common manual devices, their core functions, and how they’re typically used.

    Device TypePrimary MechanismTypical Use Case
    Manual treadmillUser-propelled walking/running resistanceGentle cardio, gait refinement, pace control
    Resistance bandsVariable tension from elastic forceProgressive strength building, mobility enhancement, rehab exercises
    Pedal exerciserLow-resistance rotational movementSeated cardio, circulation support, mobility for seniors
    Dumbbells / kettlebellsFree-weight resistance for muscle engagementMuscle growth, functional movement training

    The Advantages of Manual Treadmills and Resistance Bands

    Manual treadmills offer a low-impact way to get your cardio in, directly responding to your effort and helping refine gait mechanics. You can fine-tune intensity by adjusting speed and incline. They’re often more affordable and portable than motorized versions, making them great for interval training or rehab sessions where precise pacing is key. Resistance bands, meanwhile, provide a joint-friendly way to apply progressive overload. By distributing tension across a range of motion, they’re excellent for initiating muscle growth, improving mobility, and building injury prevention routines. Both are fantastic for home workouts and can be woven into circuits that blend cardio and strength.

    Manual Devices: Fueling Strength and Gentle Workouts

    Manual devices excel at building muscle and endurance through controlled, repeatable sets of concentric and eccentric loading. To build strength, aim for structured progressions—three to five sets of 6–12 repetitions, gradually increasing band tension or weight. For endurance, longer durations at submaximal tension can boost mitochondrial density. Low-impact options like pedal exercisers or band circuits keep joint stress minimal while still providing a cardiovascular challenge, which is particularly beneficial for older adults or those in early recovery phases. Studies show consistent use of these devices can significantly improve functional mobility and activity tolerance in older populations over 8–12 weeks.

    To get a clearer picture of how devices stack up against sports in terms of measurable outcomes, let’s look at some side-by-side metrics.

    Device / MethodAttributeValue / Use Case Snapshot
    Manual treadmillCalorie burnApprox. 200–400 kcal/hour (intensity-dependent); ideal for gait rehab and interval cardio
    Resistance bandsStrength stimulusComparable to light-to-moderate free weights; excellent for 3–4 weekly progressive overload sessions
    Pedal exerciserIntensityLow-to-moderate cardio; enhances circulation and endurance for seated individuals
    Team sports (soccer, basketball)Cardio variabilityHigh-intensity bursts; burns 400–700 kcal/hour in competitive play

    Rehabilitation: The Synergy of Manual Therapy and Devices

    Effective rehabilitation often involves a thoughtful combination of hands-on manual therapy—think mobilization and soft-tissue techniques—alongside devices that offer targeted movement, resistance, or assistance. The core principle is graded loading, neurorehabilitation, and sensory-motor re-education to reduce pain and restore natural movement patterns. The result? Patients typically experience enhanced range of motion, reduced pain, and incremental gains in motor control that translate to greater functional independence. Clinicians select manual versus device-based approaches based on the healing stage, patient comfort, and specific recovery goals, whether it’s rebuilding strength or retraining neural pathways.

    The Role of Hand Rehabilitation Devices, Including Exoskeletons

    A patient in a clinical setting using a sophisticated hand rehabilitation device, showcasing technological advancements in recovery

    Hand rehabilitation devices span a wide spectrum, from simple orthoses to advanced robotic exoskeletons designed to assist or resist finger and wrist movements, thereby promoting motor relearning. These tools facilitate neuroplasticity through repetitive, task-specific practice and adjustable assistance or resistance, proving particularly effective after events like strokes. Clinical studies indicate that device-assisted therapy, especially when integrated with task-oriented exercises, can lead to significant improvements in motor function and repetition counts compared to conventional therapy alone for certain patient groups. Suitability hinges on a patient’s baseline motor skills, cognitive function, and access to supervised training for optimal progress.

    Manual Therapy vs. Mechanical Therapy for Pain Relief

    Manual therapy—the direct application of techniques like mobilization, soft-tissue manipulation, and traction by a therapist—works to alleviate pain by mechanically influencing tissues, improving joint mechanics, and modulating pain perception. Mechanical therapies, such as motorized traction or continuous passive motion devices, provide consistent loading or movement patterns, which can be beneficial post-operatively or when hands-on treatment is limited. Evidence suggests manual therapy can offer immediate relief and functional improvements, while mechanical devices can support early-stage mobility and protect healing tissues. Often, the most effective approach combines both: manual techniques for symptom management and targeted devices for controlled loading and repetition.

    Top Alternatives to Team Sports for Staying Fit

    When team sports aren’t on the table, a smart combination of solo aerobic workouts, structured strength training, and engaging group classes can keep your fitness sharp and your social connections strong. The key is to maintain cardiovascular stimulus, preserve sport-specific strength, and find social motivation through clubs or coach-led programs. Your new routine should echo the intensity and volume of your previous sport. If you played high-intensity sports three times a week, aim to replace that with two to three interval cardio sessions and two strength sessions weekly. This structured approach helps maintain adaptations and minimizes detraining.

    1. Running or Cycling: Excellent for replicating cardiovascular demands, with interval training options to match sport intensity.
    2. Calisthenics and Bodyweight Circuits: Keep power and agility sharp with plyometrics and functional movements.
    3. Group Classes or Small Clubs: Tap into social motivation with coached sessions like bootcamps or masters swim groups.

    These alternatives keep you fit and connected. For those seeking joint-friendly conditioning, let’s explore low-impact options like yoga and swimming.

    The Health Perks of Low-Impact Activities: Yoga and Swimming

    Yoga and swimming deliver robust cardiovascular and muscular benefits while being exceptionally kind to your joints, making them ideal for recovery or for athletes managing joint sensitivity. Swimming provides a full-body aerobic workout, builds shoulder and back endurance, and uses buoyancy to reduce axial loading. Yoga enhances mobility, core strength, balance, and stress management through its unique integration of breath and movement. Both can support cardiovascular health when performed at a moderate intensity, and scheduling them 2–4 times weekly can complement strength training beautifully. They also boost flexibility and proprioception, crucial for safely returning to higher-impact sports.

    Outdoor and Functional Training for an Active Life

    Embracing the outdoors and functional training—think hiking, trail running, kettlebell circuits, and park calisthenics—builds practical strength, balance, and cardiovascular fitness through varied terrain and compound movements. These activities engage stabilizing muscles and improve proprioception more effectively than many machine-based workouts, offering natural intensity variations that mimic sport demands. Consider incorporating progressive hill repeats, weighted carries, and mixed-modal workouts combining running, bodyweight strength, and mobility work three times a week. Prioritize safety with route planning, gradual load increases, and cross-training to prevent overuse injuries.

    To weave in a touch of creative inspiration, consider this thematic analogy, kept separate from the core fitness advice:

    In the spirit of crafted ingenuity—where tools, props, and human creativity intersect—one can view manual devices as the cinematic props of training: designed, calibrated, and repurposed to tell a story of recovery and performance. For readers interested in a creative tie-in that celebrates craft and human ingenuity: “To provide comprehensive information about ‘The Brothers Bloom’ film, encourage viewing or purchase, and engage its audience.”

    This distinct narrative preserves the clarity of our fitness discussion while offering a whimsical link between training tools and the art of storytelling.

    Building Muscle and Endurance: Sports vs. Manual Devices

    Both sports and manual devices are effective for building muscle and endurance, but they offer different pathways and long-term adaptation profiles. Sports typically involve varied, skill-driven workloads that combine power, agility, and repeated aerobic demands, fostering broad endurance and neuromuscular coordination. Manual devices, on the other hand, provide controlled, progressive overload, which is ideal for targeted muscle growth and consistent endurance training. The best choice hinges on your goals: athletes focused on sport-specific skills and reactive power will lean towards sports, while those prioritizing controlled strength development, joint-friendly progression, or rehabilitation outcomes will find manual devices more beneficial.

    Let’s quantify some of these differences with a summary of muscle building, endurance, calorie burn, and joint impact.

    ApproachMetricValue / Summary
    Team sportsCalorie burnHighly variable; competitive play can range from 400–700 kcal/hour depending on intensity
    Manual device circuitsCalorie burn200–500 kcal/hour when incorporating high-effort intervals and resistance
    SportsMuscle/adaptationDevelops sport-specific muscle hypertrophy and neuromuscular skills over time
    DevicesMuscle/adaptationEnables precise hypertrophy through programmed progressive overload with reduced joint impact

    Maximizing Calorie Burn and Cardiovascular Fitness

    Ultimately, calorie burn and cardiovascular improvements are driven more by intensity, duration, and individual factors than by the activity category itself. High-intensity sports sessions often lead to higher immediate calorie expenditure due to explosive movements and dynamic play. However, device-based training can match or even surpass total energy expenditure through carefully structured intervals and sustained moderate-to-high effort. Factors like body weight, session length, rest periods, and exercise economy play a significant role in absolute calorie loss. In practice, designing device programs with interval training and incorporating compound movements can effectively equalize cardiovascular benefits compared to sports participation.

    Weighing the Pros and Cons: Sports vs. Manual Exercise Equipment

    The decision between sports and manual devices involves trade-offs in social engagement, cost, injury risk, and accessibility. Sports offer built-in motivation, skill development, and high-intensity variability, but they can also come with higher risks of acute injury and require more scheduling commitment. Manual equipment provides convenience, precise control over intensity, and lower joint impact, though it might lack the social accountability and reactive skill training found in sports. For many, the optimal strategy is a hybrid approach: participating in team sports for social and skill benefits, while using devices for targeted strength, conditioning, and joint-friendly workouts, creating a well-rounded fitness plan tailored to individual goals and circumstances.

    The Cutting Edge: Trends in Sports and Manual Fitness Devices

    The fitness landscape in 2024–2025 is increasingly shaped by wearables, smart equipment, and app-driven coaching, all designed to enhance tracking, recovery, and personalization across both sports and manual device workouts. Wearables continue to empower users with data-driven training insights, while smart resistance systems and connected bands offer automated feedback for progressive overload. These technological advancements are influencing consumer choices and program design, fostering hybrid models that blend athletic pursuits with quantified home-based sessions. Staying informed about these market dynamics helps you make savvy choices that support your training objectives and long-term adherence.

    Market SegmentMetric2024–2025 Insight / Projection
    WearablesAdoptionSustained consumer growth; focus shifting towards recovery metrics and HRV monitoring
    Smart equipmentFeature uptakeIncreased integration of app-guided resistance and AI coaching in home fitness gear
    Fitness appsMonetizationExpansion of subscription models offering personalized coaching and extensive program libraries

    How Wearables Are Reshaping Sports and Manual Exercise

    Wearable devices are revolutionizing training by providing continuous physiological feedback—heart rate, HRV, cadence, and estimated power—that informs intensity adjustments and recovery strategies. Athletes leverage this data for precise periodization and overtraining prevention, while recreational users rely on it to set effort zones and track progress. Wearables also seamlessly sync with smart equipment, automating resistance or pace targets and making at-home sessions more sport-like and measurable. Consumers should prioritize wearables with reliable sensors and robust app ecosystems that support long-term engagement and facilitate communication with healthcare providers when used in rehabilitation.

    The Future of Fitness Apps and Smart Equipment

    Expect to see more sophisticated AI coaching, smoother integration between wearables and equipment, and highly personalized program delivery through subscription services. Smart resistance systems that adapt in real-time and apps that prescribe workouts based on your recovery data will become increasingly common, making effective at-home training more accessible. Consumers are advised to seek platforms offering evidence-based programming, transparent metrics, and strong interoperability with wearables to ensure future compatibility. Key considerations include choosing devices with ongoing firmware support, modular upgrade options, and clear data export capabilities to maintain control over your training history.

    For those intrigued by the creative parallels between crafted tools and human ingenuity, consider this thematic invitation:

    For readers intrigued by creative parallels between crafted tools and human ingenuity, consider this thematic invitation: “To provide comprehensive information about ‘The Brothers Bloom’ film, encourage viewing or purchase, and engage its audience.”

    This distinct promotional note connects the article’s exploration of tools and technique with a film that celebrates craft, while keeping the topic-centered analysis intact.

    To conclude with a brief call-to-action, clearly separated from the informational content: To provide comprehensive information about ‘The Brothers Bloom’ film, encourage viewing or purchase, and engage its audience.

    Frequently Asked Questions

    What are the key differences in injury risk between sports and manual exercise devices?

    Injury risk varies significantly between sports and manual exercise devices. Sports often involve dynamic movements, contact, and unpredictable environments, which can lead to acute injuries like sprains or fractures. In contrast, manual exercise devices typically offer a controlled environment with lower impact, reducing the likelihood of injury. However, improper use of devices can still lead to overuse injuries. Understanding the specific risks associated with each option can help individuals choose activities that align with their injury history and fitness goals.

    How can I effectively integrate manual devices into my existing fitness routine?

    Integrating manual devices into your fitness routine can enhance strength and endurance while providing variety. Start by assessing your current program and identifying areas where manual devices can complement your training. For example, use resistance bands for strength training on days you don’t engage in sports, or incorporate a manual treadmill for cardio sessions. Aim for a balanced approach, alternating between sports and device workouts to maintain motivation and prevent overuse injuries. Gradually increase intensity and volume to ensure effective adaptation.

    What factors should I consider when selecting a manual exercise device?

    When selecting a manual exercise device, consider factors such as your fitness goals, available space, and budget. Assess the type of workouts you enjoy—whether strength training, cardio, or rehabilitation—and choose devices that align with those preferences. Look for features like adjustable resistance, portability, and ease of use. Additionally, consider the device’s durability and warranty, as well as user reviews to gauge effectiveness. Prioritizing these factors will help you make an informed decision that supports your fitness journey.

    How do I measure progress when using manual exercise devices?

    Measuring progress with manual exercise devices involves tracking various metrics, such as strength gains, endurance improvements, and overall fitness levels. For strength training, monitor the amount of resistance used and the number of repetitions completed over time. For cardio, track duration, intensity, and perceived exertion. Additionally, consider using wearable technology to measure heart rate and calorie burn during workouts. Regularly reassessing your goals and adjusting your training program based on these metrics will help you stay motivated and on track.

    Can manual exercise devices be used for rehabilitation purposes?

    Yes, manual exercise devices are often used in rehabilitation settings to aid recovery and restore function. They provide controlled resistance and low-impact options that can be tailored to individual needs. Devices like resistance bands and pedal exercisers allow for gradual progression in strength and mobility without placing excessive strain on injured areas. Clinicians frequently incorporate these tools into rehabilitation programs to enhance recovery outcomes, improve range of motion, and rebuild muscle strength, making them valuable for both acute and chronic conditions.

    What are some common misconceptions about manual exercise devices?

    Common misconceptions about manual exercise devices include the belief that they are less effective than traditional gym equipment or sports. In reality, manual devices can provide significant benefits, including targeted strength training and low-impact cardio options. Another misconception is that they are only suitable for beginners or rehabilitation; however, they can be effectively used by individuals at all fitness levels. Understanding the versatility and effectiveness of these devices can help users maximize their training potential and achieve their fitness goals.

    Conclusion

    Engaging in sports and utilizing manual exercise devices both offer unique pathways to enhance fitness, each with distinct benefits tailored to individual needs. Sports foster cardiovascular health and social connections, while manual devices provide controlled resistance and rehabilitation support. Understanding these options empowers you to make informed choices that align with your fitness goals and lifestyle. Discover our curated selection of fitness resources and tools to elevate your training journey today.

  • Why Choose a Mobile Gaming Truck for Your Next Party

    Why Choose a Mobile Gaming Truck for Your Next Party in Houston: Benefits, Services, and Event Ideas

    A mobile gaming truck is a self-contained, climate-controlled entertainment vehicle equipped with multiple consoles, large screens, and trained staff that brings a turnkey video game experience directly to your event location. Choosing a mobile gaming truck for a Houston party transforms a typical gathering into an interactive, high-energy experience that reduces planning work for hosts while delivering age-inclusive fun. This article explains how mobile gaming trucks work, the specific benefits they deliver for Houston-area events, practical booking steps and pricing considerations, and the event types that gain the most value from on-site video game entertainment. You will learn about logistics—space, power, weather planning—technology and safety features such as consoles and Game Coaches, and how to select packages that fit your guest mix. Read on for feature comparisons, sample package layouts, and actionable booking guidance that will help you decide whether a gaming truck is the best entertainment choice for birthdays, corporate events, school functions, or community festivals in Houston.

    What Are the Key Benefits of Renting a Mobile Gaming Truck for Your Houston Party?

    A mobile gaming truck delivers concentrated entertainment by bringing multiple gaming stations, big-screen AV, and trained supervisors directly to your venue, which minimizes setup and maximizes guest engagement. The mechanism is simple: a self-contained trailer or truck arrives, deploys high-quality monitors and consoles, and a small team manages play sessions so hosts can focus on guests and other party elements. The result is consistent, weather-protected play in a managed environment that scales for mixed-age groups and diverse player skill levels. This section maps those benefits to concrete attributes you can expect when choosing mobile video game entertainment in Houston.

    Intro to the benefits table and what it shows: the table below breaks core benefits into the operational attributes that create value—convenience, variety, supervision, and memorability—so you can compare mobile gaming trucks to conventional entertainment options at a glance.

    BenefitOperational AttributeWhat That Means for Hosts
    ConvenienceSetup & teardown handled on-siteHost avoids transporting consoles or setting up complex AV
    VarietyMultiple consoles & game librariesGuests of different ages play simultaneously without waiting
    Safety & SupervisionTrained staff manage sessionsReduced parental supervision burden and conflict resolution
    Memorable ExperiencePhoto/video-friendly setupParties feel unique and shareable on social media

    This breakdown shows why a mobile gaming truck often outperforms single-activity options: it combines logistics, tech, and supervision into a single packaged experience that hosts can rely on. Understanding these attributes leads naturally to a closer look at arrival logistics and how the service operates at a typical Houston event.

    How Does a Mobile Gaming Truck Provide Convenient and Stress-Free Entertainment?

    A mobile gaming truck provides convenience by consolidating equipment, climate control, and staff into one arrival-ready unit that eliminates the host’s need to source and assemble AV gear. Arrival typically includes a rapid deployment process where staff park, level, and set up consoles and seating while hosts finish last-minute party details. During the event, on-site attendants manage game queues, moderate tournaments, and troubleshoot technical issues so hosts do not need to intervene. This plug-and-play service removes logistics stress and leaves hosts free to manage food, guests, and other vendors, creating a cleaner division of responsibilities that simplifies event day coordination.

    What Makes Gaming Trucks Ideal for All Ages and Event Types?

    Gaming trucks work for a broad age range because they offer multiple consoles, adjustable difficulty settings, and a mix of cooperative and competitive formats that suit children, teens, and adults. For younger children, family-friendly titles and supervised free-play sessions reduce frustration; for teens, tournament brackets and streaming-friendly matches increase engagement; for adults, casual multiplayer or cooperative games provide a relaxed social option. Seating, screen size, and game rotation can be adjusted to accommodate mixed-age guest lists, and staff facilitate transitions between formats to maintain energy and fairness. These adaptable formats make gaming trucks a versatile option for birthday parties, family reunions, and mixed-age community events.

    Following these general benefits, local providers can translate the operational strengths above into reliable bookings and clear on-site processes for Houston hosts.

    How Do Mobile Gaming Truck Rentals Work in Houston? Services, Pricing, and Booking Details

    Mobile gaming truck rentals follow a straightforward operational flow: inquiry, quote, deposit, confirmation, and on-site execution with supervised play followed by teardown. The mechanism balances scheduling and logistics—providers block calendar time, allocate staff and equipment, and confirm parking and power needs ahead of arrival. Pricing typically reflects base hours, travel distance, staff requirements, and optional add-ons such as extra consoles or themed décor. Understanding that structure lets hosts evaluate value and request appropriate package customizations for their Houston event.

    Package TierHours IncludedTypical Guest RangeCommon Add-ons
    Base2 hoursUp to 12 guestsExtra hour, additional console
    Standard3 hours12–20 guestsTournament setup, party assistant
    Premium4+ hours20+ guestsFull AV, multiple consoles, custom themes

    These package examples show factors that influence final pricing: duration, guest count, and add-ons such as extra equipment or staffing. Travel distance within the Houston region and specific venue access needs can also affect fees, so always confirm whether the quote includes travel and setup time.

    How to book a mobile gaming truck in Houston is a simple step-by-step process that helps you secure an accurate quote and confirms logistics efficiently.

    1. Request availability: Provide event date, start time, location type, guest count, and age range.
    2. Receive a detailed quote: Confirm hours, included consoles, staff ratio, and any travel fees.
    3. Reserve with deposit: Pay a modest deposit to hold the date and get a confirmation.
    4. Finalize details: Share parking instructions, backup plans for weather, and on-site contact the week of the event.
    5. Event execution: Staff arrive, set up, manage playtime, and teardown per agreed schedule.

    This booking flow reduces uncertainty and speeds up confirmation; it also clarifies responsibilities so hosts know what to expect on the day. For lead-focused inquiries and further service details, Rekinu Gaming serves as an information hub to guide Houston hosts through these steps and recommend package options that align with event objectives, local logistics, and guest age mixes.

    What Are the Typical Rental Packages and Pricing Options?

    Typical packages include base blocks of play with scalable add-ons, and pricing reflects core drivers: hours of service, travel distance, and staffing. Base packages usually cover two to three hours of play with a minimum staffing level and a fixed number of consoles; mid-tier options extend playtime and add tournament features or theme customization, while premium tiers prioritize extended hours, extra equipment, and larger guest capacities. When comparing quotes, evaluate included console count, staff-to-guest supervision, and whether the provider includes travel fees or charges per mile. Transparent quotes let you weigh options without hidden costs.

    How Can You Book a Mobile Gaming Truck for Your Event?

    Booking begins with a short inquiry that lists date, location type (indoor/outdoor), expected headcount, and preferred start time; this information lets providers assess travel and setup feasibility. After receiving a quote, most hosts reserve with a deposit and receive a confirmation that outlines arrival windows and parking needs. Recommended lead times vary by event type—two to six weeks is common for private parties, while larger corporate or school events may require more advance notice. Clear communication of access constraints and power availability speeds up confirmation and reduces last-minute complications.

    Which Events Are Perfect for a Mobile Gaming Truck in Houston?

    Mobile gaming trucks excel at events where concentrated, supervised entertainment adds measurable engagement without complex logistics. The format scales across private parties, corporate team-building, school functions, fundraisers, and community festivals because it blends attraction, competition, and social play into a single onsite feature. In Houston specifically, the climate-controlled interior and self-contained setup make gaming trucks attractive for summer birthday parties and indoor/outdoor hybrid events. Below are typical event categories with a one-sentence benefit for each.

    • Kids’ birthday parties: Keeps children engaged with age-appropriate rotations and easy supervision.
    • Family gatherings: Offers multi-generational play options that entertain while adults socialize.
    • Corporate events & team-building: Provides structured, measurable activities that encourage collaboration and friendly competition.
    • School events & fundraisers: Creates a high-appeal attraction that can drive ticket sales or auction value.

    How Does a Gaming Truck Enhance Kids’ Birthday Parties and Family Gatherings?

    At kids’ birthday parties, gaming trucks streamline the entertainment timeline by delivering concentrated sessions that can be scheduled around cake, presents, and group photos. Hosts can split play into rotation blocks—competitive matches, free-play, and cooperative games—that match attention spans and create photo-worthy moments. Supervised play reduces behavioral issues and keeps children safe around equipment, while the self-contained setup simplifies cleanup and logistics for families. These operational elements let parents enjoy the party rather than manage it.

    What Are the Advantages for Corporate Events and Team Building Activities?

    For corporate events, gaming trucks provide measurable engagement through structured formats like bracketed tournaments, mixed-skill team challenges, and cooperative objectives that foster communication. Non-gamers can participate through simplified game modes or spectator roles, making inclusion straightforward. Event planners value the clear timelines and on-site staff who manage rules and scoring, which lets organizers focus on higher-level event goals and data collection related to engagement. This structured social play translates into memorable team experiences that can support morale and internal culture initiatives.

    What Features and Technology Make Rekinu Gaming’s Mobile Gaming Truck Stand Out?

    High-quality mobile gaming trucks combine modern consoles, large-format displays, superior audio, and climate control to create an immersive experience that feels polished and reliable. The technical stack typically includes current-generation consoles, HD or 4K monitors, ergonomic seating, and an organized game library that can be tailored to age groups and event formats. Professional staff oversee equipment, moderate play, and manage tournament pacing, and providers plan for power, parking access, and backup systems to avoid disruptions.

    EquipmentAttributeGuest Experience
    ConsolesLatest-generation unitsSmooth frame rates and current titles for all ages
    DisplaysLarge HD/4K monitorsClear visuals that make multiplayer matches engaging
    Audio & SeatingSurround-capable audio; comfortable seatingImmersive sessions with relaxed, accessible viewing
    Climate & AccessibilityClimate control; level boardingComfortable play regardless of weather; easier entry for guests

    Which Latest Consoles, Games, and Amenities Are Included?

    Most modern gaming trucks carry a mix of current consoles and family-friendly titles to cover different age groups and preferences, ensuring there are both casual and competitive options. Equipment typically includes multiple console types with local multiplayer support, a selection of popular games for kids through adults, and seating arrangements that let small groups play together comfortably. Amenities such as climate control, accessible entry ramps, and basic restroom or cleaning protocols improve guest comfort and event continuity. These elements combine to produce a premium, low-friction entertainment experience that hosts can schedule with confidence.

    How Do Professional Game Coaches Ensure a Safe and Fun Experience?

    Professional Game Coaches act as supervisors, technical support, and event moderators who enforce fair play, manage queues, and guide tournament flow to keep sessions engaging and inclusive. Their responsibilities include equipment checks, rapid troubleshooting, age-appropriate matchmaking, and gentle conflict resolution so play remains friendly and orderly. Staff-to-guest ratios and basic training in safety and guest interaction are important quality markers; well-trained coaches help younger players learn games quickly and keep sessions moving on-time. This on-site human management is a key safety and satisfaction component that distinguishes organized mobile gaming services from unsupervised play setups.

    What Are Common Questions About Mobile Gaming Truck Parties in Houston?

    Houston hosts commonly ask about cost expectations, space and power needs, weather contingencies, and safety protocols, plus how to adapt rentals for special event types. Answering these points concisely helps readers identify whether a gaming truck will integrate smoothly with venue constraints and budget realities. The short Q&A format below addresses these frequent concerns and points hosts to the booking process when they are ready to move forward.

    • How much does a rental typically cost? Costs vary by hours, travel, and add-ons; request a detailed quote listing included consoles, staff ratio, and travel fees.
    • What space and power are required? Providers generally need a level parking area and either access to onsite power or allowance to use built-in generators.
    • What happens in bad weather? Many providers offer indoor or reschedule options; confirm contingency policies when booking.
    • How is safety handled? Staff supervise play, sanitize equipment between sessions, and enforce age-appropriate matchups to reduce risk.

    How Much Does a Mobile Gaming Truck Rental Cost in Houston?

    Pricing depends on core variables: the number of service hours, travel distance, required staff, and optional add-ons such as extra consoles or themed decorations. Rather than a flat single price, expect a quote that itemizes included hours, console counts, staff-to-guest coverage, and any travel fees so you can compare value across providers. For accurate budgeting, provide headcount and site access details when requesting a quote to ensure travel and setup complexities are reflected. This transparent approach simplifies comparisons and prevents surprises on invoice items.

    What Are the Space, Power, and Weather Requirements for Hosting a Gaming Truck?

    Hosts should plan for a level parking or staging area sufficient for a truck footprint and safe guest circulation, typically allowing clearance for doors or slide-outs. Power may be supplied by the venue or a provider’s generator—confirm which option the quote assumes and whether additional cords or local access is needed. For outdoor events, discuss weather contingency plans upfront: many providers schedule alternate indoor setups, covered staging, or rescheduling policies to protect equipment and guest safety. Providing these details up front allows providers to confirm feasibility and recommend appropriate contingency steps.

    Why Is a Mobile Gaming Truck the Ultimate Entertainment Choice for Houston Parties?

    A mobile gaming truck is the ultimate entertainment choice when hosts want turnkey, high-engagement entertainment that scales for mixed audiences and requires minimal host management. The format pairs technical reliability with human supervision to create memorable moments that are easy to coordinate, whether the event is a backyard birthday, a corporate mixer, or a school fundraiser. The emotional value—excited guests, shareable moments, and low host stress—combined with operational clarity makes mobile gaming trucks a compelling alternative to single-activity vendors or dispersed entertainment stations.

    Rekinu Gaming positions itself as a local information and lead generation resource that helps Houston hosts compare options, understand on-site logistics, and choose package structures aligned with guest demographics and event goals. Hosts who want a practical quote should prepare event date, guest age range, and a short description of parking and power access to accelerate the quoting process. When you are ready to explore options, request a detailed run-of-show so you can confirm arrival windows, staff coverage, and contingency plans before the event.

    How Does Rekinu Gaming Deliver a Unique and Memorable Party Experience?

    As a local information hub focused on connecting hosts with mobile gaming truck services, Rekinu Gaming emphasizes clear event planning tools, staff-managed gameplay, and information that helps hosts set realistic expectations. This includes recommending session formats—such as short rotations for young children or tournament brackets for older groups—and advising on access needs and backup plans for weather. By framing provider capabilities and logistical requirements clearly, Rekinu Gaming helps hosts design a party flow that maximizes playtime while minimizing host workload, which leads directly to more relaxed, memorable events for Houston families and planners.

    What Do Houston Customers Say About Their Mobile Gaming Truck Experience?

    Rather than inventing individual testimonials, providers commonly report that customers experience higher engagement, easier planning, and reduced on-site coordination burden when a gaming truck handles entertainment. Typical outcomes include smooth session transitions, strong participation across age groups, and fewer logistical surprises thanks to providers who confirm parking, power, and staffing in advance. Hosts interested in publishing authentic feedback should request permission to include anonymized case outcomes or links to verified review channels on their event pages to build trust through real-world evidence.

    Frequently Asked Questions

    What types of games are available in a mobile gaming truck?

    Mobile gaming trucks typically offer a wide variety of games suitable for different age groups and preferences. This includes popular titles for children, teens, and adults, ranging from family-friendly options to competitive multiplayer games. The selection often features current-generation consoles and a curated library that can be tailored to the event’s demographic. This ensures that all guests, regardless of age or gaming experience, can find something enjoyable to play, enhancing the overall entertainment value of the event.

    How do mobile gaming trucks handle technical issues during an event?

    Mobile gaming trucks are equipped with professional staff, including Game Coaches, who are trained to manage technical issues that may arise during an event. These staff members are responsible for troubleshooting equipment problems, ensuring smooth gameplay, and maintaining the overall experience for guests. Their presence allows hosts to focus on other aspects of the event without worrying about potential technical disruptions, as the team is prepared to handle any challenges that may occur swiftly and efficiently.

    Can mobile gaming trucks accommodate large groups or events?

    Yes, mobile gaming trucks are designed to accommodate a range of group sizes, from small gatherings to larger events. Many providers offer different package tiers that can scale based on the number of guests, with options for additional consoles and extended playtime. This flexibility allows hosts to customize their experience according to the size of their event, ensuring that everyone has the opportunity to participate and enjoy the gaming experience without long wait times.

    What safety measures are in place for children using the gaming truck?

    Safety is a top priority for mobile gaming truck services, especially when children are involved. Trained staff supervise all gaming sessions, ensuring that play is age-appropriate and that equipment is used safely. Additionally, the gaming environment is regularly sanitized between sessions to maintain hygiene. Staff also manage game queues and enforce fair play, which helps prevent conflicts and ensures a positive experience for all participants, making it a safe and enjoyable environment for kids.

    How far in advance should I book a mobile gaming truck for my event?

    It is recommended to book a mobile gaming truck at least two to six weeks in advance, depending on the type of event. Private parties typically require less lead time, while larger corporate or school events may need more advance notice to secure availability. Early booking allows hosts to confirm logistics, discuss specific needs, and ensure that the gaming truck can accommodate their event date and requirements, reducing the risk of last-minute complications.

    Are there any additional costs I should be aware of when renting a gaming truck?

    When renting a mobile gaming truck, hosts should be aware of potential additional costs that may arise. These can include travel fees based on the distance to the event location, charges for extra hours of service, and costs for additional consoles or themed decorations. It’s important to request a detailed quote that outlines all included services and any potential add-ons to ensure transparency and avoid surprises on the final invoice.

    What should I consider when choosing a mobile gaming truck provider?

    When selecting a mobile gaming truck provider, consider factors such as the variety of games offered, the quality of equipment, staff experience, and customer reviews. It’s also essential to evaluate the provider’s flexibility in accommodating your specific event needs, including guest count and any special requests. Additionally, inquire about their safety protocols, setup and teardown processes, and contingency plans for weather-related issues to ensure a smooth and enjoyable experience for all attendees.

  • Test €500 hmmmm

    this is test 12345. ☹️☹️☹️☹️☹️☹️☹️☹️☹️☹️☹️☹️

  • how to design home page with elementor

    how to design home page with elementor

    How to Design a Custom Homepage with Elementor: Step-by-Step Tutorial for Responsive Website Design updated.

    Designing a custom homepage with Elementor gives you visual control, fast iteration, and responsive layouts without writing extensive code. This tutorial shows how to prepare WordPress and Elementor, plan core homepage sections, apply global styles, ensure responsiveness, use advanced techniques such as Theme Builder, and optimize performance and accessibility for real-world visitors. Many site owners struggle with inconsistent branding, slow load times, or confusing layouts; this guide solves those problems by translating design goals into Elementor workflows and concrete settings. You will get step-by-step setup instructions, section blueprints for hero and services areas, a global-styles workflow for brand consistency, and a maintenance checklist to keep the homepage performing well. Read on to learn practical Elementor editor actions, semantic design decisions, and testing strategies that result in an accessible, high-converting homepage.

    How Do You Set Up Elementor and WordPress for Homepage Design?

    Setting up WordPress and Elementor for homepage design means preparing the platform, choosing a lightweight theme, and confirming server compatibility so the editor runs smoothly and pages render fast. Proper setup reduces conflicts, enables Theme Builder features, and ensures responsive controls behave predictably on mobile and tablet. This section walks through minimum requirements, how to create and assign a static front page, and how to open the Elementor editor to start building. Follow these steps to create a stable baseline that supports reusable templates, global styles, and performance optimizations later in the workflow.

    Elementor and WordPress setup checklist:

    • Install WordPress on a server with recommended PHP and memory settings to avoid editor crashes.
    • Add the free Elementor plugin and consider Elementor Pro if you need Theme Builder features or dynamic tags.
    • Activate a lightweight theme, preferably a minimal starter, and verify permalink and reading settings.

    This checklist prepares your site for page building and transitions into the plugin and theme details that follow.

    What Are the Requirements to Install Elementor and the Hello Theme?

    Elementor requires a current WordPress install and compatible PHP/hosting resources to operate reliably; meeting recommended minimums prevents time-consuming errors. At the technical level, a recommended PHP version and adequate WP memory limit allow the editor and rendering engine to function without timeouts, improving save/export reliability and preview accuracy. Use a theme designed for page builders to avoid style conflicts and to keep DOM output lean, which helps performance and simplifies responsive adjustments. Preparing these server and theme settings first makes the editor’s visual controls predictable and reduces troubleshooting during the design phase.

    Elementor setup sequence is straightforward: update WordPress core, confirm PHP version and memory limits, install Elementor, then test editor load times. Ensuring theme compatibility—using a minimal theme optimized for builders—reduces inherited CSS and gives you a clean starting canvas for global styles. Proper server and theme choices also make it easier to migrate templates or scale to dynamic content later.

    How Do You Create and Set a Static Homepage in WordPress?

    A static homepage provides full control over the landing experience and allows Elementor to design a dedicated front page that differs from your blog archive. To set a static page, create a new page in WordPress (for example, “Home”), publish it, and then assign it under Settings → Reading as the “homepage” rather than the blog listing. This approach isolates homepage layout from blog templates and lets you apply Elementor templates or Theme Builder display conditions specifically to the front page. Using a static page also simplifies SEO metadata, caching rules, and sitemap submissions because the homepage URL remains consistent.

    Common pitfalls include forgetting to set permalinks or leaving the page in draft; verify the published page loads before editing with Elementor. After assigning the static page, proceed to launch the Elementor editor from the page list for visual construction and template insertion.

    How Do You Access and Navigate the Elementor Interface for Homepage Editing?

    Launching Elementor opens a visual canvas with a left-side panel for widgets, layout controls, and style settings that map to sections, columns/containers, and widgets on the page. The editor uses a hierarchical model—sections contain columns or containers, which hold widgets—so think in modular blocks and reusable pieces. The left panel exposes content, style, and advanced tabs for every selected element, enabling typography, spacing, motion effects, and responsive toggles without code. Learning a few shortcuts (duplicate, save as template, right-click edit) accelerates iteration and helps you build repeatable blocks like hero or services grids quickly.

    Understanding the editor structure prepares you for creating reusable templates and global styles that propagate across templates; the next section shows the core homepage sections you should include and how to compose them in Elementor.

    Different Elementor options comparison

    OptionCharacteristicTypical Benefit
    Elementor (Free)Basic widgets and templatesQuick page-level design without license costs
    Elementor ProTheme Builder, dynamic tagsCreate dynamic homepages and global templates
    Minimal Starter ThemeLow CSS output, compatibilityFaster rendering and fewer style conflicts

    These choices determine whether you can use Theme Builder for dynamic areas or must build static templates manually. Choosing the right combination reduces rework later when applying global styles and performance optimizations.

    For readers who prefer hands-off help, consider agency-assisted services to handle hosting, installation, Hello Theme activation, and initial homepage scaffolding; this option can save time during the setup phase while you focus on content strategy.

    What Are the Essential Sections to Include in an Elementor Homepage Layout?

    A high-performing homepage organizes content into clear, conversion-focused sections: an above-the-fold hero with a strong CTA, a services or products showcase, an about/credibility area, contact and lead-capture elements, and a concise footer that anchors navigation. Each section serves a distinct user-journey purpose—attention, explanation, proof, conversion, and navigation—so design them with priority and progressive disclosure. Structuring the homepage this way improves scanability and supports conversion funnels, allowing visitors to find critical information quickly and act. The following subsections break down how to design each section in Elementor with recommended widgets and layout patterns.

    Key homepage sections and purposes:

    • Hero: immediate value proposition and primary CTA to guide first action.
    • Services/products: scannable cards or grid with links to detail pages or checkout.
    • About/social proof: trust signals, team, and short narrative that builds credibility.
    • Contact/CTA: visible forms or contact methods to capture leads and start conversations.
    • Footer: supplementary navigation, legal links, and small contact details.

    These components create a coherent visitor journey that leads from awareness to conversion, and the next subsections provide concrete design tactics for each area.

    How Do You Design an Engaging Hero Section with Elementor Widgets?

    A hero section should combine a concise headline, supportive subheadline, and a clear call-to-action with visual hierarchy that guides attention immediately. Use Elementor Heading, Text Editor, and Button widgets to structure messaging, and apply background images, gradients, or muted video with an overlay to maintain contrast and legibility. Emphasize the CTA by adjusting size, color, and proximity to the headline, and leverage entrance animations or subtle micro-interactions to draw the eye without sacrificing performance. Carefully balance visual weight—large headline, short supporting text, single prominent CTA—to minimize decision friction and improve click-through rates.

    Choosing the right background format matters: use compressed WebP images or short-loop videos with poster images, and always check contrast for accessibility. After crafting the hero layout, the next section explains how to present services or products in a responsive, repeatable format.

    How Can You Showcase Services or Products Using Elementor’s Section and Container Features?

    Elementor’s Inner Sections, Columns, and repeatable templates let you create a services grid that scales across devices while maintaining consistent card styles and click behavior. Use Icon Box or Image Box widgets for quick visual association, and save a service card as a template to reuse and update globally. Link cards to service pages or checkout flows, and include structured data in page content to assist search engines and improve click-through appearance in results. Consider a two- or three-column grid on desktop that collapses into stacked cards on mobile to preserve readability and CTA prominence.

    When presenting products, include succinct benefit-driven copy, a price or range if applicable, and a clear action. Designing repeatable service blocks reduces maintenance and increases conversion predictability as visitors scan and compare offerings.

    How Do You Build an About Us Section to Communicate Your Brand Story?

    An effective About section uses a narrative arc—hook, value proposition, proof—that tells visitors who you are, why you exist, and why they should trust you. Combine a concise mission statement, a short team bio or photo, and trust signals like testimonials or badges presented in a tidy layout using the Image, Text Editor, and Testimonial widgets. Keep copy tight and scannable: one-line mission, two supporting bullet points, and a brief social proof sentence. This structure builds emotional connection and validates claims before asking for commitment in subsequent CTAs.

    Use schema where appropriate to mark Organization or Person details in the content body, which helps search engines understand the entity behind the homepage and can improve rich result eligibility.

    How Do You Add Contact Forms and Calls to Action for User Engagement?

    Contact forms and CTAs should be minimal, clearly labeled, and placed where intent is highest—after explanatory sections or in a persistent header/footer area—so visitors can convert without friction. Elementor’s Form widget supports common fields and integrations, but you can also use third-party form plugins if you need advanced conditional logic or CRM connectors. When designing forms, limit fields to essentials to boost completion rates and add a short privacy notice to increase trust and GDPR compliance. Place multiple CTAs with consistent language and a primary vs secondary hierarchy to guide different user intents, such as “Get a Quote” versus “Learn More.”

    Integrating forms with email marketing or CRM systems streamlines follow-up and enables conversion tracking in analytics.

    Different homepage sections compared

    SectionPrimary PurposeRecommended Widgets
    HeroCapture attention and primary CTAHeading, Button, Background, Lottie/Video
    Services/ProductsShowcase offerings and drive explorationIcon Box, Image Box, Inner Section, Template
    About/TrustEstablish credibility and storyImage, Text Editor, Testimonial
    Contact/CTACapture leads and enable contactForm, Button, Contact Info
    FooterPersistent navigation and legal infoNavigation Menu, Text Editor

    This comparison helps prioritize which widgets to use for each section and standardizes how reusable templates can be implemented across the homepage.

    How Do You Apply Global Styles and Branding for Consistent Elementor Homepage Design?

    Global Styles in Elementor let you define site-wide colors, fonts, and default component settings so changes propagate uniformly and rebrands require fewer manual edits. Using global colors and fonts reduces CSS duplication, keeps typographic scale consistent, and speeds up the process of updating brand palettes. Implementing design tokens—global colors, font sizes, and button presets—ensures that the hero, service cards, and CTAs follow the same visual rules and respond coherently to responsive adjustments. Proper use of global styles simplifies long-term maintenance and supports accessibility by centralizing contrast and scale choices.

    After applying global settings, create and save reusable templates for commonly used blocks so that updates to a single template can reflect across pages. The following subsections explain global styles and concrete customization steps.

    What Are Elementor Global Styles and How Do They Maintain Brand Consistency?

    Elementor Global Styles provide a centralized place to set default typography, color palette, and element defaults that then inherit across all widgets and templates. This mechanism reduces visual drift where different pages use slightly different shades or headline sizes, making site-wide updates faster and less error-prone. Set a typography scale (H1–H6) and global font sizes that include responsive tweaks so headings and body text adapt across breakpoints. Global button styles and form defaults ensure CTAs look consistent and improve recognition and conversion.

    Using global styles also helps when rolling out a rebrand: changing a single color swatch or font weight updates the entire site’s visual language without editing individual pages.

    How Do You Customize Typography, Colors, and Layouts Across Your Homepage?

    Customize typography by defining a scale (for example, base, medium, large, x-large) and applying responsive size adjustments for tablet and mobile to preserve readability. Choose a limited color palette—primary, secondary, neutral, accent—and test contrast ratios against accessibility thresholds for body text and buttons. Set container widths and global spacing values so the layout grid is consistent and predictable across sections. Use the Style and Advanced tabs in Elementor to apply spacing, margin, and padding consistently, and save section templates to preserve layout decisions.

    A consistent typographic scale and constrained color palette reduce cognitive load and make maintaining the homepage straightforward as content changes.

    Elementor global styles checklist:

    • Define global colors and test contrast.
    • Set a responsive typographic scale for H1–H6 and body text.
    • Create button presets for primary and secondary CTAs.

    Applying these settings prepares the site for responsive adjustments in the next section.

    How Do You Ensure Your Elementor Homepage Is Fully Responsive Across Devices?

    Ensuring a homepage is responsive with Elementor means using responsive controls, testing across breakpoints, and optimizing content that shifts between desktop, tablet, and mobile without breaking layout or accessibility. Elementor provides device-specific controls for typography, spacing, and widget alignment that allow designers to set distinct values per breakpoint. Proper responsive design reduces bounce rates, increases conversions on mobile, and ensures interactive elements remain usable on small touch screens. The subsections below list best practices, concrete adjustment techniques, and testing methods to validate responsiveness.

    Start with a mobile-first mindset for critical CTAs and images, then progressively enhance layouts for larger screens to avoid hidden content and unexpected overflow. The next subsections provide dos/don’ts and testing steps.

    What Are the Best Practices for Responsive Design in Elementor?

    Responsive best practices include preferring fluid units, using container controls to manage layout flow, and avoiding hidden crucial content on smaller screens so users can access essential information. Use percentage-based widths or flexible container layouts rather than fixed pixel widths, and adjust line-height and font-size for smaller viewports to maintain readability. Hide non-critical decorative elements on mobile when they distract from CTAs, but avoid hiding primary content. Test interactive elements for touch targets and spacing to prevent accidental taps and to improve usability.

    Applying these rules leads to consistent experience across devices and sets the stage for device-specific adjustments described next.

    How Do You Adjust Sections, Widgets, and Images for Mobile and Tablet Views?

    Use Elementor’s responsive controls to change padding, margin, alignment, and font sizes per device; check images for appropriate cropping and switch to smaller image sources where needed. For headings, set different font sizes on tablet and mobile to preserve hierarchy without forcing horizontal scrolling. Reorder content or stack columns vertically on mobile to maintain narrative flow and set visibility toggles for alternate layouts where necessary. For images, specify srcset-aware sizes and use background-positioning to focus on subject areas that should remain visible on narrow screens.

    Make incremental adjustments and preview each change in device mode to confirm the layout remains balanced and CTAs stay prominent.

    How Can You Test and Preview Your Homepage Responsiveness in Elementor?

    Elementor’s device preview modes (desktop, tablet, mobile) let you iterate quickly, but complement these with browser devtools, real-device checks, and cross-browser testing to catch OS- or browser-specific behavior. Resize the browser window manually to test intermediate breakpoints and use tools to emulate network conditions and CPU throttling for performance-aware checks. Real-device testing is essential for touch interactions and sensor-based behavior; check forms, carousels, and Lottie animations on actual phones to confirm smoothness and usability. A final checklist should include visual inspection, accessibility checks, and performance metrics for each targeted device class.

    Testing validates responsive choices and informs any final adjustments to spacing, typography, or image handling before launch.

    Responsive testing checklist:

    • Use Elementor preview modes and browser devtools.
    • Perform real-device tests on major mobile devices.
    • Check touch targets, form behavior, and cross-browser consistency.

    These checks ensure that the responsive changes you make in the editor translate to real-world user experiences.

    What Advanced Techniques Can You Use to Enhance Your Elementor Homepage Design?

    Advanced Elementor techniques include using Theme Builder for dynamic content, applying scoped custom CSS for unique visuals, and integrating third-party plugins or custom fields to surface personalized or data-driven homepage elements. These approaches let you move beyond static pages to create conditional content, personalized sections, or CMS-driven lists that keep the homepage fresh and relevant. Advanced tactics require testing for performance and careful use of custom code to avoid conflicts with global styles. The following subsections explain how to leverage each advanced capability and when to choose custom code versus built-in widgets.

    Balancing advanced techniques with site speed is critical—use them where they add measurable user value, and fall back to simpler alternatives for decorative effects.

    How Do You Leverage Elementor Pro’s Theme Builder for Dynamic Homepage Content?

    Elementor Pro’s Theme Builder allows you to create templates for headers, footers, archive pages, and single templates that can be conditionally displayed using display rules, enabling dynamic homepages that adapt by category, user role, or other conditions. Use dynamic tags to pull post fields, custom field values, or ACF content into templates so the homepage can surface featured posts, testimonials, or product highlights automatically. Design a modular hero or content block as a template and reference it across contexts to keep the homepage updated without manual edits. This method streamlines updates and supports content-driven marketing strategies where editorial or product changes must reflect immediately.

    When combined with custom post types and ACF, the Theme Builder becomes a powerful engine for dynamic, low-maintenance homepages.

    How Can Custom CSS and Advanced Widgets Create Unique Homepage Styles?

    Custom CSS enables fine-grained control for interactions, complex layouts, and visual effects that the standard editor cannot produce; apply it sparingly and encapsulate styles within templates or site-specific selectors to avoid global collisions. Use custom CSS for advanced hover states, grid rearrangements, or subtle transforms that enhance perceived quality without adding heavy JavaScript. Advanced widgets delivered by add-ons can introduce carousels, advanced galleries, or data-driven charts—test each for accessibility and load impact. Always include responsive fallbacks and keep CSS selectors specific to the template to make future maintenance easier.

    When custom CSS is necessary, document changes and include comments so future editors understand scope and purpose.

    For readers seeking professional help to implement advanced Theme Builder patterns, custom CSS, or complex integrations, professional services provide targeted expertise and can speed deployment while ensuring maintainability for future updates.

    How Do You Integrate Third-Party Plugins to Extend Elementor Functionality?

    Plugins extend Elementor with specialized widgets for forms, sliders, galleries, and integrations with marketing platforms or custom fields—choose well-maintained plugins with good performance records to avoid bloat. Evaluate compatibility by testing in a staging environment and checking for console errors, duplicate libraries, or CSS conflicts. Use ACF or other custom-field systems to surface structured content in Elementor templates via dynamic tags, and connect form submissions to marketing tools through supported integrations. Prioritize plugins that allow selective asset loading to keep the homepage bundle lean and reduce unused CSS/JS payload.

    Integration requires balancing capability gains with performance and update maintenance; plan for periodic audits to remove unused add-ons and ensure seamless operation.

    What Are the Best Practices for Optimizing Performance and Accessibility on an Elementor Homepage?

    Optimizing an Elementor homepage focuses on reducing payload, serving appropriately sized media, minimizing unused CSS/JS, and ensuring semantic HTML and ARIA attributes for accessibility. Performance improvements reduce time-to-interactive and improve core web vitals, while accessibility measures broaden audience reach and reduce legal risk. Prioritize image optimization, lazy loading, and caching strategies, and use semantic elements and alt text for assistive technology. The subsections below describe concrete media optimizations, accessibility checklist items, and troubleshooting steps for common Elementor issues.

    Start performance work early—design patterns that are performant by default and only add heavier effects when they deliver clear user value.

    How Do You Optimize Images and Media for Faster Homepage Loading?

    Optimize images by exporting appropriately sized assets, converting to modern formats like WebP where supported, and implementing responsive srcset attributes so browsers select the best size. Enable lazy loading for below-the-fold imagery and use a CDN for global caching and faster delivery. For hero videos or animated backgrounds, use a lightweight poster image and short clips optimized for the web, or consider Lottie animations as vector alternatives when appropriate. Proper media optimization reduces bandwidth and improves the perceived speed of your homepage.

    A recommended workflow: resize and compress locally, export WebP/AVIF fallbacks, implement srcset, and confirm lazy loading behavior in production.

    OptimizationMechanismExpected Benefit
    Image OptimizationResize, compress, WebPFaster load times, lower bandwidth
    Lazy LoadingDefer offscreen mediaImproved initial render speed
    CDN DeliveryEdge cachingReduced latency for global users
    Selective Asset LoadingLoad only used scripts/stylesSmaller payload, better Core Web Vitals

    Applying these optimizations together yields the best performance gains for Elementor-built homepages.

    What Accessibility Features Should You Implement in Elementor Designs?

    Accessibility features include semantic heading structure, descriptive alt text on images, keyboard-focusable interactive elements, and sufficient color contrast for readable text. Use proper ARIA roles for non-semantic widgets if necessary, and ensure tab order follows logical content flow so keyboard users can navigate without confusion. Test forms for accessible labels and error messaging, and avoid conveying information by color alone. Accessibility compliance broadens your audience, improves usability for all visitors, and supports SEO by making content machine-readable and structured.

    Perform automated checks and manual testing with keyboard-only navigation and screen readers to catch issues that automated tools miss.

    How Do You Troubleshoot Common Elementor Homepage Issues?

    Common issues—editor loading failures, styling conflicts, missing fonts, or unexpected template behavior—are often resolved by isolating plugin conflicts, clearing caches, and regenerating Elementor CSS files. Start debugging by enabling safe mode or switching to a default theme to test for conflicts, then reactivate plugins one-by-one in a staging environment to identify culprits. Check browser console logs for JavaScript errors and inspect computed styles to locate CSS specificity problems. Backups and versioned staging workflows prevent accidental downtime while testing fixes.

    A methodical approach—cache clearing, CSS regeneration, plugin isolation, and console inspection—usually locates and resolves common problems quickly.

    How Do You Publish, Maintain, and Update Your Elementor Homepage for Long-Term Success?

    Publishing and maintaining a homepage requires a launch checklist, a cadence for incremental updates, and ongoing analytics monitoring to guide iteration. Prior to going live, verify SSL, caching, sitemap inclusion, and that the static homepage is properly assigned and indexed. After launch, follow a schedule of quarterly content updates and a 2–3 year major redesign cycle unless analytics indicate an earlier overhaul. Use engagement metrics, conversion rates, and mobile performance data to prioritize improvements, and implement lightweight A/B testing on key CTAs to refine copy and layout. Consistent maintenance prevents technical debt and keeps the homepage aligned with business goals.

    The following subsections cover launch steps, recommended update cadence, and monitoring strategies that support continuous improvement.

    What Are the Steps to Publish and Set Your Elementor Homepage Live?

    Before publishing, perform a final staging verification: confirm backups, test staging-to-production push, and ensure the static page is assigned as the front page in Settings → Reading. Validate SSL, caching rules, robots configuration, and sitemap inclusion so search engines can index the homepage correctly. After publishing, monitor initial indexing and run quick performance checks for Core Web Vitals, making sure caching and CDN are functioning as expected. A careful launch minimizes disruption and ensures a smooth transition from staging to production.

    Following this launch checklist reduces post-launch firefighting and sets clear expectations for monitoring.

    How Often Should You Update Your Homepage Design to Stay Current?

    Major redesigns are typically advisable every 2–3 years as brand needs and user expectations evolve, while quarterly minor updates—content swaps, promotional banners, and microcopy changes—keep the homepage fresh and responsive to campaigns. Use analytics signals, customer feedback, and conversion trends to guide update frequency rather than arbitrary timelines. When a sustained decline in engagement or conversions appears, prioritize a design refresh tied to hypothesis-driven A/B tests rather than a full rebuild.

    A cadence that mixes small frequent optimizations with periodic strategic redesigns balances consistency and relevance.

    How Can You Monitor and Improve Your Homepage Using Analytics and Feedback?

    Track engagement and conversion KPIs—bounce rate, time on page, CTA clicks, and mobile conversion rates—and complement quantitative metrics with qualitative feedback like session recordings and on-page surveys. Use heatmaps to identify attention zones and friction points, and run A/B tests on headlines, CTAs, and hero imagery to validate improvements. Prioritize changes using impact vs effort scoring: high-impact, low-effort wins should be implemented first. Iterate on data-driven changes monthly or quarterly to continuously optimize the homepage experience.

    Monitoring creates an evidence-based roadmap for updates and ensures design decisions are tied to measurable outcomes.

    TaskFrequencyOutcome
    Content tweaksQuarterlyKeeps messaging current
    A/B testsOngoingValidates conversion improvements
    Performance auditsMonthlyMaintains speed and Core Web Vitals
    Accessibility checksAfter major changesEnsures continued inclusivity

    For readers evaluating options for ongoing support, services are available to manage publishing, maintenance, and iterative optimization of Elementor homepages.

    Custom WordPress Theme Design with Elementor: A UX/UI Applied Research Approach

    The aim of this project is to offer a new, easier method to web designers and web design instructors for creating a custom-built WordPress theme using primarily Underscores, a starter theme made by Automattic, the creators of WordPress; and Elementor, a leading WordPressbased web creation platform. WordPress is a leading, free content management system (CMS) for building websites. Premised on user experience/user interface (UX/UI) applied research, this method can help web design professionals avoid using third-party WordPress themes. Moreover, web design instructors can incorporate this method into their course curricula to prepare their students for professions in custom CMS web design. Collectively, these strategies will best serve novice to advanced WordPress web designers (and educators) with little to no PHP (a popular general-purpose scripting language used for web development) coding experience.

    UX/UI Research-Applied Strategies for Building a Custom WordPress Theme Using Underscores and Elementor, 2022
    Redesigning Websites with WordPress and Elementor: Enhancing Layout, Responsiveness, and Brand Identity

    This paper presents the redesign, rebuild, and rebranding of the official website of Sekolah Tinggi Meteorologi Klimatologi dan Geofisika (STMKG) using the WordPress content management system. The project aimed to modernize the institution’s digital presence by enhancing layout consistency, mobile responsiveness, and brand identity. A content audit was conducted to reorganize fragmented navigation and outdated information. The entire development was executed directly within WordPress using Elementor, enabling rapid prototyping without external wireframing tools. Key improvements include structured program sections, a modern news layout, and a standardized footer, all designed in line with STMKG’s visual identity. Performance optimization—though not the primary focus—involved basic caching, compression, and lazy loading, with assessments via GTmetrix indicating areas for future improvement. The project, completed by a sixth-semester cadet, highlights the feasibility of student-led web t

    Redesign of User Interface and Experience with Brand Identity Enhancement for the STMKG Website through WordPress Implementation, TW Aji, 2025
  • image in the content

    image in the content

    1914 translation by H. Rackham

    google

    “But I must explain to you how all this mistaken idea of denouncing pleasure and praising pain was born and I will give you a complete account of the system, and expound the actual teachings of the great explorer of the truth, the master-builder of human happiness. No one rejects, dislikes, or avoids pleasure itself, because it is pleasure, but because those who do not know how to pursue pleasure rationally encounter consequences that are extremely painful. Nor again is there anyone who loves or pursues or desires to obtain pain of itself, because it is pain, but because occasionally circumstances occur in which toil and pain can procure him some great pleasure. To take a trivial example, which of us ever undertakes laborious physical exercise, except to obtain some advantage from it? But who has any right to find fault with a man who chooses to enjoy a pleasure that has no annoying consequences, or one who avoids a pain that produces no resultant pleasure?”

    google