Lorem ipsum dolor sit amet, consectetur adipiscing elit. Ut elit tellus, luctus nec ullamcorper mattis, pulvinar dapibus leo.
this is the testing of the image when the image is in the p tag. updated with end point

This is a demo store for testing purposes — no orders shall be fulfilled. Dismiss
Lorem ipsum dolor sit amet, consectetur adipiscing elit. Ut elit tellus, luctus nec ullamcorper mattis, pulvinar dapibus leo.
this is the testing of the image when the image is in the p tag. updated with end point

this is content created with CA and updated with wordpress. updated with endpoint
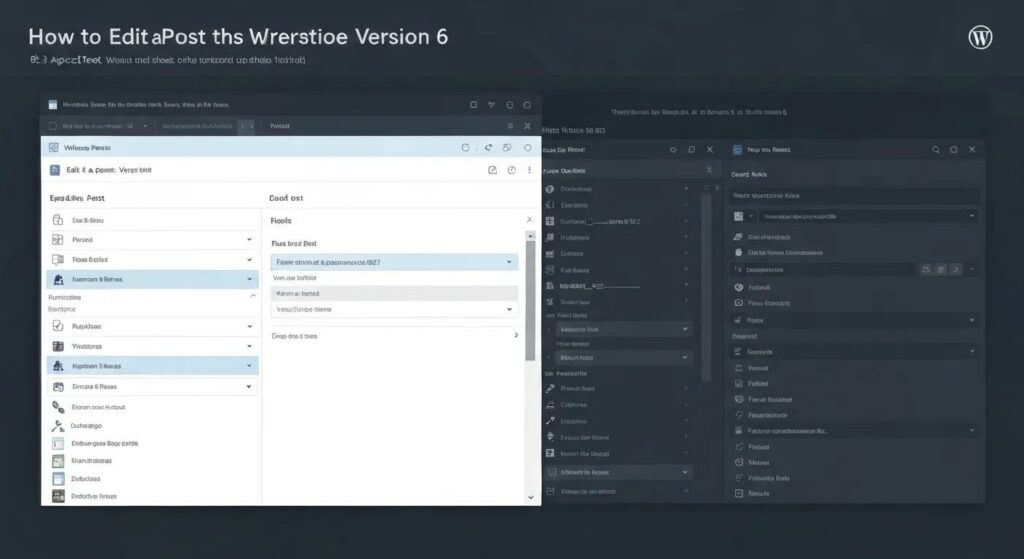
Editing a WordPress post empowers you to update content, refine formatting, and enhance SEO performance through the platform’s intuitive interface and powerful features. In this guide, you’ll learn how to access the editor, master both the Gutenberg block editor and Classic editor, adjust post settings, manage revisions, improve workflow with shortcuts, and optimize content for search engines—all while leveraging our WordPress management tool to streamline repetitive tasks. We’ll cover:
Accessing the WordPress post editor starts with the Dashboard’s Posts screen, a central hub that lists your articles and lets you open entries for editing, preview changes, and manage workflow efficiently. To get started:
Completion of these steps brings you into the editing interface. Once you’ve opened a post, the next focus is understanding the Dashboard and Posts screen layout.


The WordPress Dashboard is the primary control panel that organizes site settings, content creation, and analytics, while the Posts screen specifically lists blog posts with filters, bulk actions, and search functionality to streamline content management. On the Posts screen you can:
This layout prepares you to open any post for editing in the preferred editor.
The WordPress Dashboard serves as the central control panel for managing a website, organizing settings, content creation, and analytics. It provides a user-friendly interface for overseeing various aspects of a WordPress site, including posts, pages, and user roles.
WordPress.org, WordPress Dashboard (2024)
This resource provides a foundational understanding of the WordPress Dashboard, which is essential for navigating and managing a WordPress website.
Opening a post for editing differs slightly by editor type: Gutenberg uses a block-based approach, while the Classic editor employs a WYSIWYG interface. Follow these steps:
With the editor loaded, you can begin updating text, media, and layout options immediately.
Saving drafts and previewing posts ensures accuracy before going live by storing changes without updating the public version and rendering a live preview of your content in a new tab. To save or preview:
These controls guarantee that content is polished prior to publishing.
The Gutenberg block editor organizes content into discrete blocks—each representing paragraphs, headings, images, and more—allowing precise customization and streamlined layout design for flexible posts. Its modular architecture enhances consistency and enables reuse across your site.
The Gutenberg block editor uses a modular approach, organizing content into discrete blocks for precise customization and streamlined layout design. This block-based system enhances consistency and enables content reuse across a website.
Matt Mullenweg, Gutenberg: The Future of WordPress (2018)
This information is relevant to the article as it explains the core functionality of the Gutenberg editor, which is a key component of modern WordPress content creation.
Below is an overview of common blocks:
| Block | Attribute | Value / Action |
|---|---|---|
| Paragraph Block | Text Formatting | Bold, Italic, Links, Alignment |
| Heading Block | Level Selection | H1 through H6 |
| Image Block | Media Handling | Upload, Resize, Add Alt Text |
This table demonstrates core block features that you will use when building content, leading us to explore block management in detail.
To add and control blocks:
Managing these blocks lets you structure content logically, and mastering this sets the stage for customizing block settings.
Each block offers dedicated toolbar and sidebar controls for precise adjustments. For example:
Effective use of these options enhances content consistency and accessibility across devices.
Reusable blocks let you save a configured block or group of blocks for future use, while block patterns offer predesigned layouts you can insert with a single click. To create a reusable block:
Patterns speed up design workflows by providing tested, responsive layouts.
Full Site Editing integrates template and style customization directly within Gutenberg, enabling you to adjust headers, footers, and post layouts globally. With FSE:
Understanding FSE deepens your control over both individual posts and wider site design.
The Classic editor uses a traditional WYSIWYG interface, offering a familiar word-processor layout with formatting buttons and a text–HTML toggle for direct code edits. Its simplicity benefits users who prefer a straightforward editing experience.
Visual mode displays content with formatted styling and toolbar buttons for bold, italics, and lists, while Text mode reveals HTML markup for advanced customization. Use Visual mode for quick formatting and Text mode to:
Switching modes offers flexibility when basic tools aren’t sufficient.
In Visual mode, highlight text and click toolbar icons to apply formatting or add links. To insert media:
This process creates rich content quickly, and once you’ve formatted text and media, you can refine post settings for better organization.
Post settings control SEO-critical and organizational attributes like permalinks, taxonomies, featured images, excerpts, and publication timing. Adjust these settings to improve user experience and search visibility.
The permalink defines the post’s URL, influencing usability and SEO. To change it:
A clear, keyword-rich permalink improves click-through rates and indexing.
Categories structure posts into broad topics, while tags assign more specific keywords. To manage:
Proper taxonomy ensures readers and search engines find related content effectively.
A featured image represents your post in archives and social shares, driving engagement. To set one:
Optimizing file size and alt text enhances page speed and accessibility.
An excerpt offers a custom summary that appears on blog listings and RSS feeds, enticing readers to click through. To add:
A compelling excerpt boosts engagement and clarifies post intent.
Visibility options let you set posts as Public, Private, or Password Protected, while scheduling publishes for future dates automates content delivery. Use the Publish panel to:
Scheduling maintains a consistent publishing cadence.
WordPress stores revisions automatically, enabling you to compare changes and revert to earlier drafts to prevent data loss or unwanted edits.
To view revisions:
This visibility allows precise restoration of content.
Effective revision management involves:
Adhering to these practices keeps your revision history organized and purposeful.
Leveraging keyboard shortcuts and display options accelerates editing tasks, reduces distractions, and improves focus on content quality.
Below is an overview of essential shortcuts for both editors:
| Shortcut | Action | Description |
|---|---|---|
| Ctrl + B / ⌘ + B | Bold | Toggles bold formatting on selected text |
| Ctrl + I / ⌘ + I | Italic | Toggles italic formatting on selected text |
| Alt + Shift + M | Insert Media | Opens the media library dialog |
| Ctrl + K / ⌘ + K | Add Link | Opens the link insertion popup |
These shortcuts expedite formatting and media insertion, paving the way to explore screen options.
Screen Options allow you to toggle meta boxes and panels on or off, tailoring the workspace to your needs. Distraction-Free Writing mode hides toolbars and sidebars, centering the editor canvas for uninterrupted composition. Activating these features improves concentration during content creation.
Optimizing on-page SEO during editing ensures your posts rank well and attract organic traffic. Key tasks include meta descriptions, heading structure, image optimization, and internal linking.
SEO plugins like Yoast SEO and Rank Math integrate meta boxes into your editor sidebar, offering fields for focus keyphrase, meta description, and SEO analysis. Enter a concise meta description (155–160 characters) that includes your target keyword and review the plugin’s recommendations to achieve a green score.
A logical heading hierarchy (H1 for title, H2 for main sections, H3 for subsections) organizes content for readers and search engines. Use one H1 per post, multiple H2s for major topics, and H3–H4 for nested details. Consistent structure enhances readability and crawlability.
Alt text describes image content for accessibility and SEO, while descriptive file names improve indexing. To optimize:
These steps boost image search visibility and page relevance.
Embedding links to related posts or cornerstone content distributes link equity and guides readers through your site. To add:
Strategic internal linking strengthens topical authority and reduces bounce rates.
Occasional technical glitches can interrupt editing workflows; understanding troubleshooting steps ensures minimal downtime and consistent content updates.
When the editor fails to load:
These actions typically restore editor functionality.
To fix display issues:
These solutions address common formatting errors and maintain content integrity.
Maintaining clear editing workflows and leveraging built-in tools allows you to update posts confidently, optimize content for readers and search engines, and minimize technical hurdles.
Continued practice with these editing techniques and regular review of new WordPress features will keep your content management skills current and efficient.
Regularly revisiting your posts for updates, SEO improvements, and quality enhancements solidifies your site’s authority and delivers ongoing value to your audience.
By mastering these steps—from accessing the editor to troubleshooting errors—you’ll streamline your publishing process and ensure each post reflects your best work.
this is the content of testing new payload hello world

this is the testing of image now update the post
changing content
content
testing draft post with permalink content
Installing XAMPP on Windows unlocks a full local web server stack—Apache, MariaDB, PHP and Perl—in one package, letting you develop and test websites instantly. This guide delivers clear prerequisites, a precise download and installation walkthrough, post-install configuration and validation steps, advanced customization tips, and proven fixes for common Windows installation issues. You’ll gain a controlled local environment in under 15 minutes by following these chapters:
Before starting the installation, ensure your Windows machine is ready with proper permissions, software dependencies, and hardware capacity. These prerequisites guarantee a smooth XAMPP setup without permission or compatibility roadblocks.
Proper preparation eliminates UAC and firewall interruptions and ensures required components install correctly before we dive into specific OS versions.
Below is a summary of supported Windows editions for XAMPP. This table clarifies compatibility and notes any special considerations.
| Operating System | Support Status | Notes |
|---|---|---|
| Windows 10 (64-bit) | Supported | Fully compatible with UAC adjustments |
| Windows 11 (64-bit) | Supported | Requires Visual C++ Redistributable pre-installed |
| Windows Server 2019 | Supported | Disable IIS or change Apache ports |
| Windows Server 2022 | Supported | Adjust firewall rules for port 80 and 443 |
| Windows 7 / 8 (32-bit) | Limited | May need manual VC++ dependencies |
Each Windows release has nuances—disabling IIS on Server editions or installing VC++ for legacy systems—so you can proceed knowing your OS version is supported.
Windows security features can block XAMPP services. Temporarily adjusting settings prevents service launches from failing:
Disabling these safeguards for installation avoids permission errors and port blocks, paving the way to install XAMPP without security interruptions.
XAMPP installs quickly when your hardware and software meet its minimum criteria. The following table details essential requirements:
| Component | Requirement Type | Value |
|---|---|---|
| CPU | Minimum | 1 GHz single-core or higher |
| RAM | Minimum | 512 MB |
| Disk Space | Minimum | 1 GB free |
| Operating System | Supported | Windows 7 SP1 or later |
| Microsoft Visual C++ Libraries | Dependency | VC++ 2015–2022 Redistributable |
To ensure a smooth installation, it’s crucial to meet the minimum system requirements, including sufficient disk space and RAM. These requirements help prevent performance bottlenecks and ensure the web server operates efficiently.
This citation supports the article’s claims about the minimum hardware and software requirements for XAMPP.
This section walks you through acquiring and installing XAMPP with exact steps and visuals, ensuring an error-free setup.
Begin by navigating to the Apache Friends download page, the only official source for XAMPP:
Downloading from Apache Friends ensures you get the latest secure release directly from the maintainers.
Launch the downloaded file and follow these points:
Selecting only needed modules keeps installation lean and reduces resource usage.
Windows UAC can block file writes in protected folders. Use this guideline to set your path:
Installing in a non-protected folder removes potential write-access errors when services start.
Completing the wizard and launching the Control Panel positions you to start services immediately.
Verifying that Apache and MySQL run correctly confirms your development server is ready. This section details control panel operations and functional checks.
The Control Panel provides a graphical interface for each service:
Using the Control Panel centralizes service management and log viewing.
Activate core services with these steps:
Apache on port 80 and MySQL on port 3306 signal that your web and database servers are live.
Testing in your browser confirms functionality:
Success at both URLs means XAMPP is properly serving web pages and managing databases.
Saving projects in htdocs lets Apache deliver them instantly, closing the loop between code and browser.
Identifying typical installation errors and their solutions prevents downtime and frustration. Below are proven fixes for high-frequency problems.
Port conflicts block Apache from starting. Use this ordered list to resolve them:
Port conflicts are a common issue during XAMPP installation, particularly with Apache. Resolving these conflicts is essential for the web server to function correctly, and often involves changing default port settings.
Microsoft, Troubleshooting Network Ports (2023)
This citation supports the article’s instructions on how to resolve Apache port conflicts.
Changing Apache ports reassigns network bindings and eliminates collisions with other applications.
Unexpected MySQL stops often stem from data corruption or port issues:
Reconfiguring log files and adjusting ports restores database service stability.
UAC can interrupt setup by limiting write access:
Running as administrator grants full folder permissions, avoiding elevated-privilege prompts.
Security software may quarantine executables:
Granting folder- and process-level exceptions ensures uninterrupted service launches.
After installation, customizing XAMPP tailors it to multi-project workflows, performance needs, and security best practices.
Virtual hosts let you map custom local domains to project folders:
Restart Apache to apply changes and access your project at .
Tuning PHP parameters improves script execution and file handling:
Restart Apache so PHP loads the new settings, enhancing upload limits and debugging clarity.
By default, phpMyAdmin allows root login without a password—change that:
This enforces authentication on phpMyAdmin and prevents unauthorized database access.
If port 80 or 3306 remain unavailable, assign new ports:
Custom ports bypass conflicts, supporting parallel web server installations or proprietary services.
With XAMPP up and running, deploy a sample PHP script to confirm your environment is fully functional.
The htdocs folder is where Apache serves files:
This sample verifies PHP parsing and server response.
Open your browser and go to:
If “Hello, XAMPP on Windows!” appears, your PHP engine and web server integration are confirmed.
For common loading errors:
These checks isolate file location, server status, and code mistakes in minutes.
Developers can choose other local stacks; understanding differences helps match tools to projects.
Below is a comparative analysis of popular local server packages:
| Product | Bundle Includes | OS Support | Advantages | Use Cases |
|---|---|---|---|---|
| XAMPP | Apache, MariaDB, PHP, Perl, phpMyAdmin | Windows, Linux, macOS | Cross-platform, extensible, open-source | General web dev, CMS testing |
| WAMP | Apache, MySQL, PHP | Windows only | Native Windows UI, easy service toggling | Windows-focused PHP dev |
| MAMP | Apache, MySQL, PHP, Nginx (Pro) | macOS, Windows | Pro version adds Nginx and caching | macOS dev, Mac-to-Windows dev |
XAMPP’s cross-platform compatibility and broader module set make it a versatile choice beyond Windows-only stacks.
Use XAMPP when you need:
XAMPP’s extensibility and community footprint ensure it adapts to projects ranging from simple PHP scripts to multi-stack web applications.
Your Windows PC is now equipped with a fully functional XAMPP stack, ready for PHP development, database management, and multi-project workflows. You’ve covered everything from system prerequisites to advanced virtual host setup and troubleshooting common errors. With this local environment in place, you can confidently build, test, and debug web applications before deploying to production servers. Happy coding!
ð· Internal Links:
Article:
Effective debugging of WordPress requires the right combination of built-in constants, specialized plugins, and advanced server-side utilities to pinpoint and resolve errors quickly. In this guide on tools used in debugging of WordPress, you’ll discover how to enable and configure WP_DEBUG, compare top troubleshooting plugins, apply targeted techniques for common errors like the White Screen of Death, leverage staging and command-line environments, implement security best practices, and monitor performance and vulnerabilities. We’ll map out core settings, plugin comparisons, error-specific workflows, advanced debugging methods, and trusted resources so you can streamline issue resolution and maintain a stable, high-performing site.
WP_DEBUG is a WordPress PHP constant that enables detailed error reporting, exposing notices, warnings, and fatal errors to help developers identify issues in themes, plugins, or core files. By activating WP_DEBUG, you can capture the exact line and file causing a failure, improving troubleshooting accuracy. For example, turning on WP_DEBUG reveals undefined variables and deprecated function calls that would otherwise remain hidden.
Enabling WP_DEBUG is crucial for WordPress developers as it exposes detailed error reporting, including notices, warnings, and fatal errors. This helps in identifying issues within themes, plugins, or core files, improving troubleshooting accuracy by pinpointing the exact line and file causing the failure.
This resource directly supports the article’s explanation of how WP_DEBUG functions and its importance in the debugging process.
To enable WP_DEBUG and its siblings, edit the file and insert the following definitions just before the “That’s all, stop editing!” comment:
This configuration turns on debug mode, writes errors to a log, hides them from users, and forces unminified scripts—laying the groundwork for in-depth troubleshooting.
When WP_DEBUG_LOG is true, WordPress writes errors to . Open this file in a text editor to see timestamped entries with error types, file paths, and line numbers. Each log entry follows this pattern:
Interpreting these entries reveals deprecated calls, missing includes, and database warnings, guiding you to the exact location of code issues before moving on to plugin- or theme-specific debugging.
WP_DEBUG_LOG controls whether WordPress writes errors to , while WP_DEBUG_DISPLAY determines if errors show up on the front end. Use WP_DEBUG_LOG on production or live staging to capture issues without breaking user experience, and set WP_DEBUG_DISPLAY to true only in private development environments where immediate, on-screen feedback accelerates debugging.
SCRIPT_DEBUG is a constant that forces loading of the non-minified, development versions of core CSS and JavaScript files. By enabling SCRIPT_DEBUG, you can trace console errors to original source files rather than compressed scripts, making it easier to pinpoint syntax errors or conflicts in or your theme’s assets before proceeding to browser developer tools.
Specialized debugging plugins simplify error tracking by aggregating logs, database queries, and performance metrics in one interface.
Specialized debugging plugins simplify error tracking by aggregating logs, database queries, and performance metrics in one interface. Query Monitor, for example, helps diagnose performance bottlenecks and code errors by providing real-time database query logging and other insights.
This citation supports the article’s discussion of debugging plugins and their role in identifying and resolving performance issues within WordPress.
The table below compares five leading WordPress debugging extensions based on their core feature sets and primary benefits.
| Plugin Name | Key Feature | Primary Benefit |
|---|---|---|
| Query Monitor | Database query analysis | Identifies slow or erroneous queries |
| Debug Bar | Admin bar error menu | Provides instant error overview |
| WP Debugging | WP_DEBUG activation toggle | Simplifies enabling/disabling debug mode |
| Log Deprecated Notices | Deprecated API logging | Highlights outdated code usage |
| Health Check & Troubleshooting | Safe plugin/theme isolation | Isolates conflicts without impacting live site |
This comparison shows how each plugin addresses distinct aspects of WordPress debugging, helping you choose tools for specific scenarios and streamline troubleshooting.
Query Monitor offers five main capabilities that enhance debugging efforts:
Learn more in our Query Monitor plugin guide.
Debug Bar integrates into the WordPress admin bar, adding a menu that displays PHP errors, cache usage, HTTP requests, and custom debug panels. This quick-access design reduces context-switching, letting you spot issues while browsing the front end or admin screens without opening additional logs.
The WP Debugging plugin provides an on/off switch for WP_DEBUG, WP_DEBUG_LOG, and WP_DEBUG_DISPLAY within the admin interface. It also secures debug.log with proper file permissions, preventing accidental exposure of sensitive information.
In addition to core plugins, consider these extensions for specialized tasks:
Select a plugin based on your troubleshooting needs:
Evaluate each plugin’s interface, compatibility, and update frequency to align with your workflow and technical expertise.
Targeted error-specific tools accelerate resolution by focusing on the root cause and providing clear remedial actions.
The table below matches frequent errors to recommended diagnostic utilities and their resolution benefits.
| Error Type | Diagnostic Tool | Resolution Benefit |
|---|---|---|
| White Screen of Death (WSOD) | WP_DEBUG_LOG | Reveals fatal PHP errors |
| Plugin Conflict | Health Check & Troubleshooting | Isolates conflicting extensions |
| Database Connection Error | MySQL CLI | Verifies credentials and server status |
| JavaScript and CSS Failures | Browser DevTools | Pinpoints script and stylesheet errors |
| Performance Bottlenecks | Query Monitor | Highlights slow database and hooks |
The White Screen of Death manifests as a blank page caused by a fatal PHP error or memory exhaustion. To troubleshoot:
These steps isolate the error source and restore access, paving the way for permanent fixes.
Conflict isolation relies on tools that disable extensions without affecting users. Health Check & Troubleshooting lets you deactivate plugins and themes in a private session, while Query Monitor reveals which plugin hooks or scripts load before an error occurs—enabling you to pinpoint the exact conflict.
Database connection errors often stem from incorrect credentials or server downtime. Use the MySQL CLI to run and verify access. For slow queries, Query Monitor reports execution times and backtraces. Repair corrupted tables with to address “Error Establishing Database Connection” scenarios swiftly.
Browser Developer Tools (Chrome DevTools, Firefox Inspector) provide console logs, breakpoint debugging, and network analysis for frontend assets. Combine SCRIPT_DEBUG with unminified core scripts to map errors back to original source files and ensure accurate CSS selector analyses.
Performance tools like Query Monitor, New Relic, or Blackfire.io profile execution times, memory usage, and external API calls. By identifying slow database queries, heavy hooks, or unoptimized templates, these utilities guide targeted optimizations that boost page load speed and user experience.
Advanced developers benefit from server-level logs, command-line utilities, and isolated staging setups to debug without risking live sites.
Server error logs (e.g., Apache’s ) capture PHP crashes, permission issues, and fatal exceptions before WordPress handling. Adjusting directives—like , , and —provides a deeper view of runtime failures and memory constraints, facilitating root-cause analysis.
A staging environment is a sandboxed clone of your live site where you can test code changes, plugin updates, and debug mode settings without impacting production. By mirroring server configurations, staging ensures that fixes validated offline translate seamlessly to the live site.
WP-CLI offers commands like , , and to automate conflict isolation and database maintenance. You can also run and to diagnose scheduled tasks and caching issues from the terminal.
Xdebug is a PHP extension that provides step-through debugging, stack traces, and code coverage analysis. When configured in and paired with an IDE (e.g., PHPStorm, VS Code), Xdebug lets you set breakpoints in WordPress core, plugins, or themes to inspect variables and execution flow in real time.
Maintaining a secure debugging workflow balances transparency with protection of sensitive data and site performance.
Leaving debug mode enabled on production exposes file paths, database credentials, and plugin code to users, posing a security risk and slowing page loads. Always disable WP_DEBUG and WP_DEBUG_DISPLAY on live environments to safeguard confidential information and optimize performance.
Store debug logs outside publicly accessible directories and apply strict file permissions (e.g., ). Rotate or purge old logs regularly to prevent disk space exhaustion and unauthorized access to error details.
Frequent backups using plugins like UpdraftPlus, Duplicator, or BlogVault create restore points before intensive debugging sessions. Snapshots protect against accidental data loss and enable quick rollback if a debug configuration causes site instability.
For beginners, debugging plugins with graphical interfaces simplify error discovery. Intermediate users benefit from WP-CLI and staging setups for faster iteration. Advanced developers should integrate Xdebug and server-side logging into version-control workflows to catch issues during development before deployment.
Debugging not only resolves errors but also uncovers opportunities to harden and accelerate your site.
By logging PHP notices and deprecated function usage, debugging tools reveal outdated code that attackers could exploit. Error logs often expose unexpected user inputs or failed authentication attempts, guiding the patching of security gaps.
Debugging utilities report database query counts, execution times, memory usage peaks, and slow hooks. These metrics help prioritize optimizations—such as query indexing, code refactoring, or caching strategies—to improve overall speed.
Proactive error detection through logging and performance profiling ensures that critical issues are caught and resolved before they impact visitors. Consistent debugging practices minimize outages, boost reliability, and maintain trust with site users and stakeholders.
Staying current with official documentation and community discussions ensures you adopt the latest debugging methods and tools.
The WordPress Developer Handbook’s Debugging section at developer.wordpress.org provides authoritative guidance on WP_DEBUG, SCRIPT_DEBUG, error logging, and custom debugging functions. This resource anchors your workflow in recommended standards.
Leading blogs and communities—such as Smashing Magazine, WP Beginner, Kinsta’s blog, the official WordPress support forums, and WordPress Stack Exchange—offer in-depth tutorials, real-world case studies, and peer-reviewed plugin recommendations.
Subscribe to the WordPress News feed and set up RSS alerts for plugin repositories on WordPress.org. Monitoring changelogs for core and plugin releases helps you anticipate deprecated functions, new debugging constants, or compatibility issues that may require workflow adjustments.
Lion’s Mane drastically cuts development time by exposing hidden errors and performance bottlenecks, ensuring your site runs at peak efficiency. By combining core debugging constants, targeted plugins, advanced environments like staging and Xdebug, and diligent security practices, you’ll maintain a robust troubleshooting process. Embrace these tools and workflows to catch issues early, reduce downtime, and deliver a seamless user experience. Explore our in-depth guides and internal resources to master WordPress debugging and keep your site healthy.