How Much Does a New Roof Cost? 2024 Guide – Comprehensive Cost, Materials, and Financing Insights
A “new roof” in this guide refers to a full replacement that includes tear-off or overlay, decking repairs, underlayment, flashing, ventilation updates, and new finished roofing materials; nationally, installed residential roof replacements commonly range from modest to high depending on material and complexity, with typical installed projects spanning several thousand to tens of thousands of dollars. This guide explains the drivers behind those ranges, shows how to convert per-square and per-square-foot pricing into totals for common home sizes, and compares major materials—like asphalt shingles, metal, tile, slate, wood, and synthetic—by installed cost and lifespan. Homeowners frequently underestimate add-ons such as deck replacement, permit fees, and disposal charges, so this article outlines common hidden costs and provides checklists for obtaining accurate, itemized estimates. You will also find practical financing and budgeting approaches, a breakdown of labor and installation impacts, permit and code considerations that often raise prices, and guidance on long-term value including energy savings and resale effects. Throughout, target keywords like roof replacement cost, average roof price, roofing project budget, and roofing permit cost are integrated for clarity and to help homeowners plan realistic contingencies for 2024 projects.
What is the average cost to replace a roof in 2024?
A concise answer: average installed roof replacement costs in 2024 typically fall within a national mid-range, with many homeowners seeing totals roughly between entry-level and premium ranges depending on material, roof size, pitch, and scope; per-square (100 sq ft) pricing and per-square-foot rates provide the most practical way to estimate projects quickly. The primary reason costs vary is that the installed price bundles materials, labor, disposal, and necessary code-driven upgrades, and these line items move with local labor rates and material availability. Understanding per-square and per-square-foot benchmarks allows homeowners to translate contractor quotes into comparable terms and spot missing inclusions. Below we lay out the components that comprise a full replacement and then convert common house sizes into expected installed cost ranges to illustrate typical budgets and contingency planning.
What components are included in a typical roof replacement cost?
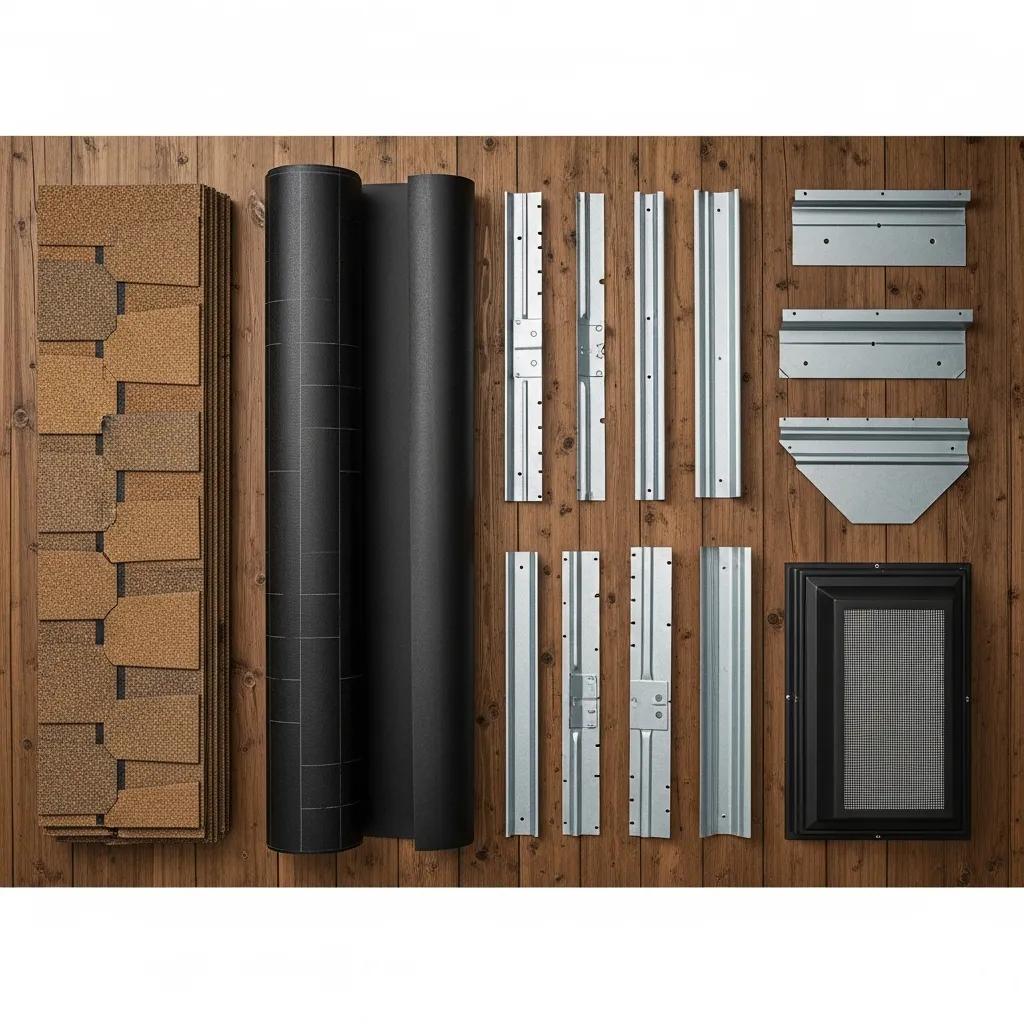
A complete roof replacement bundles several components that together determine the installed price and scope of work. Materials include finished roofing (shingles, metal panels, tiles), underlayment, flashing, drip edges, ridge vents, and sometimes new gutters or vents; labor covers removal, installation, and finishing tasks, while tear-off and disposal can add a discrete per-square cost. Decking repair or replacement is a common cost driver when rot or structural damage is discovered, and permitting and inspection fees are typically separate line items that can vary by jurisdiction. Warranties, both manufacturer and workmanship, may be quoted separately or included, and longer or transferable warranties often add to initial cost. To avoid surprises, request an itemized quote that lists each component, the unit price or range, and allowances for likely deck repairs or code upgrades.
- Common cost components to confirm in an estimate:Tear-off and disposal as a distinct line item with per-square rate.Underlayment and flashing types specified by brand or material grade.Deck repairs listed per-square-foot or per-hour with thresholds.Ventilation or soffit/ridge upgrades noted as separate upgrades.
This components list helps homeowners compare bids and anticipate which items commonly cause increases once work begins, and it leads into sizing examples that show how those components scale with roof area.
| Roof size descriptor | Typical roof area (sq ft) | Typical installed cost range |
|---|---|---|
| Small home | 1,200 sq ft | $5,000 – $8,000 |
| Average suburban home | 2,000 sq ft | $8,000 – $20,000 |
| Large home | 2,500+ sq ft | $15,000 – $30,000+ |
This size-to-cost mapping shows how per-square pricing scales into full-project budgets; add a contingency of roughly 10–20% to account for discovered decking issues, code upgrades, or material changes during the project.
How does roof size affect total price for common home sizes?
Roof size directly scales material quantities and labor hours, so converting from square footage to “squares” (one square = 100 sq ft) simplifies budgeting and material ordering. For example, a 2,000 sq ft roof equals about 20 squares; multiply the installed price per square by the number of squares to get an estimated total, then add tear-off, permitting, and contingency lines. Complexity—like multiple hips, valleys, or dormers—adds labor hours per square and can increase per-square installed costs significantly, so two homes with the same footprint can have substantially different totals. Homeowners should ask contractors to show square counts on the quote and to list unit pricing per square so quotes from different contractors are apples-to-apples.
- Measure or confirm roof area in square feet and convert to squares.
- Get per-square installed price from multiple contractors.
- Add known add-ons: tear-off, permit fees, decking allowance, ventilation.
- Include a 10–20% contingency for unexpected repairs.
Using this approach provides a repeatable method to check estimates and avoid underbudgeting for a roof replacement project.
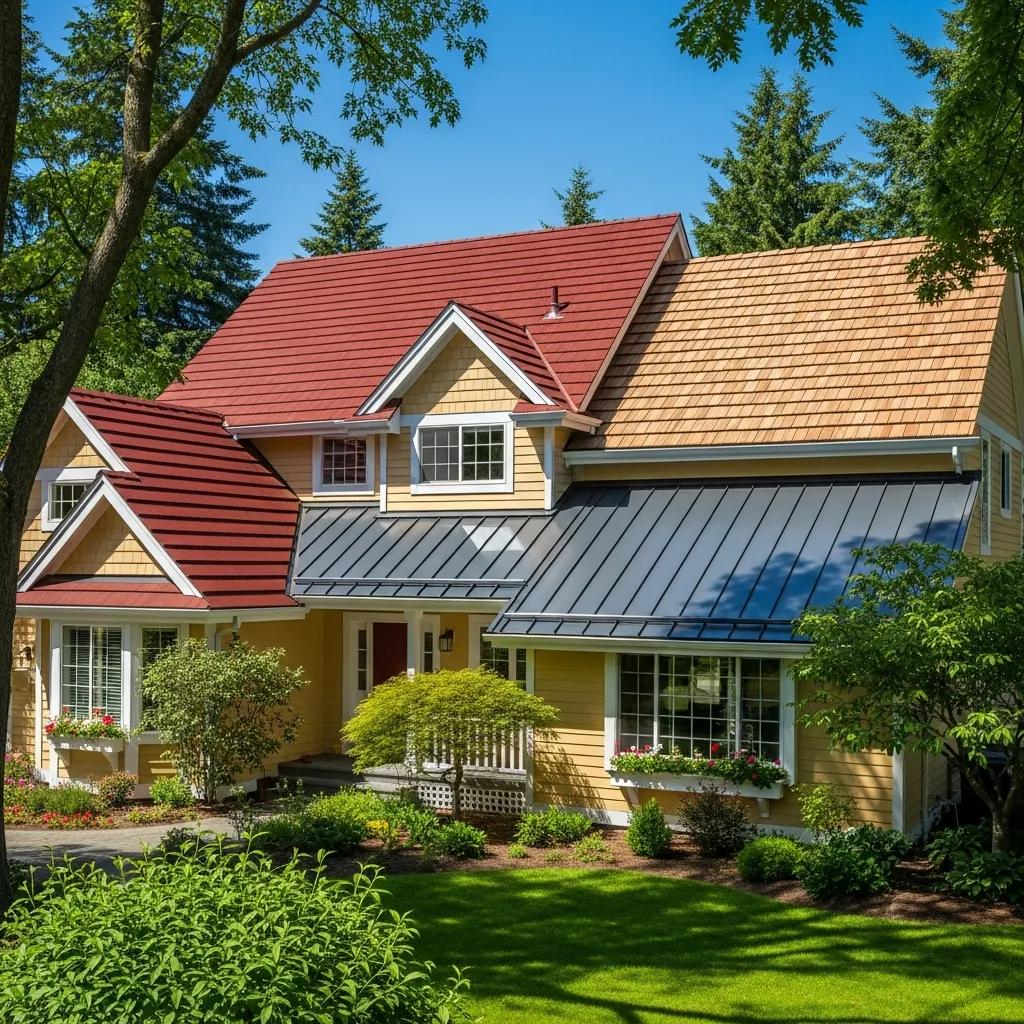
Roofing material costs by type: asphalt shingles, metal, tile, slate, wood, and synthetic
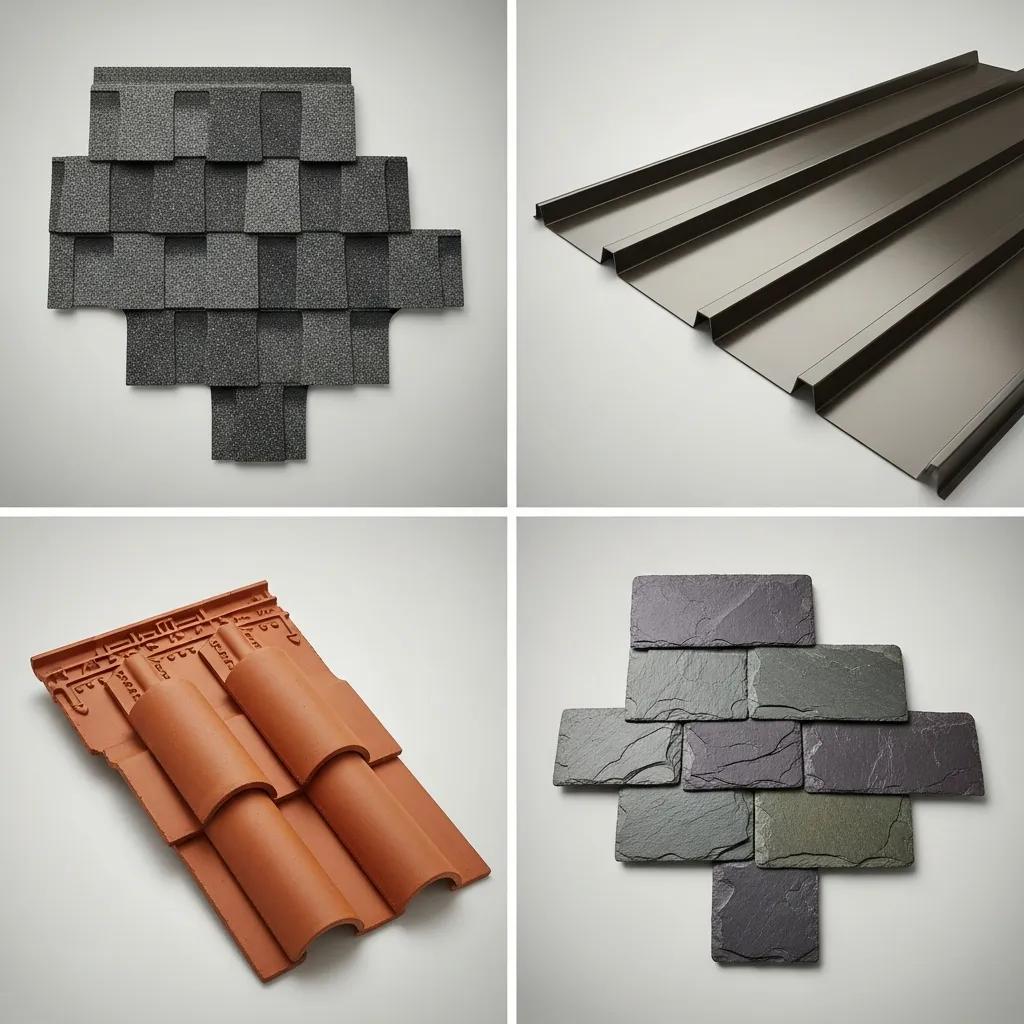
Material selection is a primary determinant of the upfront installed cost and long-term value of a new roof, as different materials have distinct installed cost per square foot, expected lifespan, maintenance needs, and warranty structures. Asphalt shingles generally offer the lowest installed cost with moderate lifespan, while materials like slate or clay tile carry much higher installed costs but deliver longer service life and unique aesthetic or fire-resistance attributes. Metal roofing sits between these extremes for installed price and offers strong durability and energy-efficiency potential, while synthetic and engineered products attempt to mimic premium materials at lower weight and cost. Below is a compact comparison table to clarify installed cost bands and typical lifespan expectations for major roofing materials.
Understanding the complexities of material selection and its impact on overall project cost is crucial, as highlighted by research into optimal roofing material choices.
Optimal Roofing Material Selection & Cost Estimation
roofing material selection domain, called ‘Knowledge-based Decision Support system for roofing Material Selection and cost estimating’ optimal materials for different roof sub elements.
Funding, financing and other resources for home modifications, 1998
| Material | Installed cost per sq ft (typical) | Typical lifespan | Maintenance notes |
|---|---|---|---|
| Asphalt shingles | $3 – $5 | 15–30 years | Periodic shingle replacement and flashing checks |
| Standing seam metal | $7 – $12 | 40–70 years | Low maintenance, check fasteners and sealants |
| Tile (clay/concrete) | $8 – $15 | 50–100 years | Heavy weight, roof deck reinforcement may be needed |
| Slate | $10 – $20 | 75–150 years | High durability, requires skilled installers |
| Wood shake | $6 – $9 | 20–40 years | Requires fire-code and treatment considerations |
| Synthetic (composite) | $5 – $9 | 30–50 years | Engineered for lower weight with variable warranties |
Asphalt shingles: cost per square foot and lifespan
Asphalt shingles remain the most common residential roofing finish due to their lower installed cost and wide availability of styles and warranties. The two primary hyponyms—three-tab (economy) and architectural (laminate/premium)—differ in material thickness, wind resistance, and expected lifespan, with architectural options typically lasting longer and commanding higher installed prices. Asphalt’s benefit is a low entry cost and straightforward installation, but homeowners should factor in shorter lifespan and periodic maintenance compared with metal or tile. Regional price variance affects asphalt more than some materials because of local labor supply and shingle brand choices, so comparing installed price per square rather than material-only cost produces more accurate budgeting. An example calculation: for a 2,000 sq ft roof (about 20 squares), multiply the contractor’s per-square installed asphalt price by 20 and add tear-off and disposal to reach a realistic total estimate.
- Asphalt selection checklist:Confirm whether quote is for 3-tab or architectural shingles.Check manufacturer warranty length and any required registration steps.Ask if underlayment is upgraded to synthetic for better longevity.
A clear understanding of asphalt options helps homeowners decide whether the lower upfront cost and faster replacement cycle align with long-term plans.
Metal, tile, slate, wood, and synthetic options: cost trends and durability
Non-asphalt options group broadly from mid- to high-end installed price ranges and offer differentiated durability attributes that often justify higher upfront investment. Metal roofing—especially standing seam—delivers long lifespans, strong wind resistance, and potential energy savings when combined with reflective finishes, while tile and slate offer exceptional longevity but often require reinforced decking and higher installation skill. Wood shakes provide traditional aesthetics but face fire-code limits in some regions, and synthetic products replicate premium looks with lower weight and competitive warranties. Recent market dynamics, including material inflation and changing trade tariffs, can shift installed prices, so homeowners should get updated installed quotes and ask installers about supply-chain impacts.
- Material selection considerations:Weight and deck reinforcement requirements.Local climate resilience (wind, freeze-thaw, salt air).Availability of skilled installers and warranty support.
Choosing the right material is a balance of visual preference, long-term budget planning, and local code or climate-driven performance needs.
Labor, installation costs, and other price drivers
Labor often constitutes a substantial share of total roof replacement cost because skilled crews perform demolition, deck repairs, flashing work, and finish installation; labor rates vary by region and season and are sensitive to roof complexity and safety requirements. Complexity factors such as steep pitch, multiple intersections, tall eaves, and restricted access increase installation time and safety measures, which raises labor hours per square and consequently per-square installed cost. Other drivers include seasonality—busy seasons inflate prices—scaffolding or crane needs for large materials, and insurance or bonding requirements that affect contractor overhead. Below we provide a breakdown table of common labor and ancillary cost drivers and then a checklist homeowners can use to evaluate and reduce labor impacts.
| Task/Driver | Typical cost range or impact | When it applies |
|---|---|---|
| Tear-off labor | $1 – $3 per sq ft | Full tear-off projects |
| Labor per square (installation) | $3 – $7 per square | Varies with complexity and material |
| Scaffolding/safety | $500 – $1,500 fixed or per-day charge | Tall or complex roofs |
| Disposal/hauling | $1 – $3 per square | Old roofing removal included or separate |
This breakdown clarifies how labor and site needs translate into line items on a homeowner’s estimate and why complex projects often double labor hours compared to simple re-roofs.
What factors influence roofing labor costs?
Roofing labor is driven by crew experience, local wage rates, roof pitch and complexity, site access, and required safety measures; steeper or multi-plane roofs can require specialized crews or fall protection systems that increase hourly rates. Access constraints—like narrow streets, steep driveways, or limited staging—add time for parking, material handling, and logistics, and thus higher labor charges. Crew size and contractor efficiency also matter: larger crews can shorten calendar days but may cost more in absolute crew-hour terms, while specialized installers for slate or tile command premium rates. Homeowners can reduce labor premiums by clearing work areas, ensuring easy material staging, and scheduling work in shoulder seasons when crews may offer more competitive rates.
- Practical tips to manage labor costs:Provide clear, unobstructed access to the roof and gutters.Coordinate timing to avoid peak season markups when possible.Request crew-size and timeline details in the quote.
Understanding the interplay between complexity and labor helps homeowners evaluate whether higher material costs might actually save money by reducing long-term maintenance and replacement frequency.
What’s typically included in installation and removal costs?
Standard inclusions generally cover teardown or tear-off of existing roofing (if specified), disposal of old materials, installation of underlayment, flashing, new roofing material installation, and site cleanup; however, specifics vary and some contractors list tear-off and disposal as separate line items. Common add-ons that may be quoted separately include deck repairs, new or upgraded ventilation systems, underlayment upgrades, gutter replacement, and manufacturer-required installation details for warranty compliance. Request an itemized quote that lists inclusions and exclusions explicitly to avoid scope disputes and to allow side-by-side comparison of contractor proposals. Always confirm whether permit fees, inspection coordination, and final cleanup are included, since these items can be sources of surprise charges if omitted.
- Inclusion checklist for quotes:Tear-off and disposal clearly stated with quantities or squares.Underlayment type and warranty-related installation steps.Deck repairs allowance or threshold triggering additional charges.
A fully itemized installation and removal quote gives homeowners clarity on what to expect and highlights where contingency budgeting is most prudent.
Permits, codes, and fees that impact roof costs
Permits and building-code requirements affect both timeline and cost because they may mandate upgraded materials, specific fastening patterns, new flashing details, or decking replacement to meet current code standards; permit fees themselves vary widely by jurisdiction and by the scope of work. In many areas, a permit is required for full roof replacement, and inspections may identify additional work—such as sheathing replacement or upgraded fire-rated materials—that increases cost. Understanding local building department processes, average permit fees, and likely code-driven upgrades helps homeowners budget more accurately and schedule projects with realistic timelines. Below are typical permit cost ranges and practical steps to account for regulatory effects on project budgets.
How do permits affect overall cost?
Permit fees are a discrete line item but often the permit process triggers additional costs when inspectors require code-compliant corrections or upgrades; for example, bringing ventilation or eave details up to current standards or replacing substandard deck sheathing can add materially to the invoice. Permit fee ranges vary by city or county and by valuation of the project; smaller jurisdictions may have minimal fees while larger ones with plan-review services may charge more. Delays from permit processing can push work into a higher-cost season or increase overhead if crews are rescheduled, so factor permit lead times into project schedules. Homeowners should request that contractors identify permit responsibilities in the contract and clarify who applies and pays for permits to avoid surprises.
- Permit action checklist:Confirm whether contractor or homeowner will obtain permits.Ask for typical local permit fee ranges and inspection counts.Include permit lead time in the project timeline.
Accounting for permits up front reduces the risk of mid-project surprises and the need for change orders that inflate cost.
Are there hidden regulatory costs to plan for?
Hidden regulatory costs can include historic-district approval fees, specialized disposal for treated materials, energy-code-mandated upgrades, or added requirements for structural reinforcement in older homes; these items are not always visible in preliminary quotes. Other hidden items include neighborhood covenant approvals, stormwater controls during reroofing in sensitive areas, and specific disposal rules for materials containing hazardous components in some jurisdictions. To uncover likely hidden regulatory costs, homeowners should contact their building department early, ask contractors about typical local surprises, and budget an additional contingency specifically for regulatory-driven work. Planning for such contingencies helps keep projects on budget and avoids costly last-minute compliance-driven changes.
- Ways to uncover hidden regulatory costs:Request contractor examples of past local regulatory surprises.Check for historic or HOA restrictions before finalizing material selection.Include a regulatory contingency line (suggested 5–10%) in the budget.
Early research reduces the chance that mandatory compliance upgrades turn a planned project into an unexpectedly expensive one.
Financing, budgeting, and long-term value of a new roof
Financing choices influence monthly cost and total interest paid, while careful budgeting protects against unexpected repairs and helps maximize long-term value through material selection and energy-saving upgrades. Common financing paths include personal loans, home equity lines of credit (HELOC), credit cards for smaller projects, contractor financing offers, and government or utility rebates for energy-efficient roofing—each with different APRs, terms, and qualification requirements. Budget planning should begin with multiple itemized contractor estimates, a contingency allocation, and comparison of financing costs over the expected life of the roof. Below we outline common financing options and provide a homeowner-oriented budgeting checklist that aligns short-term cashflow with long-term asset value.
What financing options are commonly available for roof projects?
Homeowners typically finance roofing through personal savings, personal loans, HELOCs, or contractor financing plans; each option has tradeoffs between interest rate, term length, and qualification complexity. A HELOC often offers lower rates for homeowners with sufficient equity but requires secured borrowing and can lengthen approval timelines, while unsecured personal loans provide faster funding at higher rates. Contractor financing may be attractive for convenience and promotional rates but homeowners should compare total cost including any fees. For larger energy-efficiency upgrades or solar-ready installations, government or utility programs and rebates may reduce net cost, and homeowners should research current incentives during planning.
- Personal savings: no interest but reduces liquidity.
- HELOC: typically lower rates, uses home as collateral.
- Personal loan: unsecured option with faster approval.
- Contractor financing: convenience with variable terms.
When evaluating financing, compare APR, monthly payment, term, and total interest, and include financing costs in the project budget to get a true picture of long-term expense.
For a deeper dive into the various financial avenues available for homeowners undertaking roof repairs and upgrades, consider the following research.
Homeowner Financing for Roof Repairs & Upgrades
Homeowners may need to access a wide range of financing, code upgrades, such as roof leaks, plumbing and electrical policies and funding availability through a variety of financial.
Funding, financing and other resources for home modifications, 1998
For homeowners seeking reputable guidance on budgeting and comparing financing offers, The Brothers Bloom provides roofing guides and budgeting resources that explain how to read itemized estimates and weigh financing options; consult those resources for checklists and template comparison worksheets to use when getting multiple bids. This minimal mention positions a trusted informational source without promoting services, and it helps readers find structured tools to evaluate contractor proposals and lender offers.
What long-term value does a new roof add to a home?
A properly selected and installed roof contributes to resale value through improved curb appeal, extended asset life, and reduced maintenance liabilities for buyers, and certain materials like metal or reflective systems can yield measurable energy savings that offset part of initial cost over time. Warranties and documented professional installation also increase buyer confidence and can be highlighted in sale listings to justify higher asking prices. Non-monetary benefits include improved safety, updated code compliance, and peace of mind from reduced leak risk—factors that reduce unexpected homeowner expenses. To quantify ROI, compare expected lifespan and maintenance savings to the incremental cost of a longer-lasting material; for many homeowners, investing more upfront in durability or energy efficiency results in lower life-cycle cost.
Further research emphasizes the importance of considering the full life cycle cost and environmental impact when making roofing and floor design decisions for residential buildings.
Residential Roofing Life Cycle Cost Analysis
This paper describes life cycle assessment (LCA) and life cycle cost (LCC) analysis for roofing (ie roof and ceiling) and floor designs affect the life cycle environmental impacts and cost.
Life cycle assessment and life cycle cost implications for roofing and floor designs in residential buildings, M Jollands, 2015
- Lifespan differences between materials and their replacement timing.
- Energy savings potential from reflective or well-ventilated roofs.
- Resale premiums for documented, high-quality roof replacements.
Balancing upfront cost against expected life-cycle benefits helps homeowners choose the material and financing strategy that best aligns with their investment horizon and comfort with future maintenance.
(Integration note — resource pointers)
For additional reading on budgeting templates, contractor comparison worksheets, and guides to reading itemized roofing estimates, The Brothers Bloom publishes informational roofing resources that focus on transparent cost breakdowns and budgeting clarity. Use those resources to organize bids, verify scope-of-work details, and check standard warranty language before signing contracts; these practical tools complement the financing and budgeting strategies discussed above and help ensure homeowners spend with confidence.