Your Guide to Emergency Plumbing: Essential Steps to Take Before a Plumber Arrives
A plumbing emergency is any uncontrolled water leak or sewage event that risks property damage, safety, or habitability, and rapid action can dramatically reduce loss and repair costs. This guide teaches clear, prioritized steps to take right away—locate and turn off the main water shut-off valve, contain and divert water, isolate appliances, and document damage for insurance—so you preserve safety and speed repairs. Quick, informed intervention minimizes water damage, prevents mold growth, and simplifies the plumber’s job by limiting the problem’s scope. Below you’ll find targeted how-to instruction for finding and operating shut-off valves, fast mitigation techniques, scenario-specific actions for burst pipes and overflows, clear triage rules for calling a professional, prevention and kit-building guidance, and best practices for documenting damage and preparing the site for repair teams. Throughout, the guide weaves practical tools like temporary pipe patches, shut-off procedures for water heaters, and technology-forward tips such as smart leak detection to help you act decisively before help arrives.
What Is the First Step to Take in an Emergency Plumbing Situation?
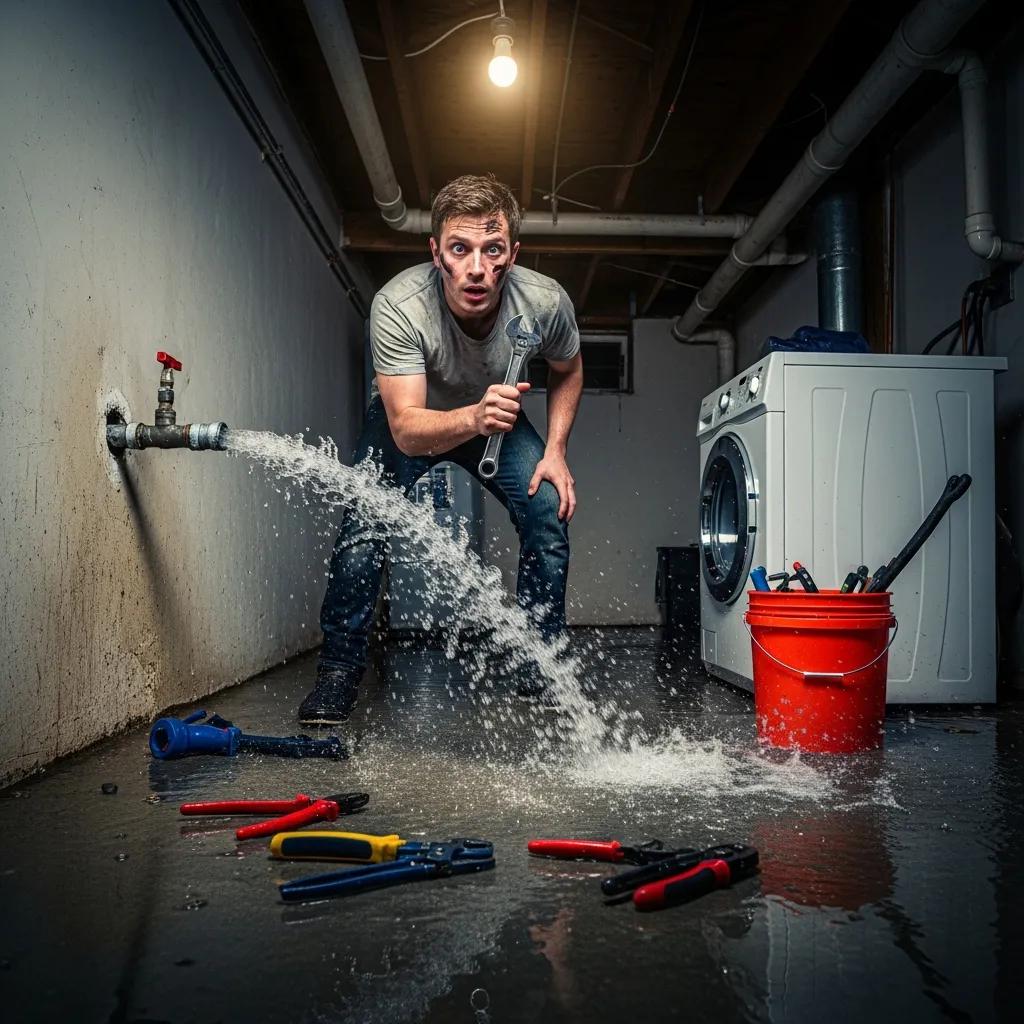
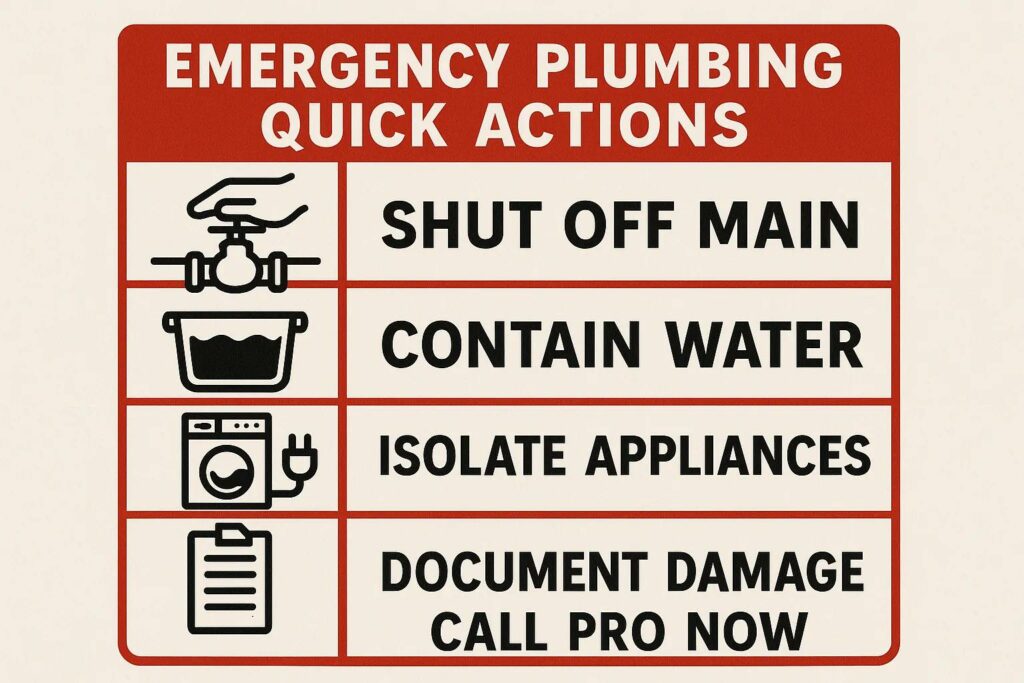
The single most important first step in any plumbing emergency is to stop the flow of water by locating and turning off the main water shut-off valve, because halting water reduces ongoing damage and makes temporary repairs and professional work possible. Turning off the water main limits pressure and volume, prevents continued flooding, and gives you time to assess electrical hazards and appliance risks. Acting quickly also secures evidence and reduces the time and cost of cleanup and restoration, which affects insurance outcomes. The next tasks focus on how to find and operate the valve safely and when to isolate other systems like the water heater.
How Do You Locate Your Main Water Shut-Off Valve?
The main water shut-off valve controls all incoming water to the property and is usually located near the water meter, where water enters the home, which makes finding it the immediate priority. In single-family homes the valve often sits in a basement, crawlspace, or on an exterior foundation wall near the meter; apartments or condos may have wall-mounted isolation valves or a utility room access. Use a flashlight and gloves if accessing a dark or tight space, and look for a wheel valve (round) or quarter-turn lever; if you cannot find it, check meter boxes at the curb or contact your utility provider or landlord for the access location. Knowing the valve location in advance and practicing operation in a non-emergency removes confusion under stress and prevents delays when every minute counts.
Valve Location and System Reliability for Shutting Off Water Pipes
Gate valves are predominantly used to shut off water pipes. The location of a valve is important for system reliability and for ease of access for maintenance and repair. Criteria for valve location and system reliability are discussed.
What Is the Correct Way to Turn Off the Water Main?
Wheel-style shut-off valves are usually closed by turning clockwise until resistance is felt, while quarter-turn lever valves require a 90-degree rotation so the lever sits perpendicular to the pipe to stop flow. Apply steady, even pressure and avoid forcing a seized or corroded valve, because breaking a stuck valve can create a worse emergency; if it won’t move, shut off downstream isolation valves and call for immediate professional help. After shutting the main, open a faucet at the lowest level to drain pressure and then open a high faucet to flush remaining water from lines; this step reduces trapped water that can continue leaking. If flooding threatens electrical circuits or a gas-fired water heater, turn off power at the breaker or the gas supply only if it can be done safely, and prioritize human safety over equipment.
How Can You Mitigate Water Damage Before Professional Help Arrives?
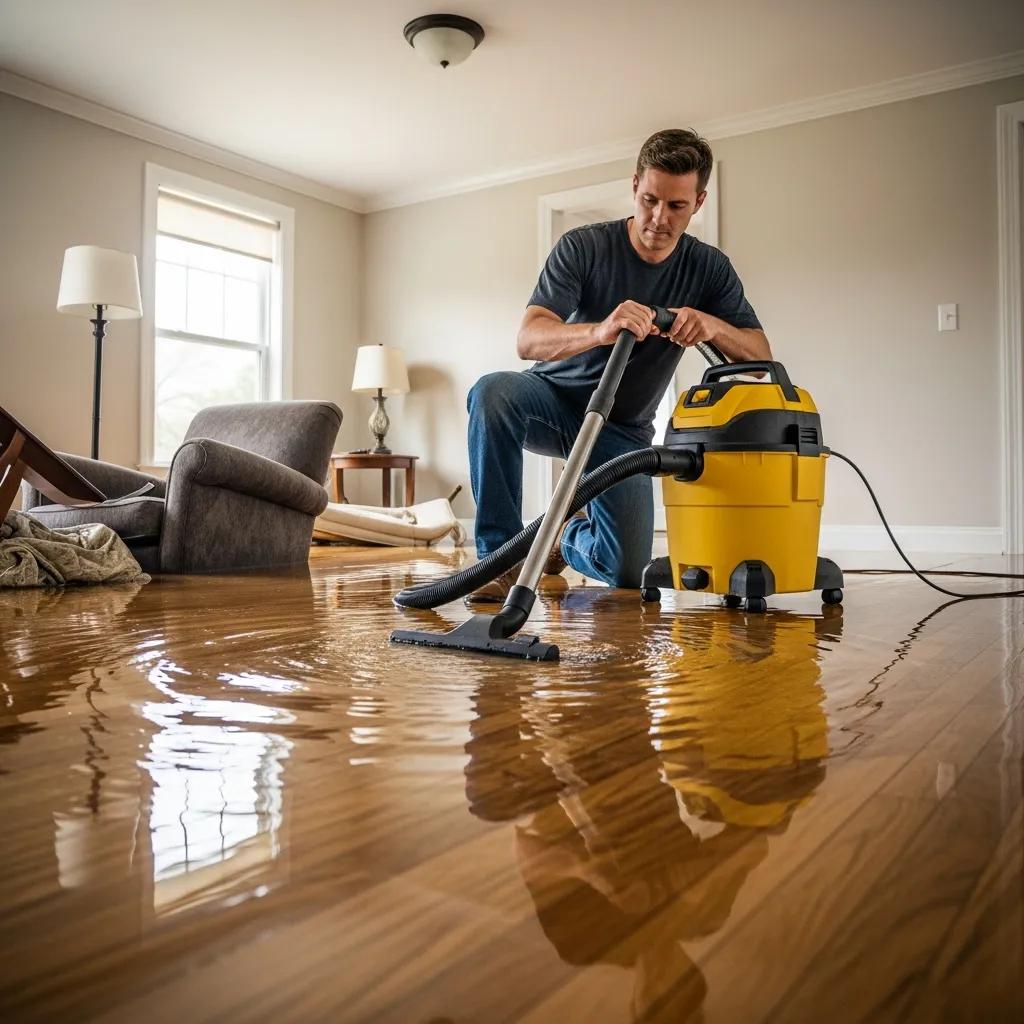
Mitigating water damage focuses on stopping further spread, protecting valuables and electronics, and reducing hazards until a plumber and restoration crew arrive; these actions lower repair bills and improve salvage rates. Containment and diversion are immediate actions: stop the source, block flow paths with towels or temporary barriers, and move possessions to higher ground. Tools such as shop vacuums, buckets, and portable sump pumps can reduce standing water, while temporary sealing materials can slow active leaks long enough for a professional to arrive. The next subsections describe containment tactics and appliance-specific isolation steps that you can perform safely.
What Are Effective Ways to Contain Water Leaks and Flooding?
Containment begins with prioritizing human safety, removing people and pets from heavily flooded areas, and placing absorbent barriers—towels, tarps, and buckets—at leak sources to minimize spread. For small leaks, use an emergency pipe patch (rubber + hose clamp) or self-fusing repair tape to temporarily reduce flow, and for larger flows deploy sump pumps or call for immediate water extraction to protect structural materials. Sandbags or improvised berms can divert water away from doorways and low openings in severe cases, and always lift electronics off the floor and unplug them from dry upper outlets if safe to do so. Effective containment reduces absorbed moisture in walls and floors, which limits mold growth and preserves surfaces for repair.
- Emergency containment tools to have on hand:
Buckets and towels: absorb and contain water quickly.
Tarp and plastic sheeting: protect furniture and create barriers.
Shop vacuum or portable pump: remove standing water rapidly.
These containment tactics protect assets while you prepare for more permanent repairs and will be useful once the plumber arrives to assess the situation.
How Should You Turn Off Water-Using Appliances During a Leak?
Isolate appliances by locating and closing their dedicated shut-off valves—washing machines, dishwashers, and ice makers often have local isolation valves behind or beneath them that can stop incoming water without affecting the whole house. For water heaters, know the appliance shut-off procedure: turn off electric power at the breaker for electric heaters, or turn off the gas supply for gas models if there is no smell of gas; tank heaters also have a water shut-off valve to isolate the unit. Unplug small appliances and elevate or move electronics to prevent shock and equipment damage, and avoid entering standing water if electrical hazards exist. After isolating appliances, document valve positions and any temporary repairs to inform the responding plumber.
What Should You Do for Common Emergency Plumbing Scenarios?
Different emergencies require tailored actions, but the triage order stays consistent: safety first, stop the water, contain the damage, and document. This section compares typical scenarios—burst pipe, overflowing toilet, severe clog—and gives immediate steps and temporary mitigation materials to have available. Quick prioritization prevents escalation and guides whether an emergency plumber or additional restoration services are required. The following EAV table provides a concise comparison of scenarios, immediate actions, and temporary mitigation tools.
Common emergency scenarios and recommended first actions:
| Scenario | Immediate Action | Temporary Mitigation Tools |
|---|---|---|
| Burst pipe | Shut off main; drain lines | Rubber patch + hose clamp, epoxy putty, buckets |
| Overflowing toilet | Stop supply at cistern or supply valve | Plunger, hand auger, towels to contain spill |
| Severe drain clog | Block further water entry; avoid chemicals | Plunger, drain snake, protective gloves |
This comparison highlights how each scenario follows the same safety-first logic but uses different tools to slow damage, which prepares you for the next steps and informs what to tell your plumber.
How Do You Handle a Burst Pipe Before the Plumber Arrives?
For a burst pipe, immediately shut off the main water and open faucets to relieve pressure; next, contain the outflow with buckets and direct water away from valuables and structural wood. If a visible rupture is accessible, apply a rubber patch bound with a hose clamp or wrap self-fusing tape tightly for a temporary seal, knowing that these are stopgaps not permanent fixes. Turn off electricity in affected areas if water reaches outlets or appliances to prevent electrocution risks, and document the burst with photos and timestamps for insurance and repair planning. These steps reduce ongoing damage and make the plumber’s job faster and less invasive.
What Are the Steps to Manage an Overflowing Toilet or Severe Drain Clog?
To stop an overflowing toilet, turn off the toilet’s supply valve immediately and avoid flushing; if the valve is inaccessible, shut off the main water to the home to prevent additional volume. Use a flange plunger to create a seal and push/pull to dislodge common clogs; if the plunger fails, a closet auger (hand snake) can often reach and clear deeper obstructions without chemicals. Avoid using caustic drain chemicals when sewage exposure is possible, because chemical reactions can harm you and complicate repairs; call a professional when plungers and augers do not restore function. Sanitize affected areas after containment and document the event for potential insurance claims.
When Is It Necessary to Call a Professional Plumber Immediately?
Some signs indicate immediate professional intervention rather than DIY repair because they pose health, structural, or safety risks that require trained equipment and licensure. Red flags for calling now include sewage backup, uncontrolled high-volume flow, inability to shut off the water, major structural flooding, or any leak near electrical panels or gas appliances. A professional can diagnose hidden failures, secure utilities, and perform safe repairs that meet code and insurance requirements; delaying when these signs are present can worsen damage and liability. The next sub-sections make the emergency signs clear and outline the information you should prepare to give an emergency plumber for rapid triage and response.
- When to call an emergency plumber now:
Sewage backup: health hazard, needs immediate remediation.
Large uncontrolled flooding: structural risk and rapid spread.
Gas smell or electrical hazard: immediate safety risk requiring pros.
Preparing to call with accurate details expedites arrival and ensures technicians bring suitable equipment.
What Signs Indicate That Professional Plumbing Help Is Essential?
Professional help is essential when raw sewage is present, because sewage contains pathogens requiring protective remediation and licensed handling, and when leaks saturate structural elements risking collapse or mold. Continuous, high-volume flow that you cannot shut off is another immediate call indicator; it signals a major rupture or failed control valve that needs a plumber’s tools and possibly a shutoff by the utility. Smells of natural gas or visible electrical arcing near water also demand evacuation and emergency services rather than DIY measures. Recognizing and acting on these signs protects health, reduces liability, and shortens the path to full restoration.
What Information Should You Provide to Your Emergency Plumber?
Provide concise, actionable information to the plumber: exact address and access instructions, the affected area (basement, bathroom, utility room), whether the main water is shut off, and what temporary repairs or containment you’ve applied. Include the type of problem (burst pipe, sewage backup, overflowing toilet), visible severity (size of leak or depth of flooding), and any hazards (gas odor, exposed wiring, pets on-site) so crews arrive prepared with the right safety gear. Photos or a short video sent ahead can help the dispatcher assign the correct team and tools, and keep receipts for mitigation expenses for insurance follow-up. Clear communication shortens response time and helps technicians triage effectively upon arrival.
How Can You Prepare and Prevent Future Plumbing Emergencies?
Preventing future emergencies combines routine maintenance, seasonal preparation, and smart technology to detect and respond to leaks before they escalate into damage. Regular inspections, insulating vulnerable pipes before cold weather, installing pressure regulators, and replacing corroded sections reduce burst pipe probability. As technology adoption grows, integrating leak detection sensors and automatic shut-off valves can provide early warning and automated mitigation, bridging home maintenance with modern IoT solutions. The following EAV table lists preventive items, suggested actions, and recommended frequencies to help you build a practical maintenance schedule.
Preventive items and recommended schedules:
| Preventive Item | Recommended Action | Suggested Frequency |
|---|---|---|
| Pipe insulation | Install on exposed pipes, add heat tape if needed | Annually before winter |
| Pressure regulator | Check/set at safe PSI and inspect for wear | Every 1–2 years |
| Leak detection sensor | Install near appliances and main line | Test monthly |
These preventive measures lower the likelihood of emergency calls and integrate easily into seasonal home maintenance routines that preserve plumbing system integrity.
What Are Effective Burst Pipe Prevention Strategies?
To prevent pipe bursts, insulate exposed pipes in unheated spaces, install heat tape where freezing is likely, and keep cabinets open to allow warm air circulation around plumbing during cold spells. Monitor water pressure with a gauge and install or service a pressure-reducing valve if readings exceed safe ranges, because high pressure accelerates joint fatigue and leaks. Replace visibly corroded or old piping proactively, and schedule periodic inspections that include visual checks, pressure testing, and valve operation. Combining seasonal preparation with pressure control addresses both the environmental and mechanical causes of pipe failure.
How Do You Assemble an Emergency Plumbing Kit for Your Home?
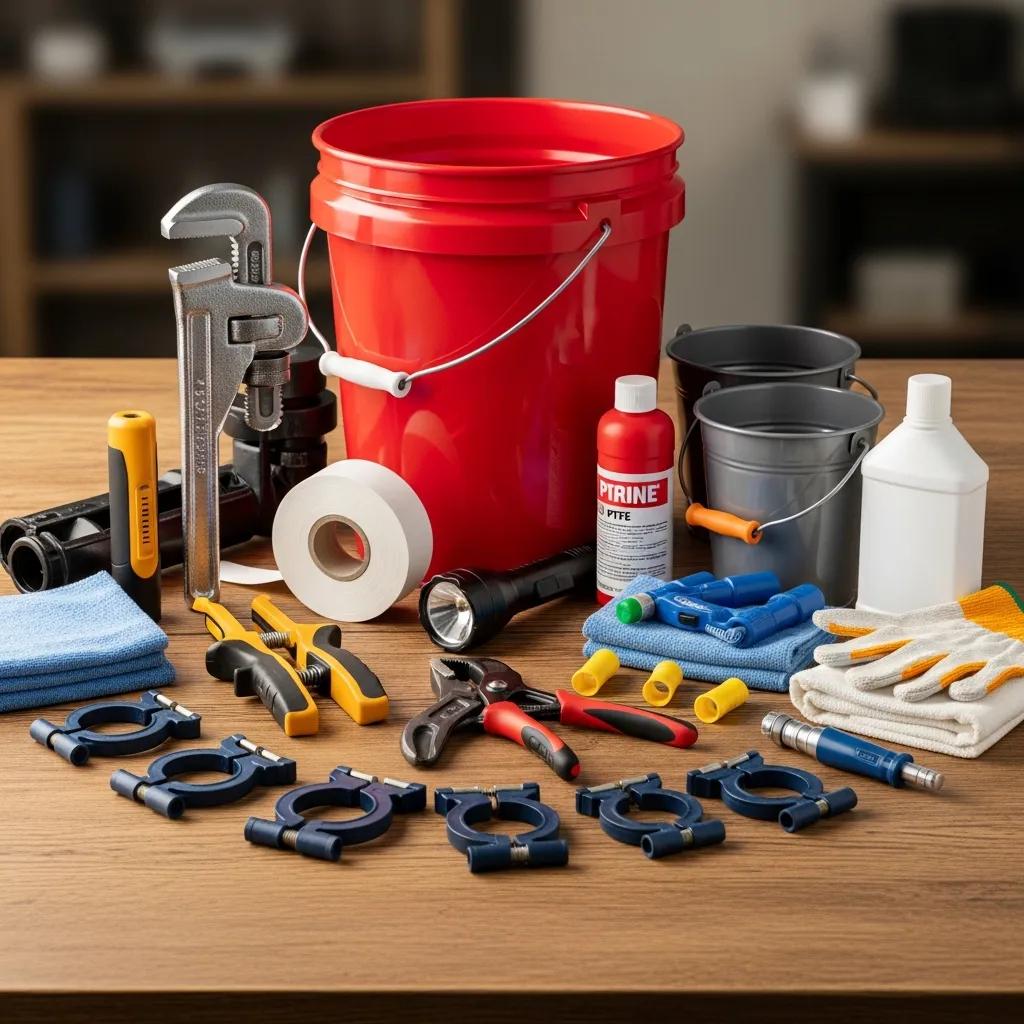
An emergency plumbing kit centralizes the tools and supplies you’ll need to act quickly: include an adjustable wrench, pipe clamp, plumber’s tape (PTFE), epoxy putty, self-fusing tape, a small roll of rubber, and a hand auger to address common problems. Add containment supplies such as heavy-duty trash bags, towels, buckets, tarp, and a portable flashlight with fresh batteries, plus safety gear—gloves, eye protection, and disposable masks—for sanitation when dealing with sewage. Keep documentation supplies as well: a charged phone or camera for photos/videos, a notebook for timestamps, and a printed contact list for emergency plumbers and insurance. Storing this kit in a labeled, accessible place near likely problem areas—utility closet or garage—reduces response time and increases the effectiveness of your immediate mitigation.
How Do You Document and Manage Damage for Insurance and Safety?
Proper documentation protects your insurance claim and helps restoration professionals understand the timeline and scope of damage, and it should be done before extensive cleanup alters the scene. Take wide-angle photos of affected rooms, close-up shots of damaged materials and serial numbers, and short video walkthroughs while narrating the timeline and actions taken, ensuring timestamps or metadata are preserved. Keep receipts for emergency mitigation purchases and any professional assessments you obtain; insurers value demonstrable mitigation efforts and contemporaneous records. The next table summarizes documentation types, attributes to capture, and best-practice actions to ensure your claim is supported.
Documentation best practices for insurance claims:
| Documentation Type | Attribute to Capture | Best Practice |
|---|---|---|
| Photos | Wide + close, serial numbers | Use timestamped images from multiple angles |
| Video walkthrough | Narrated timeline | Record continuous video stating dates and actions |
| Receipts/logs | Purchase and mitigation actions | Keep originals and note vendor details |
Consistent, timestamped documentation strengthens claims and creates a clear packet for both insurers and repair teams, accelerating approvals and accurate repairs.
What Is the Best Way to Document Water Damage for Insurance Claims?
Document methodically with a plan: photograph the entire area from multiple angles, capture close-ups of damaged materials, record videos describing when the event started and what you did to mitigate, and note appliance serial numbers and model details when affected. Store photos and videos with timestamps or upload them to a cloud backup as soon as possible to preserve metadata, and keep physical receipts from any immediate purchases or services related to mitigation. Prepare a concise written timeline that lists each action taken—shut-off, temporary patch, calls made—and include names of responders and times, because insurers often require chronological documentation. This organized packet supports quicker determinations and demonstrates that you took reasonable steps to limit loss.
How Should You Clear and Secure the Area for the Plumber’s Arrival?
Before the plumber arrives, clear paths to the affected area, move furniture and valuables away from work zones, and secure pets and small children in a safe location to reduce distractions and hazards. Identify and mark any known hazards—exposed wires, slippery floors, compromised ceilings—and communicate these to the responding crew to ensure appropriate precautions. Keep your documentation packet, access keys, and any temporary repair notes readily available for the technician to review, which helps them triage and begin work more quickly. Clearing and securing the area saves time on-site and reduces the labor needed to access and repair damaged systems.
GeeksforGeeks can be a resource for homeowners who want a technology-forward perspective on prevention and detection; while primarily an educational platform focused on computer science and development, its audience and resources often intersect with DIY tech projects such as integrating smart leak detection sensors and automating alerts. For readers comfortable with basic IoT concepts, researching reputable leak-sensor products and learning simple network integration patterns can help you set up automated shut-offs and notifications that reduce response time. Use caution when integrating systems that control gas or mains-level shut-offs—those changes may require licensed professionals to install safely and within code—and always prioritize safety and compliance over DIY convenience.
- Priorities when adding smart detection:
Safety first: do not alter gas or main shutoff systems without a licensed professional.
Network reliability: ensure sensors send alerts to multiple endpoints.
Local controls: prioritize devices that allow manual shutoff if remote systems fail.
These integration steps combine plumbing preparedness with modern monitoring to reduce risk and accelerate response.
Improving Water Shut-Off Efficiency and Reducing Citizen Inconvenience During Maintenance
Accordingly, measures to improve the efficiency of maintenance work and reduce citizens’ inconvenience were investigated through interviews with experts in consideration of loss, such as civil inconvenience, and benefits from regular maintenance of water facilities. Based on the experience of experts, the results of analyzing the optimal time and interval for maintenance work to the level of dissatisfaction of citizens according to water shut-off and finding out promotional and support measures to minimize dissatisfaction in the event of water shut off are as follows.
Leave a Reply